
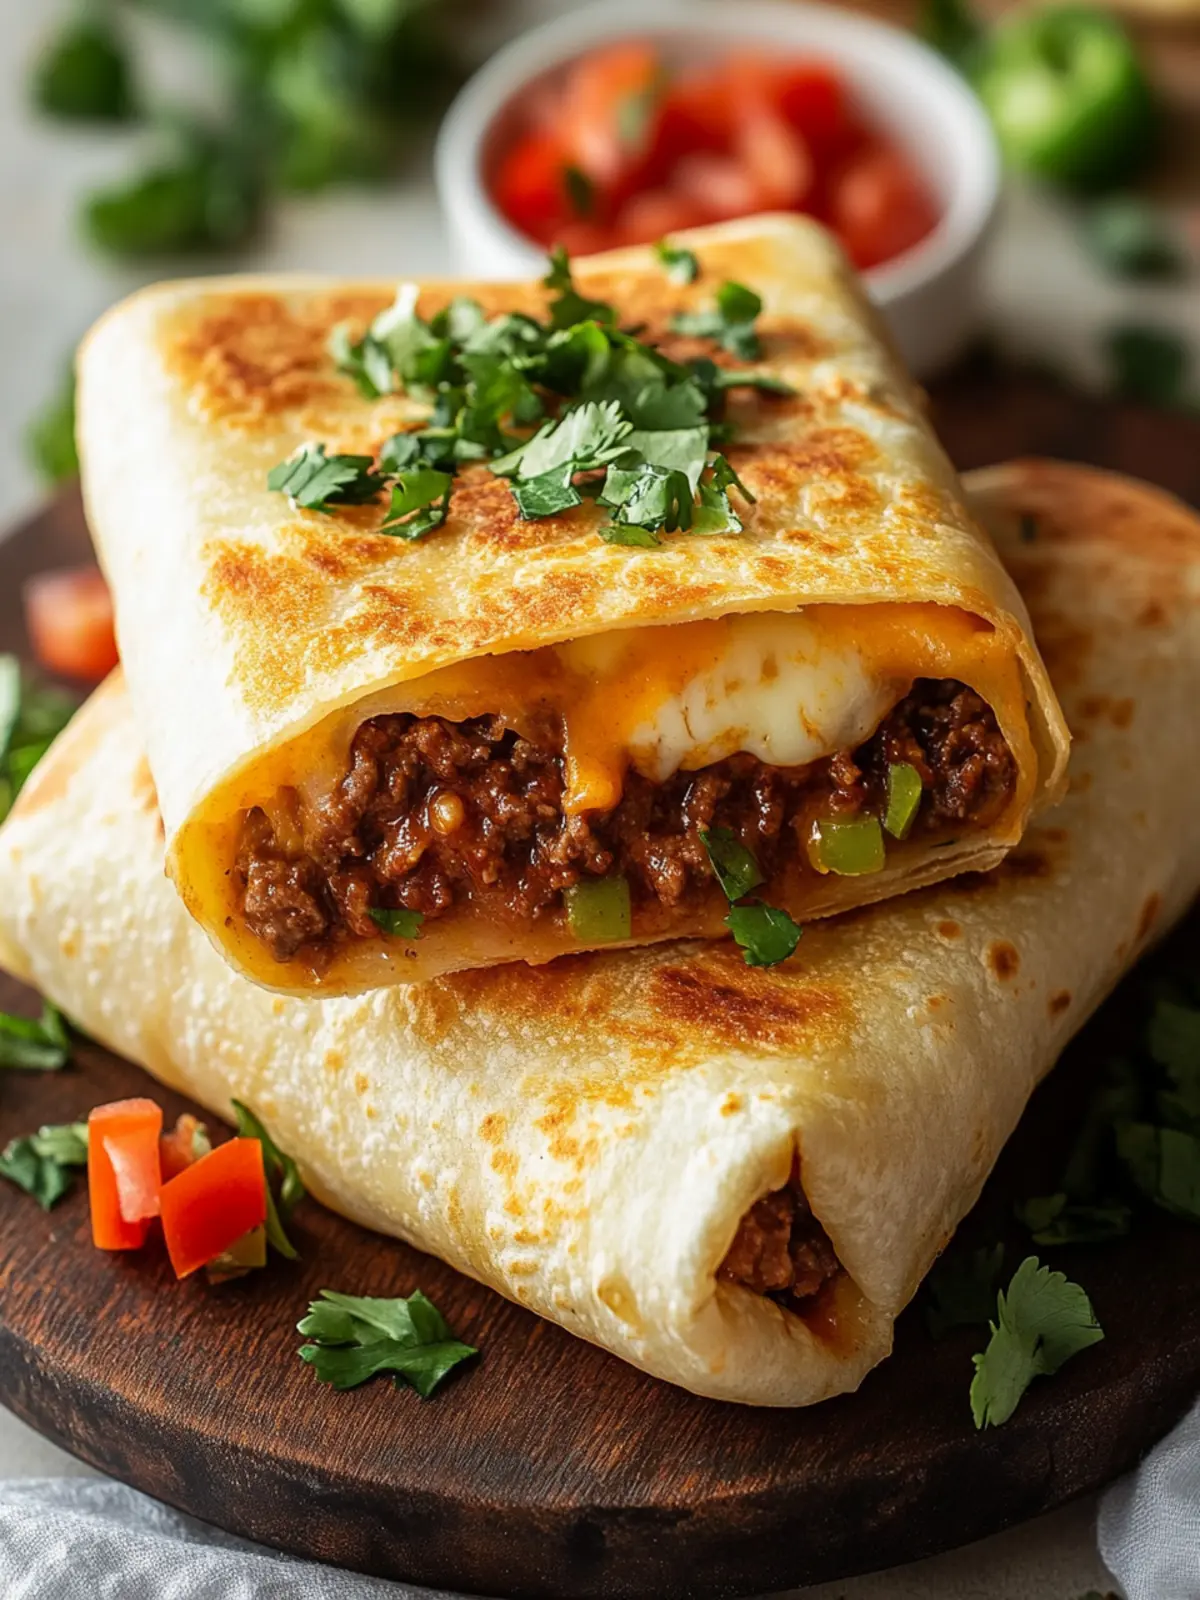
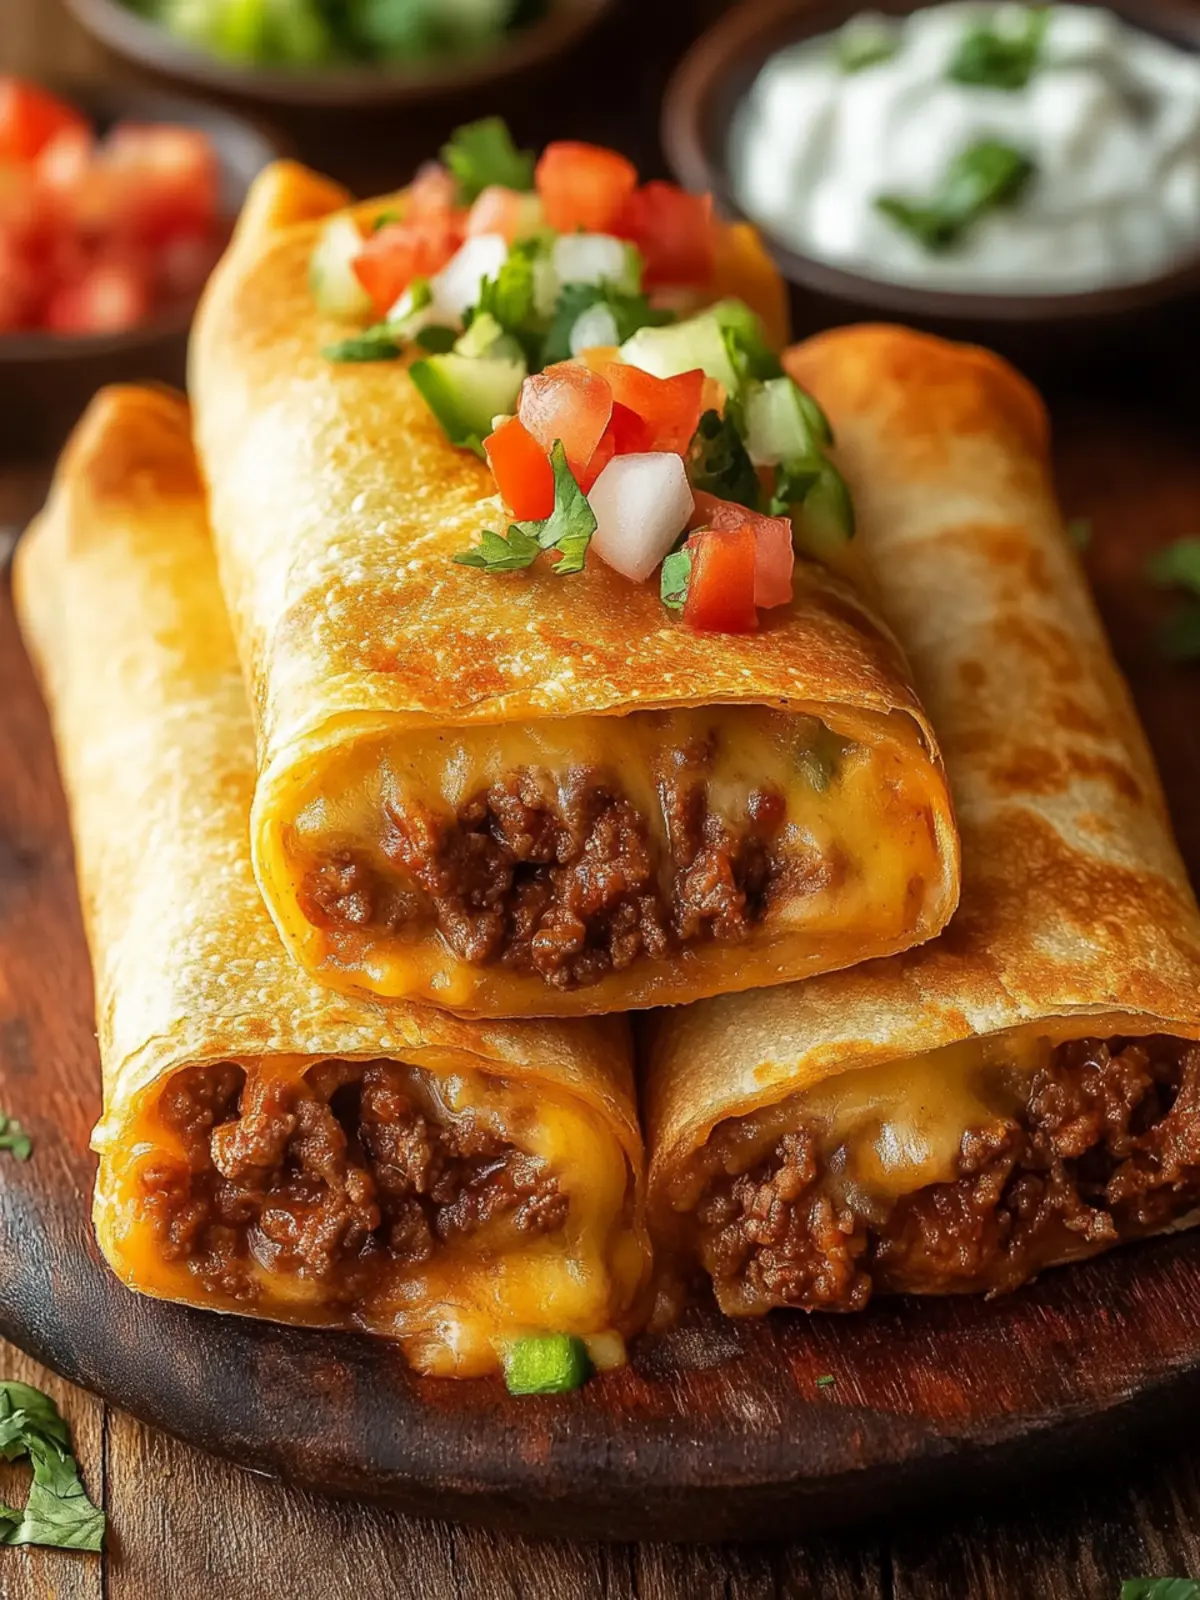
There’s a certain joy that comes from biting into a crispy chimichanga, especially when it’s packed with flavor and oozing warm cheese. When I first discovered this Beef and Cheese Chimichangas Recipe, it was like uncovering a delicious treasure in my own kitchen. Picture this: the fragrant aroma of sizzling beef mingled with spices, mingling with the sound of each tortilla crackling as they fry to golden perfection.
This dish quickly became my go-to for satisfying weeknight dinners and casual gatherings alike. The beauty lies in its versatile appeal—ranging from a simple family meal to an impressive snack when friends pop by unexpectedly. Plus, you’ll find that it’s surprisingly easy to prepare, whether you opt for a healthier oven method or the classic skillet fry for that extra crunch. Join me as we dive into this delicious recipe that promises flavor, warmth, and a touch of comfort on every plate!

Why are these Beef and Cheese Chimichangas irresistible?
Crispy Texture: Achieve a satisfying crunch, whether baked for a healthier twist or fried for pure indulgence.
Robust Flavor: Each bite packs a savory kick with seasoned beef, melty cheese, and zesty salsa that will have your taste buds dancing.
Quick Prep: Whip up this crowd-pleaser in under 30 minutes for a hearty meal that’s perfect for any occasion.
Endless Variations: Feel free to customize with your favorite toppings like guacamole or sour cream, making every serving unique!
Family Favorite: Watch faces light up as you serve these delightful chimichangas at your next family dinner or game night!
Beef and Cheese Chimichangas Ingredients
For the Filling
• Ground beef – a hearty base that keeps meals filling and satisfying.
• Small onion – finely diced for an aromatic and sweet touch to the filling.
• Garlic – minced for that extra depth of flavor that elevates the dish.
• Taco seasoning – enhances the beef with a delightful mix of spices; feel free to use a homemade blend!
• Salsa – adds zing and moisture, contributing to a flavorful beef and cheese chimichangas recipe.
For Assembly
• Refried beans – provide creaminess and balance the meat; great for added protein!
• Shredded cheddar/Mexican blend cheese – melty goodness that ties all the flavors together beautifully.
• Large flour tortillas – burrito-sized to hold all the delicious fillings securely.
For Cooking
• Vegetable oil – essential for brushing or frying to achieve that crispy, golden exterior.
Prepare your kitchen for our flavorful adventure as we create these irresistible Beef and Cheese Chimichangas!
How to Make Beef and Cheese Chimichangas
- Cook the Beef: In a large skillet over medium heat, add the ground beef and diced onion. Sauté until the beef is browned and the onion turns tender, about 5-7 minutes.
- Season the Mix: Drain any excess grease, then stir in the minced garlic, taco seasoning, and salsa. Simmer for 3–4 minutes until everything is well combined and deliciously fragrant.
- Assemble the Tortillas: Spread a spoonful of refried beans down the center of each tortilla. Layer with a generous scoop of the beef mixture and sprinkle a handful of shredded cheese on top.
- Wrap Them Up: Carefully fold in the sides of the tortilla, then roll it up tightly, like a burrito, ensuring the filling is secured inside.
- Oven Method: Preheat your oven to 400°F (200°C). Place the chimichangas seam-side down on a baking sheet, brush lightly with vegetable oil, and bake for 18–20 minutes. Flip them once until they’re golden and crispy.
- Skillet Method: Heat 2–3 tablespoons of vegetable oil in a skillet over medium heat. Place the chimichangas seam-side down and cook for 2–3 minutes per side until they are golden brown and crispy.
- Let Them Rest: Remove the chimichangas from heat and let them rest for about 2 minutes before serving. This helps keep the filling warm and delicious.
Optional: Serve with a dollop of sour cream or guacamole for an extra creamy touch!
Exact quantities are listed in the recipe card below.
Tips for the Best Beef and Cheese Chimichangas
Filling Balance: Aim for the right amount of filling to prevent overflowing. Too much filling can make them difficult to seal and fry.
Seal Properly: Ensure the chimichangas are tightly rolled. If they’re not secured well, they may burst open during cooking.
Oil Temperature: For skillet frying, make sure the oil is hot enough before adding the chimichangas; otherwise, they may soak up excess oil and become greasy.
Crispy Finish: If baking, flip the chimichangas halfway through to ensure even crispness on all sides—this helps achieve a perfect golden color.
Resting Time: Allowing the chimichangas to rest after cooking is crucial for a tasty fill—this helps prevent the cheese from oozing out on the first bite.
Enjoy your cooking adventure with this Beef and Cheese Chimichangas Recipe!
Make Ahead Options
These Beef and Cheese Chimichangas are a fantastic choice for busy home cooks looking to save time during the week! You can prepare the filling (ground beef, onions, garlic, taco seasoning, salsa, and refried beans) up to 3 days in advance. Just store it in an airtight container in the refrigerator. When you’re ready to assemble, simply scoop the cold filling into the tortillas, top with cheese, and wrap them up tightly. For cooking, they can be frozen for up to 2 months; just make sure to layer parchment paper between them to prevent sticking. When it’s time to enjoy, bake or fry them straight from the freezer, adding a few extra minutes to the cooking time. Enjoy the deliciousness with minimal effort!
What to Serve with Beef and Cheese Chimichangas?
Create the perfect meal by complementing these crispy delights with fresh and flavorful sides that will impress everyone at the table.
-
Crispy Taco Salad: A vibrant mix of greens, tomatoes, and crunchy tortilla chips offers a refreshing contrast to the warm chimichangas. This salad adds a delightful crunch and fresh flavors.
-
Guacamole and Chips: The creamy, zesty guacamole pairs beautifully with the savory chimichangas, providing a rich dip that enhances every bite. Serve with crispy tortilla chips for a snappy addition.
-
Mexican Street Corn: Sweet corn sprinkled with chili powder, lime, and cotija cheese adds a smoky, tangy essence that complements the robust flavors of the beef and cheese filling perfectly. It’s a crowd-pleaser!
-
Pico de Gallo: This fresh salsa adds a burst of flavor with its diced tomatoes, onions, cilantro, and lime. The refreshing taste is an excellent counterpoint to the richness of chimichangas.
-
Spanish Rice: With its aromatic spices and slight tomato flavor, Spanish rice rounds out the meal while providing a satisfying base for the chimichangas. Plus, it soaks up any extra salsa beautifully!
-
Zesty Cucumber Salad: Crisp cucumbers tossed in a tangy dressing bring a light and refreshing note to the table. This salad offers a delicious crunch alongside the savory chimichangas.
-
Sangria: This fruity, refreshing drink is ideal for gatherings, perfectly balancing the rich flavors of the meal while inviting friendly conversation around the table. It’s the perfect companion for your dish!
-
Churros with Chocolate Sauce: Finish off the meal with these sweet, crispy treats. Their sugary exterior and warm chocolate dip provide the perfect sweet ending to a savory menu.
How to Store and Freeze Beef and Cheese Chimichangas
Fridge: Store leftover chimichangas in an airtight container for up to 3 days. To maintain crispiness, avoid stacking them.
Freezer: Wrap tightly in plastic wrap and place in a freezer bag for up to 2 months. Reheat from frozen for best results.
Reheating: For the best texture, reheat in the oven at 350°F (175°C) for 10-15 minutes until heated through. Alternatively, use the skillet method to regain crispiness.
Serving: Add fresh toppings like salsa or guacamole after reheating for added flavor in your Beef and Cheese Chimichangas!
Beef and Cheese Chimichangas Variations
Feel free to explore these delicious twists that allow you to make this recipe your own, enhancing both flavor and texture.
-
Vegetarian Option: Substitute ground beef with sautéed black beans and corn for a hearty yet meat-free delight. You’ll savor every bit of flavor without the meat!
-
Spicy Kick: Add chopped jalapeños or a dash of cayenne pepper to the beef mixture for an exciting heat that teases the taste buds. The extra spice will make your chimichangas unforgettable!
-
Creamy Twist: Include cream cheese in the filling for an extra creamy texture that melts into the beef. It adds a delightful richness, elevating each bite to a new level of indulgence.
-
Cheese Blend: Try a mix of mozzarella and pepper jack cheese for a gooey and spicy punch. This combination will give your chimichangas a wonderful melt that you won’t be able to resist!
-
Healthier Swap: Use whole wheat tortillas instead of flour for a nutrient boost and a nuttier flavor that complements the filling beautifully. It’s a simple switch that doesn’t compromise on taste!
-
Baked Goods: Experiment by stuffing tortillas with a sweet filling of chocolate and nuts for a dessert version of chimichangas. These treat-filled rolls will leave a sweet note after dinner!
-
Herb Infusion: Stir in fresh cilantro or parsley into the filling for a bright burst of freshness. This herbaceous touch can make all the difference, brightening up the dish.
-
BBQ Style: Mix in some barbecue sauce with the beef for a smoky flavor profile that transforms the dish into a BBQ lover’s dream. Each bite will transport you to summer cookouts!

Beef and Cheese Chimichangas Recipe FAQs
What type of ground beef should I use for chimichangas?
Absolutely! For chimichangas, I recommend using ground beef that is 80% lean. This provides a nice mix of flavor and moisture without being too greasy. You can also use ground turkey or chicken if you’re looking for a leaner option!
How do I store leftover Beef and Cheese Chimichangas?
Very simply! Store leftover chimichangas in an airtight container in the refrigerator for up to 3 days. To keep them from getting soggy, try placing a paper towel inside the container to absorb excess moisture.
Can I freeze chimichangas?
Yes, you can! To freeze, wrap each chimichanga tightly in plastic wrap, then place them in a freezer bag. They can be kept in the freezer for up to 2 months. When you’re ready to enjoy, just remove them from the freezer and reheat directly from frozen for the best texture.
How do I reheat chimichangas for the best taste?
For optimal crispiness, I suggest reheating your chimichangas in the oven. Preheat it to 350°F (175°C), place them on a baking sheet, and heat for about 10–15 minutes until warmed through. Alternatively, you can reheat them in a skillet over medium heat, turning occasionally until crispy.
What should I do if my chimichangas are soggy?
If your chimichangas come out soggy, it might be due to excess moisture in the filling or cooking oil not being hot enough. To fix soggy reheated chimichangas, pop them in a preheated oven for a few minutes, which will help crisp them up again.
Are Beef and Cheese Chimichangas suitable for people with allergies?
When it comes to allergies, it’s always best to check the labels! The main allergens in this recipe would be dairy (from the cheese) and gluten (from the tortillas). If you need a gluten-free option, look for tortillas made from corn or gluten-free substitutes, and you can use dairy-free cheese alternatives if you have a dairy allergy.
Beef and Cheese Chimichangas Recipe: Crispy Homemade Delight
Ingredients
Equipment
Method
- In a large skillet over medium heat, add the ground beef and diced onion. Sauté until the beef is browned and the onion turns tender, about 5-7 minutes.
- Drain any excess grease, then stir in the minced garlic, taco seasoning, and salsa. Simmer for 3–4 minutes until everything is well combined and deliciously fragrant.
- Spread a spoonful of refried beans down the center of each tortilla. Layer with a generous scoop of the beef mixture and sprinkle a handful of shredded cheese on top.
- Carefully fold in the sides of the tortilla, then roll it up tightly, like a burrito, ensuring the filling is secured inside.
- Preheat your oven to 400°F (200°C). Place the chimichangas seam-side down on a baking sheet, brush lightly with vegetable oil, and bake for 18–20 minutes. Flip them once until they're golden and crispy.
- Heat 2–3 tablespoons of vegetable oil in a skillet over medium heat. Place the chimichangas seam-side down and cook for 2–3 minutes per side until they are golden brown and crispy.
- Remove the chimichangas from heat and let them rest for about 2 minutes before serving. This helps keep the filling warm and delicious.