
There’s a certain kind of joy that comes from biting into a slice of cheesecake – the creamy texture, the delicate sweetness, and that surprising hint of tang. But what if I told you that this classic dessert could receive a glorious twist? Picture this: a luscious Blood Orange Cheesecake, vibrant with the stunning color and zesty flavor of blood oranges.
When winter rolls around and those deep ruby fruits start appearing at the market, I can’t help but feel inspired. One evening, after a particularly long day, I decided it was time to elevate my cheesecake game. I grabbed a few blood oranges and set to work. The vibrant juice and zest not only brighten the flavor but add a beautiful contrast to the rich creaminess.
This dessert is a crowd-pleaser—ideal for dinner parties or intimate family gatherings. I promise, it will leave your guests wondering how you managed to create something so elegant! So, roll up your sleeves and let’s dive into making this stunning Blood Orange Cheesecake that is sure to impress and satisfy your cravings for something fresh and homemade.

Why will you love this Blood Orange Cheesecake?
Decadent Delight: The rich cream cheese and sour cream create a smooth, velvety texture that melts in your mouth, making every bite irresistible.
Unique Flavor: Blood oranges lend a distinct tartness that beautifully balances the sweetness, turning a traditional cheesecake into a citrusy masterpiece.
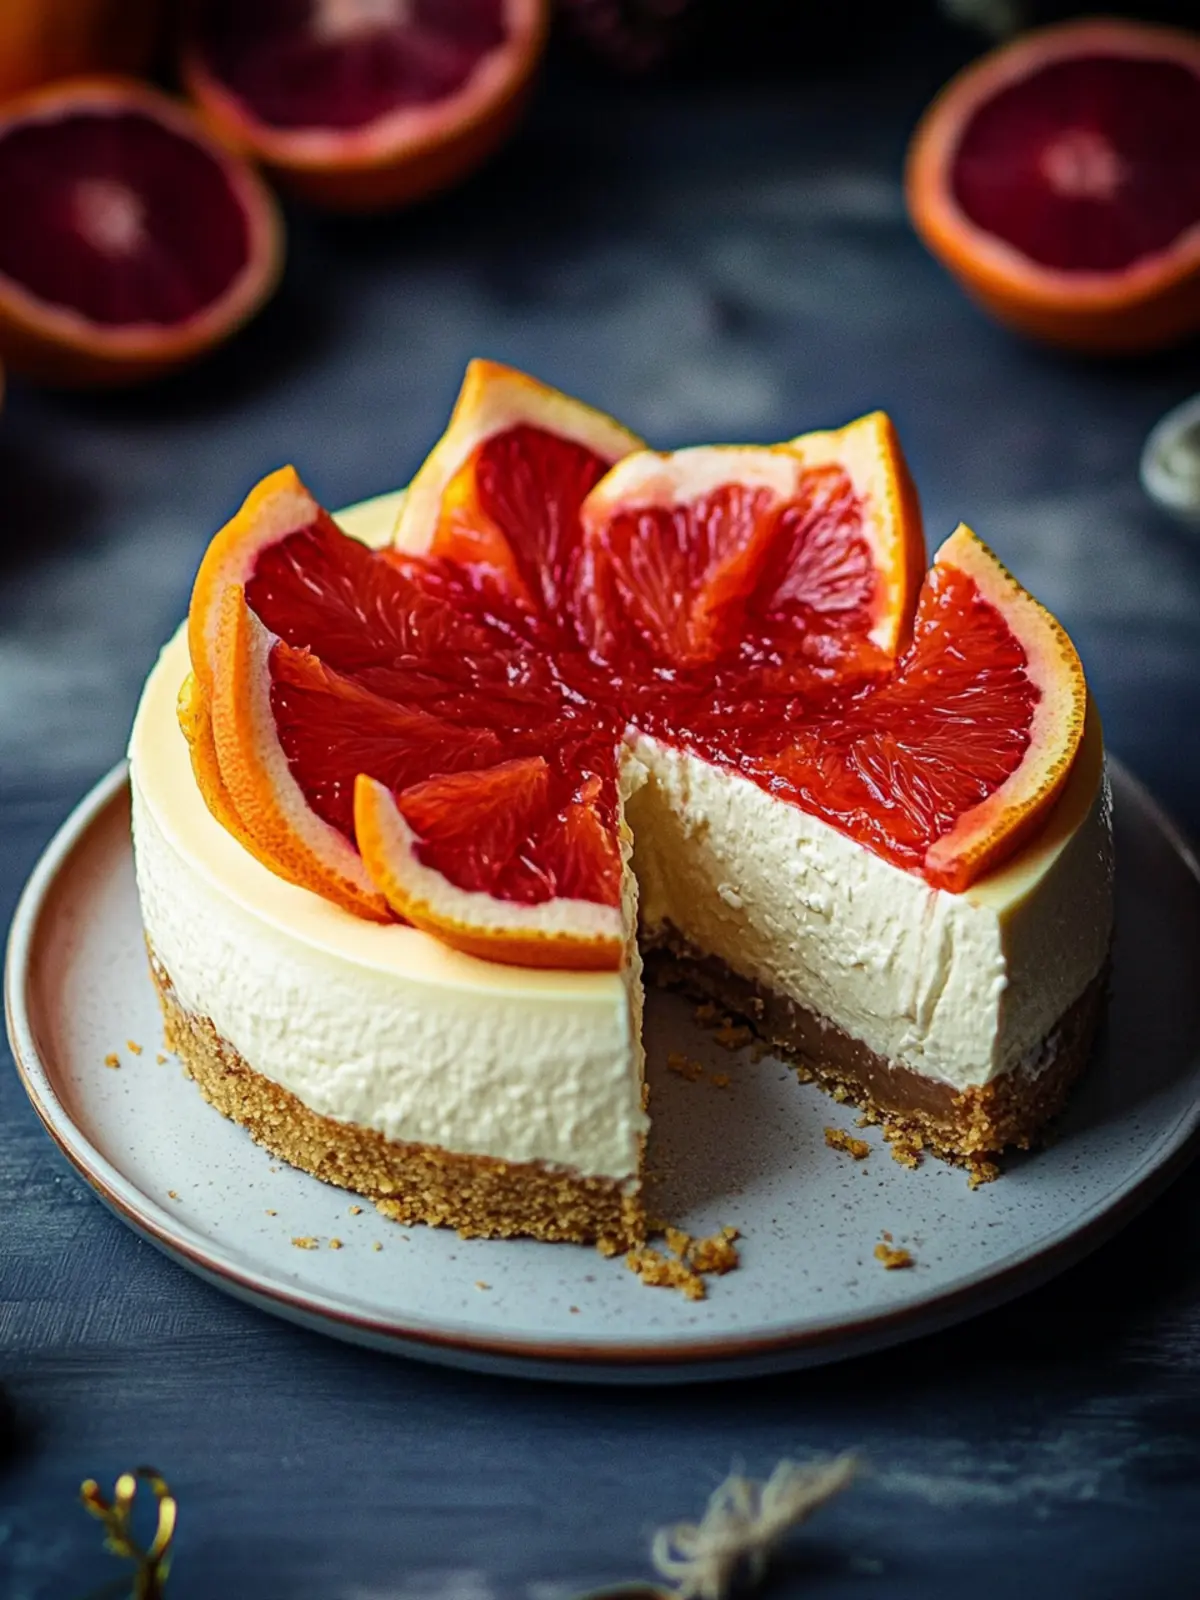
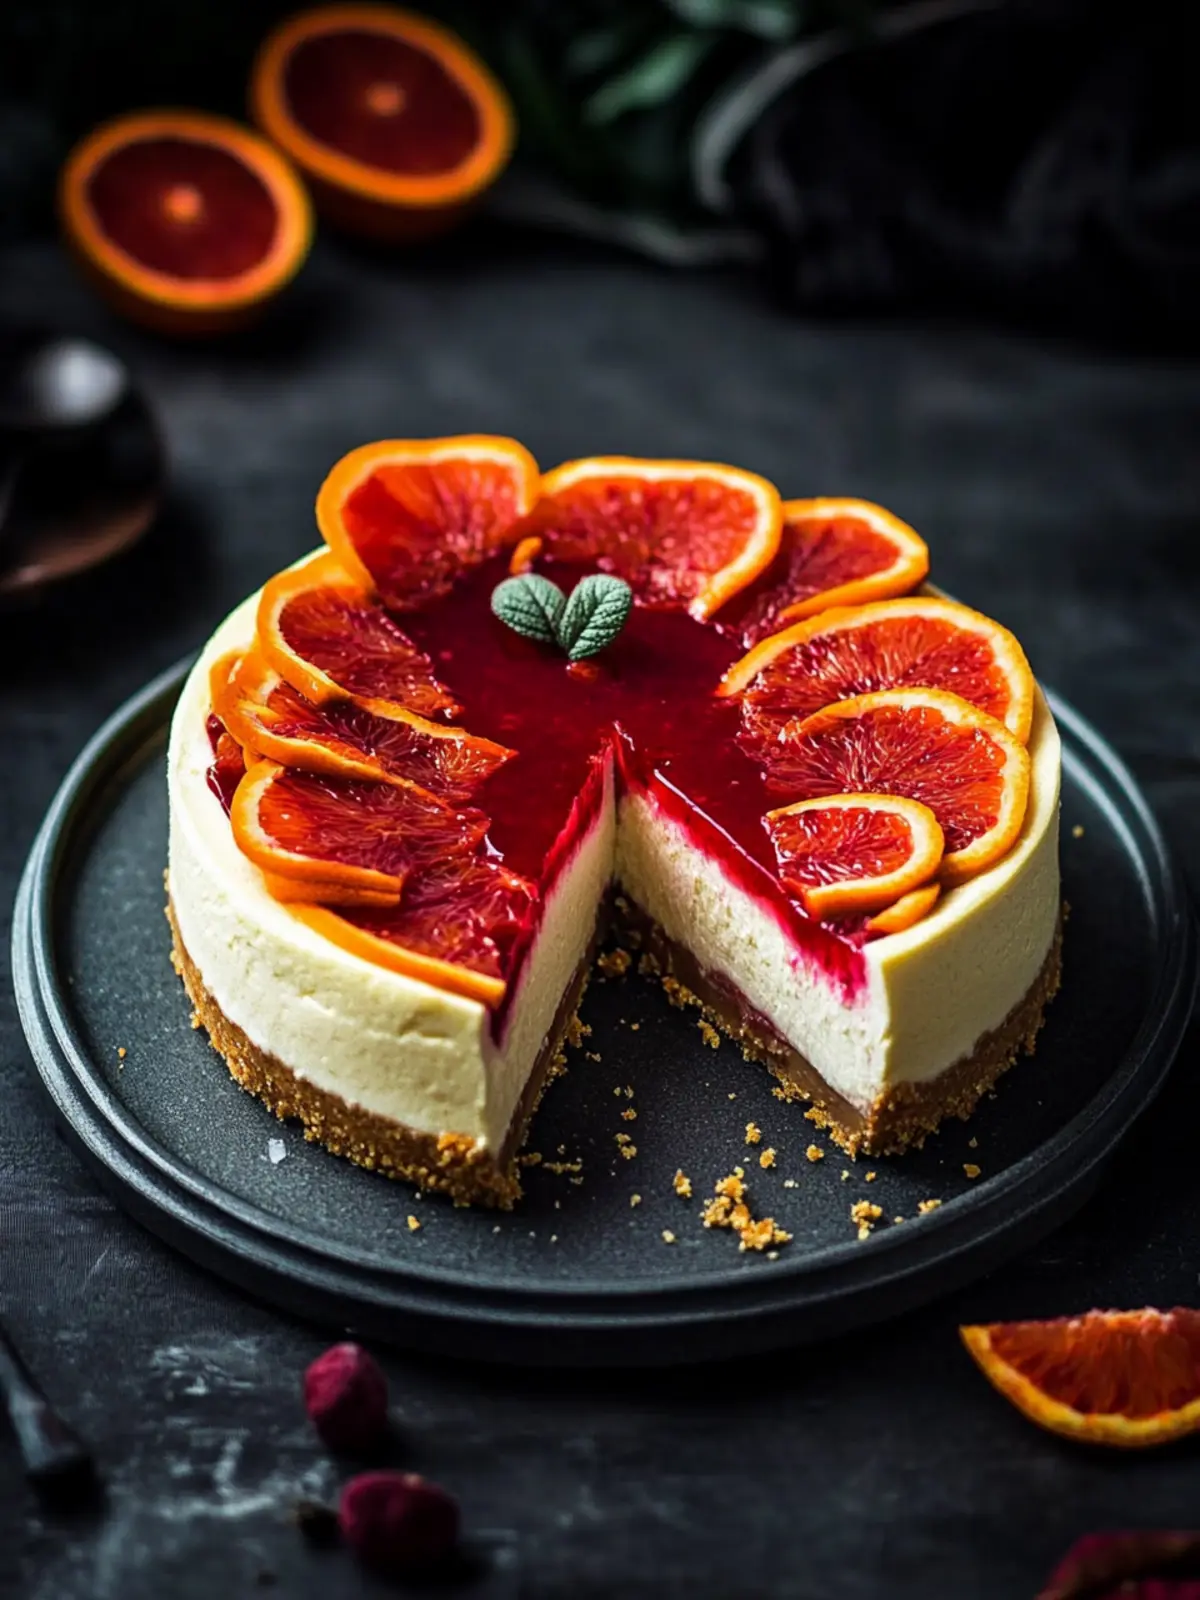
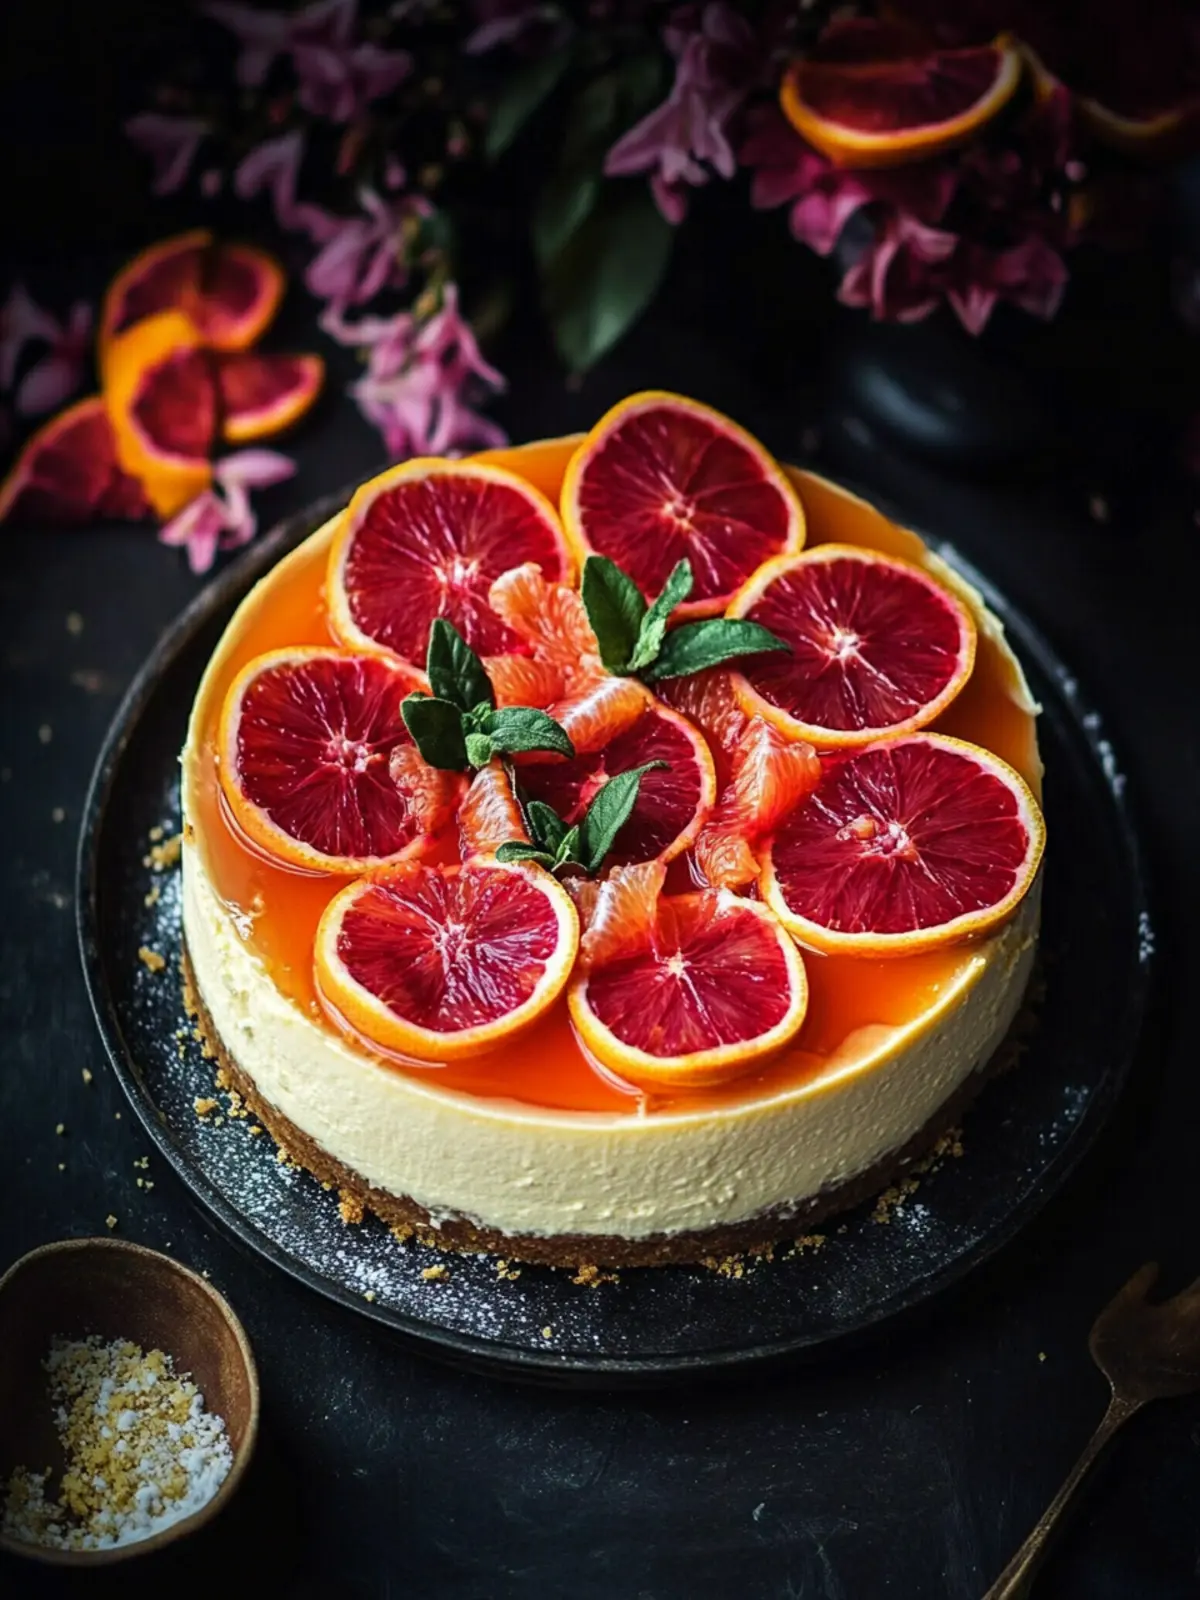
Stunning Presentation: Topped with vibrant jelly and decorative orange slices, this cheesecake is not just a dessert; it’s a work of art that impresses visually!
Perfect for Any Occasion: Whether it’s a celebration or a cozy dinner at home, this cheesecake will be the star of the show. And if you’re curious about more creative cheesecake options, check out our Cheesecake Variations for fresh ideas!
Make Ahead: With a bit of planning, you can prepare this cheesecake in advance, freeing you up for other tasks on the day of your gathering.
Blood Orange Cheesecake Ingredients
• Get ready to make your taste buds dance!
For the Crust
- Digestive biscuits – these provide a wonderful crunchy base; feel free to substitute with graham crackers or gluten-free options if needed.
- Butter – melted for easy mixing; unsalted is best to control the sweetness.
For the Filling
- Cream cheese – at room temperature for easy blending; don’t rush this step to avoid lumps!
- Sour cream – adds a tangy flavor that complements the sweetness perfectly; you can use Greek yogurt as a healthier alternative.
- Castor sugar – fine sugar helps achieve a smoother texture in your cheesecake.
- Eggs – room temperature eggs incorporate better for a creamier filling.
- Vanilla extract – enhances the flavor of the cheesecake; use pure vanilla for the best taste.
- Blood Orange zest and juice – the star of our recipe, adding that lovely citrus twist to your cheesecake!
For the Jelly Topping
- Freshly squeezed blood orange juice – about 1 cup, strained for a smooth jelly base; the fresher, the better!
- Castor sugar – additional for sweetening the jelly layer; it ensures the jelly sets beautifully.
- Water – helps dissolve the gelatine; remember to use warm water for better results.
- Powdered gelatine – gives the jelly its lovely, firm texture; vegetarian options are available if you prefer.
For Decoration
- Whipped cream – for a light and airy topping; make it homemade for richer flavor.
- Dehydrated blood orange slices – these add a stunning visual detail and a delightful chew; consider making your own or buying them pre-made.
Dive into this charming Blood Orange Cheesecake recipe and create a dessert that evokes warmth and joy with every slice!
How to Make Blood Orange Cheesecake
-
Preheat Oven: Set your oven to 160 degrees C (320 degrees F). Grease a springform pan’s base and sides, and line it with baking paper to prevent sticking.
-
Prepare Crust: Process the digestive biscuits until they form fine crumbs. Mix in the melted butter until combined, then press this mixture firmly into the base and sides of the prepared pan. Chill in the refrigerator for 30 minutes to set.
-
Make Filling: In a large mixing bowl, beat together the cream cheese, sour cream, and castor sugar until smooth. Add the eggs one by one, mixing well after each addition. Stir in the vanilla extract, blood orange zest, and juice, and beat for about 1 minute.
-
Pour Mixture: Carefully pour the creamy filling into the chilled crust, leaving space at the top for the jelly later.
-
Bake: Place the cheesecake in the preheated oven and bake for 60-70 minutes, or until the filling is set with a slight wobble in the center. Turn off the oven and let it cool slightly with the door ajar. Refrigerate for at least 4 hours.
-
Prepare Jelly: In a medium saucepan, combine the freshly squeezed blood orange juice and castor sugar. Gently stir over medium heat until the sugar has dissolved, then remove from heat.
-
Dissolve Gelatine: In a small bowl, mix gelatine with water. Microwave for 10-20 seconds until dissolved, then stir this into the hot juice mixture until smooth. Strain if needed to remove any lumps.
-
Cool and Pour Jelly: Allow the jelly mixture to cool to room temperature, then carefully pour it onto the cheesecake filling. Return it to the refrigerator until the jelly sets, approximately 2 hours.
-
Release and Plate: Once set, gently release the sides of the springform pan. Carefully transfer the cheesecake to a plate or cake stand for serving.
-
Decorate and Serve: Top the cheesecake with whipped cream and elegant dehydrated blood orange slices. Slice, serve, and enjoy this delightful dessert!
Optional: Add a sprinkle of fresh zest on top for an extra citrus kick!
Exact quantities are listed in the recipe card below.
Expert Tips for Blood Orange Cheesecake
-
Choose the Right Oranges: Select vibrant, heavy blood oranges for the juiciest flavor. Avoid ones that feel light or have blemishes.
-
Temperature Matters: Ensure all filling ingredients—cream cheese, eggs, and sour cream—are at room temperature. This helps avoid lumps, resulting in a smooth filling for your Blood Orange Cheesecake.
-
Watch the Bake: Keep an eye on the cheesecake during baking. A slight wobble in the center is perfect; overbaking can lead to cracks.
-
Chill Thoroughly: Refrigerate the cheesecake for a minimum of 4 hours, preferably overnight. This solidifies the texture and enhances flavors.
-
Decorative Touch: For added flair, consider using fresh zest from blood oranges on top of the whipped cream before serving—it’s visually stunning and adds aromatic flavor!
What to Serve with Blood Orange Cheesecake?
Imagine closing your meal with something sweet, zesty, and utterly delightful—perfect accompaniments to enhance your cheesecake experience.
-
Lightly Sweetened Whipped Cream: Adds a fluffy, airy texture that complements the cheesecake’s creaminess without overwhelming its citrus flavor.
-
Zesty Citrus Salad: A refreshing mix of citrus fruits like oranges and grapefruits can brighten your palate, while providing a vibrant contrast to the dessert.
-
Chocolate Drizzle: A rich chocolate sauce drizzled on top creates a sumptuous, indulgent combination with the tangy blood orange.
-
Mint Sprigs: Fresh mint leaves provide a burst of freshness and a hint of sophistication, making each bite feel special.
-
Crispy Cookies: Shortbread or almond cookies as a side offer a delightful crunch that complements the smooth texture of the cheesecake.
-
Lemonade or Citrus Iced Tea: Serve a refreshing drink that mirrors the cheesecake’s flavor profile, enhancing the overall experience with a zesty sip.
-
Decaf Coffee: A cup of rich, decaffeinated coffee can round out your meal beautifully, providing warmth and depth as a warm beverage to enjoy alongside.
Each of these pairings ensures that your Blood Orange Cheesecake shines even brighter at the table!
How to Store and Freeze Blood Orange Cheesecake
Fridge: Store any leftover cheesecake in an airtight container in the refrigerator for up to 3 days. This keeps it fresh while preserving the delightful flavors.
Freezer: If you’d like to enjoy your Blood Orange Cheesecake later, wrap individual slices tightly in plastic wrap and freeze for up to 2 months. Thaw in the fridge before serving.
Reheating: There’s no need to reheat cheesecake. Simply allow frozen slices to come to room temperature or let them sit in the fridge overnight for a smooth, creamy texture when you’re ready to indulge.
Avoiding Soggy Crust: When storing, avoid placing toppings directly on the cheesecake surface. Instead, add decorations like whipped cream and dehydrated orange slices just before serving to maintain a crisp crust.
Make Ahead Options
These Blood Orange Cheesecakes are a fantastic choice for anyone looking to save time in the kitchen! You can prepare the crust and filling up to 24 hours in advance; just cover the crust tightly with plastic wrap and refrigerate it until you’re ready to bake. Additionally, the jelly topping can be made ahead and stored in the refrigerator for up to 3 days in an airtight container to preserve its freshness. When it’s time to finish your cheesecake, simply bake it, allow it to cool, layer on the jelly, and refrigerate until set. This make-ahead strategy ensures your Blood Orange Cheesecake will be just as delicious, saving you time for everything else that matters on your busy day!
Blood Orange Cheesecake Variations
Feel free to unleash your creativity and customize this cheesecake to suit your taste buds and dietary preferences!
- Gluten-Free: Substitute digestive biscuits with gluten-free cookies or almond flour for a delicious, crunchy base.
- Vegan: Use cashew cream and silken tofu instead of cream cheese and eggs, sweetening with maple syrup instead of sugar.
- Chocolate Lovers: Fold in 1/2 cup of melted dark chocolate into the cream cheese mixture for an indulgent chocolate twist.
- Nutty Crunch: Add chopped walnuts or pecans to the crust for added texture and a delightful nutty flavor.
- Citrus Mix: Combine blood orange juice with other citrus juices, like lemon or grapefruit, for a zesty explosion of flavors.
- Spiced Delight: Incorporate 1/2 teaspoon of cinnamon or nutmeg into the filling for a warm, inviting spice that complements the citrus.
- Layered Surprise: Create layers of cheesecake and fruit by swirling some fresh blood orange puree into the filling before baking.
- Extra Creamy: Add an additional 100 g of cream cheese for an ultra-creamy filling that will have everyone begging for seconds.
Blood Orange Cheesecake Recipe FAQs
How do I choose ripe blood oranges?
Absolutely! Look for blood oranges that are heavy for their size and have a vibrant, deep red or orange skin. Avoid any that have dark spots or blemishes, as these can indicate overripeness or damage. The juicier the orange, the better your cheesecake will taste!
How should I store leftover Blood Orange Cheesecake?
To keep your cheesecake fresh, place any leftovers in an airtight container and store them in the refrigerator. It should stay delicious for up to 3 days. If you’re bringing it to a gathering later, chill it until serving for the best flavor and texture!
Can I freeze Blood Orange Cheesecake?
Very much! To freeze, wrap individual slices tightly in plastic wrap or aluminum foil and place them in a freezer-safe container. They can last up to 2 months in the freezer. When you’re ready to enjoy a slice, simply thaw it in the fridge overnight for the best results.
Why did my cheesecake crack?
The most common culprit for cracking is overbaking. Remember, you want the cheesecake to be set with a slight wobble in the center. If cracks do appear, don’t worry! You can cover it with whipped cream and dehydrated orange slices for a beautiful presentation.
Does this recipe contain any allergens?
Absolutely! This Blood Orange Cheesecake contains dairy (cream cheese, sour cream, butter, and eggs) and gluten (digestive biscuits). If you’re catering to allergies, feel free to swap for gluten-free biscuits and dairy alternatives like vegan cream cheese or cashew cream for a deliciously creamy texture!
How long will the jelly topping last on the cheesecake?
The jelly layer is best enjoyed within 1-2 days; it’s perfect on the cheesecake, but after that, it may start to lose its firmness. If you want to ensure the crust stays crispy, add the jelly just before serving and keep the cheesecake covered in the refrigerator to maintain freshness!
Indulge in Delightful Blood Orange Cheesecake Bliss
Ingredients
Equipment
Method
- Preheat the oven to 160 degrees C (320 degrees F). Grease a springform pan's base and sides, and line it with baking paper.
- Process the digestive biscuits until they form fine crumbs. Mix in the melted butter until combined, then press this mixture into the base and sides of the prepared pan. Chill in the refrigerator for 30 minutes to set.
- In a large mixing bowl, beat together the cream cheese, sour cream, and castor sugar until smooth. Add the eggs one by one, mixing well after each addition. Stir in the vanilla extract, blood orange zest, and juice, and beat for about 1 minute.
- Pour the creamy filling into the chilled crust, leaving space at the top for the jelly.
- Bake for 60-70 minutes until the filling is set with a slight wobble in the center. Let cool slightly in the oven with the door ajar, then refrigerate for at least 4 hours.
- Combine the freshly squeezed blood orange juice and castor sugar in a medium saucepan and stir over medium heat until sugar dissolves, then remove from heat.
- Mix powdered gelatine with warm water until dissolved, then stir into the hot juice mixture until smooth. Strain if needed.
- Allow the jelly mixture to cool to room temperature, then pour onto the cheesecake filling. Refrigerate until jelly sets, about 2 hours.
- Once set, release the sides of the springform pan and transfer the cheesecake to a plate.
- Top with whipped cream and dehydrated blood orange slices before serving.