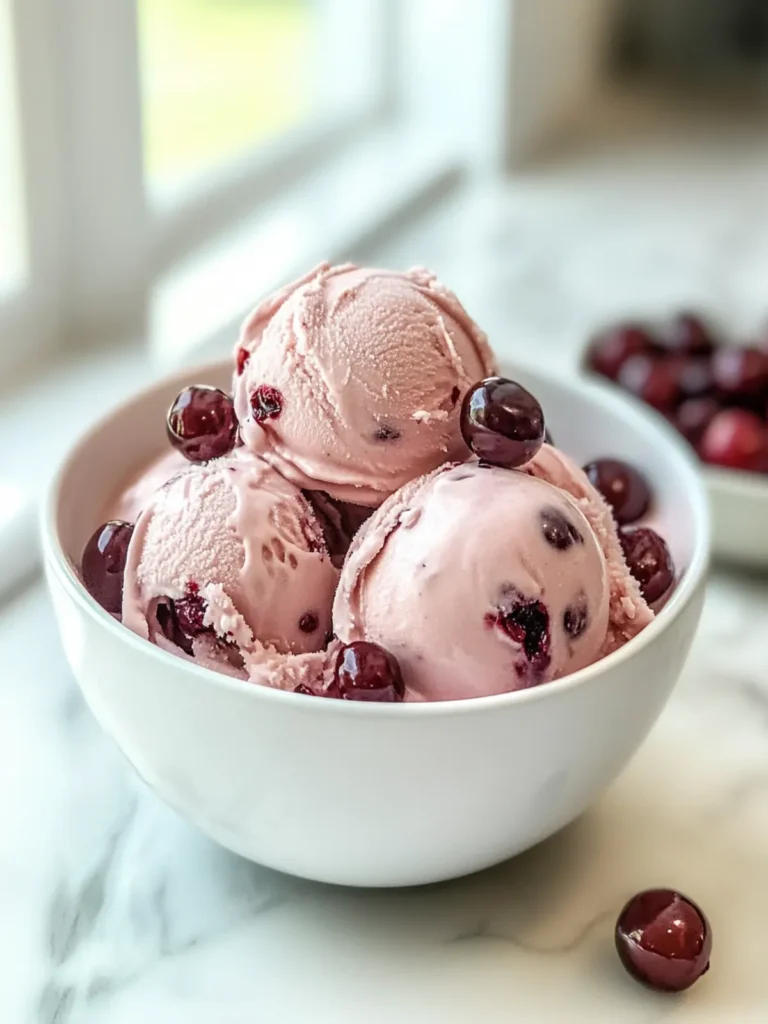
When the summer heat hits, nothing compares to the rich, creamy delight of homemade Cherry Garcia Ice Cream. I remember the first time I took a scoop of this decadent dessert; the blend of sweet Bing cherries and silky dark chocolate danced on my tongue like a refreshing symphony. Crafting your own ice cream might sound daunting, but trust me—this recipe is a breeze! As I whip up each batch in my kitchen, I can’t help but delight in the fact that this indulgent treat not only uses simple, fresh ingredients but also allows for endless customization.
Picture this: a sunny afternoon, friends gathered, and the laughter echoing around the backyard. You’re serving up generous scoops of this cherry-chocolate goodness, and everyone can’t get enough! So, forget the fast food ice creams and join me in making your very own Cherry Garcia Ice Cream that’ll make every occasion feel like a celebration. Let’s dive into the deliciousness!

Why is Cherry Garcia Ice Cream a Must-Try?
Irresistible Flavor: The sweet Bing cherries blended with rich, dark chocolate takes your tastebuds on a delightful journey.
Easy to Make: Using simple ingredients, this no-fuss recipe ensures that even beginners can shine in the kitchen.
Summer Essential: Perfect for warm days, it’s a refreshing treat that both family and friends will love.
Versatile Customization: Add your favorite mix-ins, whether it’s nuts, other fruits, or a swirl of caramel, to make it truly your own.
Crowd-Pleasing Dessert: Serve this at gatherings, and you’ll be the star of the show, leaving everyone craving more!
If you’re interested in more homemade delights, check out our flavorful ice cream recipes!
Cherry Garcia Ice Cream Ingredients
• Here’s everything you need to create the perfect Cherry Garcia Ice Cream!
For the Chocolate
- Shaved chocolate – Use Hershey’s Special Dark Chocolate Candy Bar for a rich flavor boost.
For the Cherries
- Fresh Bing cherries – Halved and pitted, these juicy delights are the star of the show!
For the Custard Base
- Large eggs – Four eggs provide the creamy texture and richness you desire.
- Granulated white sugar – The perfect sweetness to balance the tart cherries.
- Heavy whipping cream – Four cups create that luscious and decadent mouthfeel.
- Milk – Two cups of milk help lighten the custard while keeping it creamy.
Dive into these ingredients, and you’ll soon create an irresistible Cherry Garcia Ice Cream that brings everyone together!
How to Make Cherry Garcia Ice Cream
-
Refrigerate the shaved chocolate and cherries in separate bowls. This helps maintain their texture and flavor, ensuring a fresh bite in every scoop as you prepare your custard.
-
Heat the cream and milk in a saucepan over medium-low heat. Stir gently until warm, just before boiling; you’re looking for that soft, steaming swirl that brings out the richness of the cream.
-
Whisk the eggs until fluffy in a separate bowl, then mix in the sugar. You want a light, airy consistency; this will help create a smooth custard that’s full of flavor.
-
Temper the eggs by slowly adding 1/3 of the hot cream/milk mixture to the egg mixture. Stir constantly to prevent curdling, allowing those sweet flavors to combine perfectly!
-
Combine the remaining cream/milk mixture with the egg mixture. Gently heat the combined mixture over medium heat until it reaches 175°F; this brings out the creaminess you desire.
-
Chill the custard until it reaches 40°F. Patience is key here—this step ensures your ice cream will be silky smooth and delicious!
-
Churn in an ice cream maker according to the manufacturer’s instructions until it reaches a soft-serve consistency. This is the fun part—watch your creation come to life!
-
Add the chocolate and cherries just before it’s done, folding them in gently to keep each piece intact. Then, freeze until you reach your desired consistency; you want that perfect scoopable delight!
Optional: Serve with an extra drizzle of chocolate for a show-stopping dessert.
Exact quantities are listed in the recipe card below.
Make Ahead Options
These Cherry Garcia Ice Creams are perfect for meal prep enthusiasts! You can prepare the custard base up to 24 hours in advance. Simply complete steps 1 through 6, then refrigerate the custard until you’re ready to churning. This not only saves time but also allows the flavors to meld beautifully. Remember to keep the shaved chocolate and cherries refrigerated in separate containers to maintain their texture. When you’re ready to churn, just proceed with steps 7 and 8 to finish. You’ll have a delightful homemade ice cream that’s just as delicious as if you made it in one go, making it ideal for those busy summer days!
What to Serve with Cherry Garcia Ice Cream?
Indulging in a scoop of this creamy delight is just the beginning—let’s explore the perfect accompaniments that will elevate your dessert experience!
-
Fresh Berries: Juicy strawberries or blueberries add a refreshing burst of flavor that complements the cherries beautifully. Their natural sweetness balances the richness of the ice cream.
-
Chocolate Sauce: A warm drizzle of chocolate sauce intensifies the decadent chocolate flavor in the ice cream. It’s an irresistible combination that chocolate lovers will appreciate.
-
Crispy Waffle Cones: Serve your Cherry Garcia Ice Cream in crispy waffle cones for an added crunch! The texture contrast is simply delightful, making every bite an adventure.
-
Mint Leaves: A sprinkle of fresh mint leaves not only beautifies the dish but adds a cooling effect that stands up against the creaminess. This touch of freshness will wow your guests!
-
Homemade Whipped Cream: Light and fluffy whipped cream adds extra creaminess and a touch of elegance. You can even flavor it with vanilla or almond extract to enhance the overall experience.
-
Coffee: A rich cup of coffee provides a wonderful contrast to the sweet ice cream, making it a comforting pairing. The bitterness of the coffee perfectly offsets the sweet and creamy notes.
-
Chocolate Chip Cookies: Think of a deconstructed ice cream sandwich! Crumbled chocolate chip cookies sprinkled on top add texture and that nostalgic touch of childhood joy.
Whip these delightful companions together with your Cherry Garcia Ice Cream, and you’ll create an unforgettable dessert spread that everyone will love!
Cherry Garcia Ice Cream Variations
Feel free to put your own spin on this delightful treat with these simple variations!
-
Dairy-Free: Substitute coconut cream and almond milk for a creamy, vegan-friendly ice cream that’s just as delightful!
-
Chocolate Twist: Add dark chocolate chips or chunks to intensify the chocolate flavor—every scoop gets an extra surprise!
-
Nutty Delight: Incorporate chopped walnuts or pecans for a crunchy texture that pairs beautifully with the soft cherries and smooth chocolate.
-
Berry Burst: Mix in raspberries or strawberries along with the cherries for a mixed berry explosion that adds a beautiful pop of color.
-
Extra Citrus: Add a hint of orange zest into the custard base for a refreshing citrus kick that will brighten each scoop!
-
Spicy Kick: A pinch of cayenne pepper or a splash of jalapeño syrup could introduce a surprising yet delightful heat to balance the sweetness.
-
Alcohol-Infused: For adults, swirl in a couple of tablespoons of cherry liqueur or amaretto before churning for an adult twist on this childhood favorite.
-
Caramel Swirl: Drizzle in some homemade or store-bought caramel sauce during the last minutes of churning for a sweet, gooey surprise with each scoop.
Let your creativity flow and make this Cherry Garcia Ice Cream truly yours!
Expert Tips for Cherry Garcia Ice Cream
-
Fresh Ingredients: Use ripe Bing cherries and high-quality chocolate for the best flavor. Fresh ingredients elevate your Cherry Garcia Ice Cream to a whole new level!
-
Temper the Eggs: Add the hot mixture slowly to the eggs while stirring constantly. This prevents scrambling and ensures a silky custard that sets well in the ice cream maker.
-
Chill Thoroughly: Allow the custard to cool to 40°F before churning. This helps create a smooth texture and prevents ice crystals from forming in your Cherry Garcia Ice Cream.
-
Churning Timing: Do not over-churn! Once the mixture reaches a soft-serve consistency, add the chocolate and cherries. Over-churning can lead to a grainy texture.
-
Customize Wisely: Feel free to play with mix-ins, but be mindful of balance. Too many additions can affect the creaminess and flavor profile of your Cherry Garcia Ice Cream!
How to Store and Freeze Cherry Garcia Ice Cream
Fridge: Store homemade Cherry Garcia Ice Cream in an airtight container in the fridge for up to 3 days. It’s best enjoyed fresh, but the flavor remains delightful!
Freezer: Keep your ice cream in the freezer for up to 2 weeks. Use an airtight container to prevent ice crystals from forming, keeping every scoop creamy and luscious.
Reheating: If the ice cream becomes too hard, let it sit at room temperature for about 10 minutes before serving. This will make scooping easier while retaining that delicious flavor.
Serving Tip: For the best experience, serve your Cherry Garcia Ice Cream immediately after freezing and enjoy those vibrant flavors!
Cherry Garcia Ice Cream Recipe FAQs
How do I select ripe cherries for my Cherry Garcia Ice Cream?
Look for fresh Bing cherries that are firm, glossy, and deep red in color. Avoid any with dark spots or soft areas, as these may be overripe. The sweeter the cherries, the more delightful your ice cream will taste!
How long can I store my homemade Cherry Garcia Ice Cream?
Store your Cherry Garcia Ice Cream in an airtight container in the freezer for up to 2 weeks. This keeps it creamy and free of ice crystals, ensuring that every scoop maintains its luscious texture. If you notice a change in texture, allowing it to sit at room temperature for about 10 minutes can help soften it for easier scooping.
Can I freeze my Cherry Garcia Ice Cream?
Absolutely! After churning, transfer your ice cream to an airtight container and freeze it. It will be good for up to 2 weeks in the freezer. To prevent ice crystals, smooth the top before sealing—it helps maintain that indulgent creaminess!
What should I do if my ice cream turns out grainy?
If your Cherry Garcia Ice Cream ends up grainy, it likely means that the custard was over-churned or didn’t cool down sufficiently before churning. For next time, ensure your custard has chilled to 40°F and stop churning once it reaches a soft-serve consistency. If you handle these steps carefully, you’ll enjoy the smooth texture you’re after.
Is this Cherry Garcia Ice Cream safe for my pet?
No, this Cherry Garcia Ice Cream is not suitable for pets. The presence of chocolate and sugar can be harmful to animals, particularly dogs. Stick to pet-safe treats for your furry friends to keep them happy and healthy!
Can I make healthier substitutions in my Cherry Garcia Ice Cream?
Yes! You can use low-fat milk instead of whole milk and substitute a sugar alternative like maple syrup or agave nectar for a lighter option. Just keep in mind that these changes may slightly alter the flavor and texture of your Cherry Garcia Ice Cream, but it’s all about finding what works best for you!

Creamy Cherry Garcia Ice Cream: A Homemade Delight!
Ingredients
Equipment
Method
- Refrigerate the shaved chocolate and cherries in separate bowls.
- Heat the cream and milk in a saucepan over medium-low heat until warm.
- Whisk the eggs until fluffy, then mix in the sugar.
- Temper the eggs by slowly adding 1/3 of the hot cream/milk mixture while stirring.
- Combine the remaining cream/milk mixture with the egg mixture and heat until 175°F.
- Chill the custard until it reaches 40°F.
- Churn in an ice cream maker until it reaches a soft-serve consistency.
- Add the chocolate and cherries just before it’s done, folding gently.