
The first time I made Giada’s Chicken Milanese, I was swept away by the intoxicating scent of crispy panko mingling with seasoned chicken. It reminded me of family dinners growing up, where golden-brown aromas filled the air and laughter danced around the table. I can’t help but smile as I recall how this dish turned an ordinary weeknight into something special.
With just a handful of ingredients and minimal prep time, this recipe transforms simple chicken cutlets into a crispy delight that’s hard to resist. Not only is it a delightful twist on traditional comfort food, but it also appeals to those of us looking to break free from the fast-food cycle. Whether you’re hosting a casual dinner with friends or whipping something up for yourself after a long day, Giada’s Chicken Milanese is versatile and oh-so-satisfying. Serve it with a squeeze of fresh lemon, and you’ve got a dish that feels fancy but is utterly approachable. Let’s dive into the art of making this crowd-pleaser that promises to bring joy and flavor to your dining table!

Why will you love Giada Chicken Milanese?
Quick and Easy: This recipe requires just 10 minutes of prep and 5 minutes of cooking, making it perfect for busy weeknights or last-minute dinners.
Crispy Perfection: The gluten-free panko creates a delightfully crunchy coating that captures the essence of comfort food without the guilt.
Flavor Burst: Lemon wedges add a zesty brightness, elevating the dish and making every bite taste fresh and vibrant.
Family-Friendly: Its mild and addictively crispy flavor will appeal to kids and adults alike, turning any meal into a celebration.
Versatile Dish: Pair it with a beautiful salad or your favorite sides for a full dining experience, proving its place at the dinner table.
This Giada Chicken Milanese is a delightful twist that will keep you coming back for more!
Giada Chicken Milanese Ingredients
• Transform your dinner with these essentials!
For the Chicken
- 4 ounces chicken cutlets – Use thin cutlets for faster cooking and maximum tenderness.
- Salt – Enhances flavor; season generously for best results.
- Black pepper – Adds warmth and balances the saltiness perfectly.
For the Breading
- Rice flour – Great for a gluten-free option, giving a light texture.
- Eggs – Acts as the binder; beaten lightly for an even coat.
- Gluten-free panko – Offers a delightful crunch that elevates your Giada Chicken Milanese to crispy perfection.
For Cooking
- Olive oil – Use for frying; it brings rich flavor and helps achieve that golden brown.
For Serving
- Lemon wedges – Provide a fresh, zesty kick that brightens the dish with each squeeze.
Keep these ingredients handy and get ready to impress with your crispy, homemade Giada Chicken Milanese!
How to Make Giada Chicken Milanese
-
Pound the Chicken: Lay the chicken cutlets between two sheets of plastic wrap. Gently pound each piece until thin and even in thickness, ensuring they’ll cook quickly and evenly.
-
Season and Prep: Sprinkle both sides of the chicken with a portion of the salt. Set up three shallow bowls: one for rice flour, one for beaten eggs, and one for gluten-free panko. Divide the remaining salt among the bowls to season each component.
-
Dredge the Chicken: Dredge each cutlet in the rice flour, shaking off any excess. Dip the cutlets into the egg mixture, letting the excess drip before coating them well with the panko. Press gently to ensure it sticks nicely.
-
Heat the Oil: Heat a large skillet over medium heat. Add a generous amount of olive oil, allowing it to warm for a few moments—watch for a shimmer indicating it’s ready!
-
Cook in Batches: Carefully lay the breaded cutlets in the hot oil, ensuring not to overcrowd the pan. Fry the first side for about 4 to 5 minutes, until it’s golden brown and crispy.
-
Flip and Finish: Turn the cutlets over and continue cooking on the second side for another 3 minutes, or until they’re crispy and fully cooked through.
-
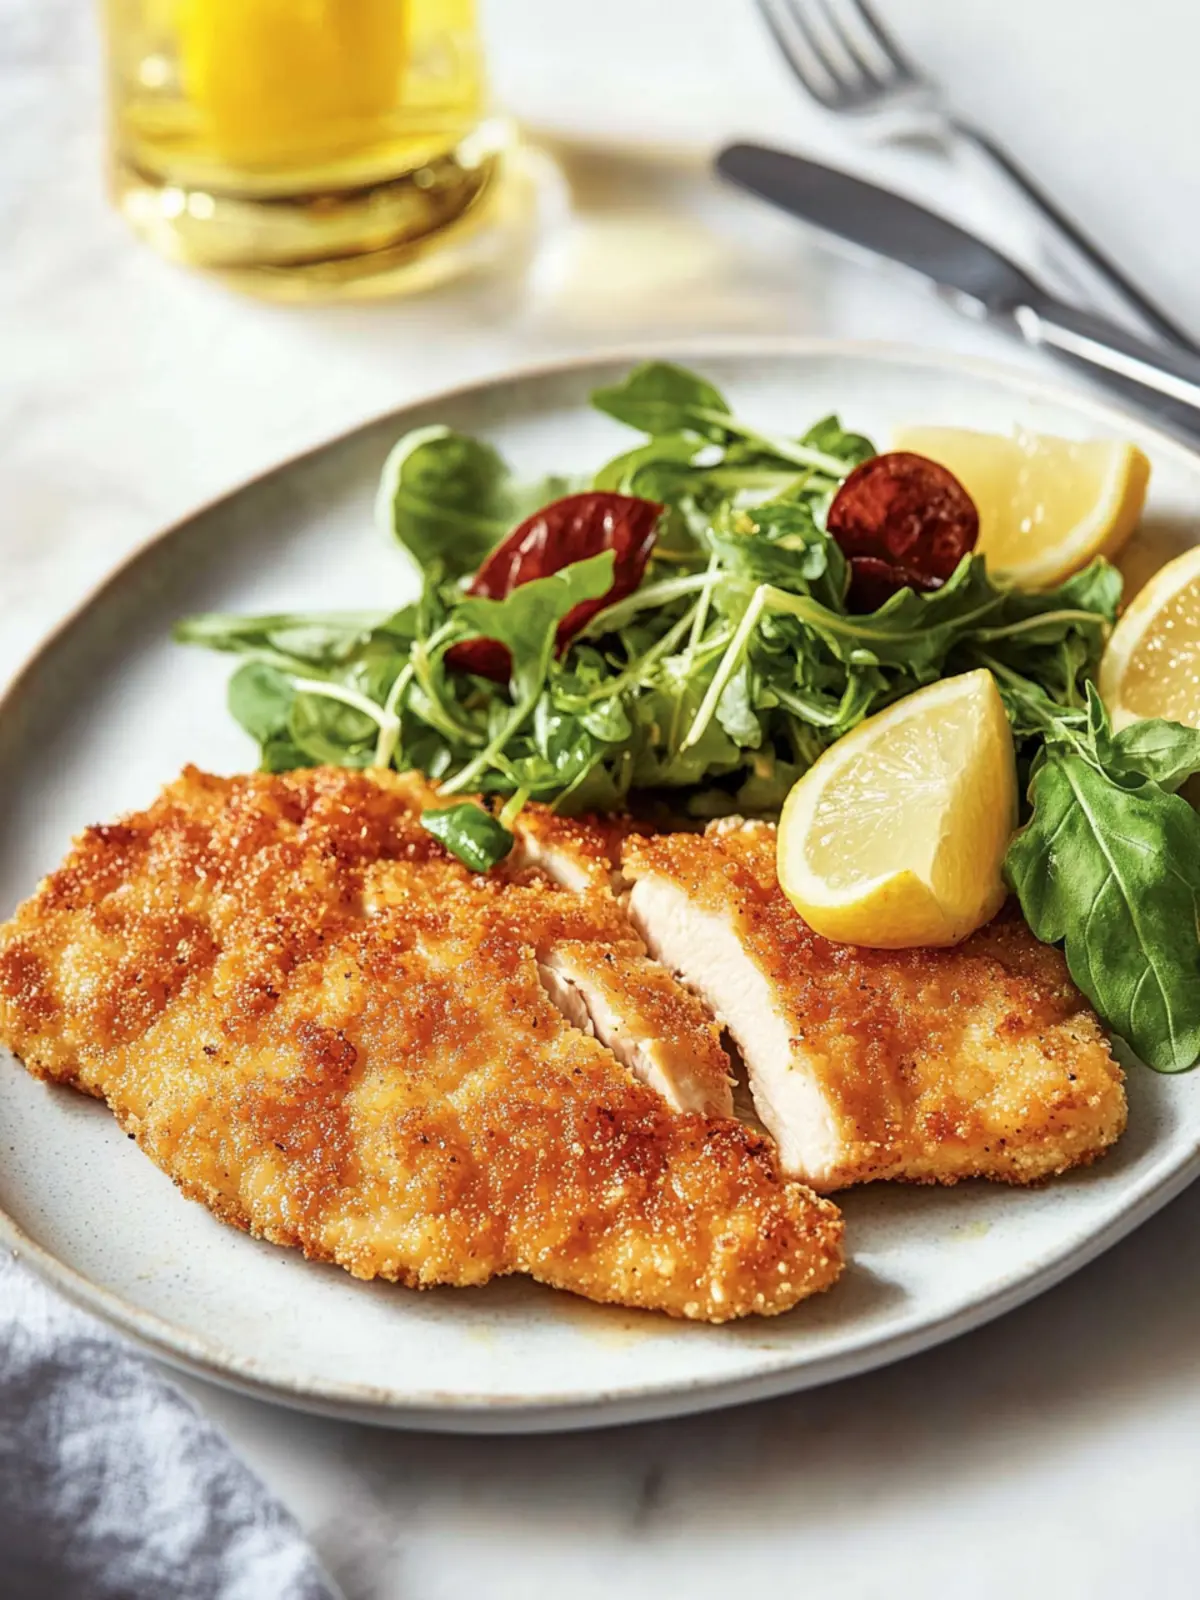
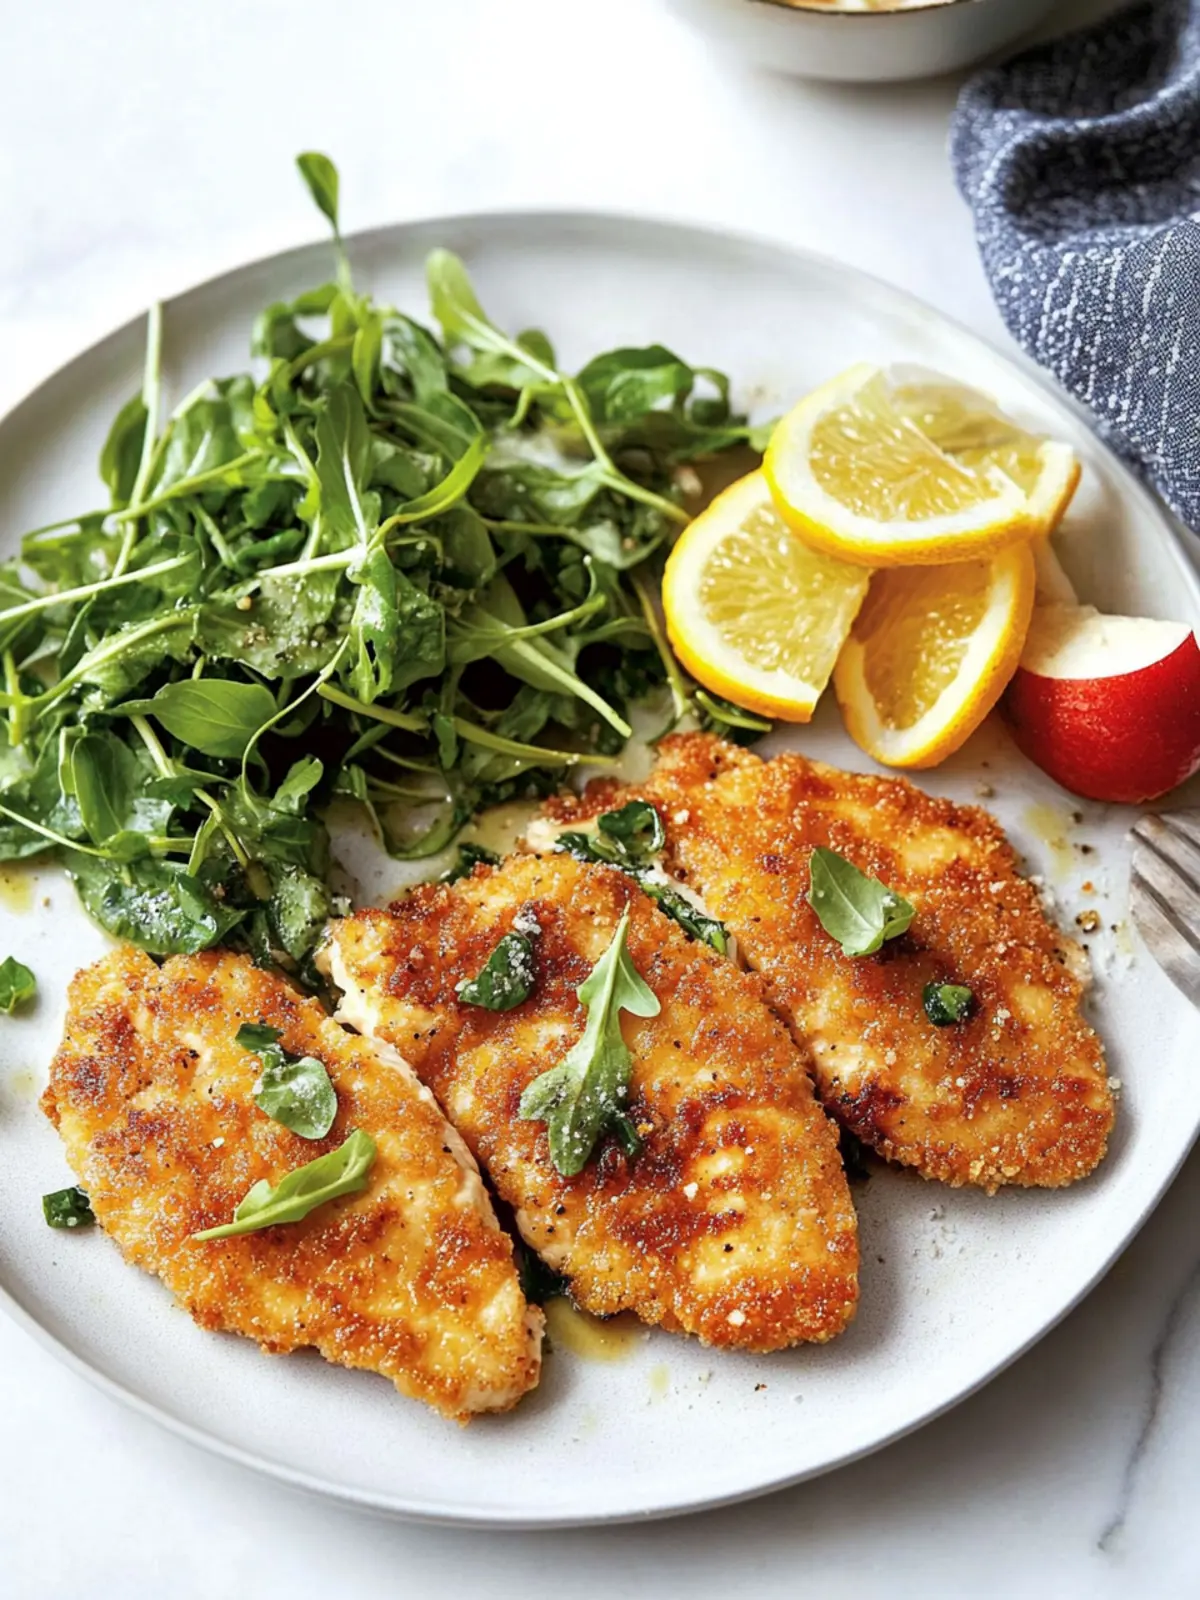
Drain and Serve: Transfer the cooked cutlets to a wire rack to drain any excess oil. Season with the remaining salt and a sprinkle of black pepper, then serve hot with fresh lemon wedges.
Optional: Serve with a side of arugula salad for a refreshing contrast.
Exact quantities are listed in the recipe card below.
What to Serve with Giada Chicken Milanese?
To create a memorable dining experience, consider these delightful pairings that complement the crispy, flavorful chicken.
-
Creamy Risotto: The richness of risotto beautifully balances the crispy texture of the chicken, making each bite a delightful harmony of flavors.
-
Arugula Salad: A refreshing salad with peppery arugula and a squeeze of lemon provides a bright contrast to the dish, keeping it light and vibrant.
-
Garlic Mashed Potatoes: Fluffy and creamy potatoes add comfort; their smooth texture contrasts against the crispy chicken, creating a fulfilling meal.
-
Roasted Asparagus: Tender asparagus adds a pop of color and a subtle crunch, enhancing the dish while offering a nutritious side.
-
Lemon Garlic Butter Sauce: Drizzling this over the chicken infuses it with an extra layer of flavor, enhancing the lemony brightness that makes this dish shine!
-
White Wine: A chilled glass of Chardonnay complements the chicken’s crispiness and brings out the lemony notes beautifully, elevating your meal.
-
Chocolate Mousse: To end the dinner on a sweet note, a rich, airy chocolate mousse is a lovely dessert pairing that contrasts the savory dish wonderfully.
Expert Tips for Giada Chicken Milanese
-
Perfect Thickness: Ensure your chicken cutlets are uniformly thin. This not only cooks them evenly but also keeps them juicy and tender.
-
Season Each Layer: Season all three components—rice flour, eggs, and panko. This ensures that every bite of your Giada Chicken Milanese is packed with flavor.
-
Oil Temperature Matters: Use enough olive oil and make sure it’s at the right temperature; overheating can burn the coating before the chicken cooks through.
-
Batch Cooking: Avoid overcrowding the skillet when frying. Giving each cutlet room allows for even cooking and better crisping.
-
Draining Excess Oil: Let the cooked cutlets drain on a wire rack instead of paper towels to keep them crispy on all sides.
How to Store and Freeze Giada Chicken Milanese
Fridge: Store leftover Giada Chicken Milanese in an airtight container for up to 3 days. Reheat in the oven to maintain crispiness.
Freezer: For longer storage, freeze the breaded but uncooked chicken cutlets for up to 2 months. Wrap tightly in plastic wrap and place in a resealable freezer bag.
Reheating: To reheat cooked chicken cutlets, place them in a preheated oven at 375°F (190°C) for about 10-15 minutes until heated through and crispy.
Avoid Moisture: When freezing, make sure there’s no moisture in the container to prevent freezer burn, keeping your chicken as delightful as the first bite!
Variations & Substitutions for Giada Chicken Milanese
Feel free to explore these delightful twists to make this recipe uniquely yours!
-
Herb Infusion: Mix dried herbs like oregano or thyme into the rice flour for an aromatic twist that heightens flavor.
-
Cheesy Crunch: Add grated Parmesan or Pecorino Romano to the gluten-free panko for an extra cheesy and savory layer. This not only amplifies the existing flavors but also adds richness that’s hard to resist!
-
Spicy Kick: Sprinkle cayenne pepper or crushed red pepper flakes into your egg mixture to give your chicken a zesty heat that tantalizes the taste buds.
-
Nutty Flavor: Incorporate ground almonds or hazelnuts with the panko for a unique texture and flavor. This nutty crunch adds depth, making each bite a new adventure.
-
Asian-inspired: Use panko made from sesame seeds instead of gluten-free panko, providing a wonderful aroma and flavor profile. Pair it with a drizzle of teriyaki sauce for an unexpected but delightful twist.
-
Vegetable Upgrade: Use thinly sliced zucchini or eggplant instead of chicken for a satisfying vegetarian mimicking dish; bread and cook them just like your chicken cutlets.
-
Citrus Zest: Add lemon or lime zest to your egg mixture for a delightful citrus aroma that complements the dish beautifully. Pairing this with a tangy dipping sauce can elevate your meal even further!
-
Flavor Marinade: Marinate the chicken cutlets in a mixture of lemon juice, garlic, and herbs for at least an hour before breading for profound depth and succulent flavor. This extra step allows the chicken to soak up all those vibrant tastes!
Make Ahead Options
Giada’s Chicken Milanese is perfect for meal prep enthusiasts! You can prepare the chicken cutlets through the dredging step up to 24 hours in advance. Simply pound and season the cutlets, and then coat them in rice flour, egg, and panko. Place the breaded cutlets on a baking sheet lined with parchment paper and refrigerate them until you’re ready to cook. This method not only saves you time on busy weeknights but also keeps the chicken fresh and crispy when cooked. When you’re ready to serve, just heat the olive oil and fry the cutlets as directed for delicious, restaurant-quality results without the last-minute rush!
Giada Chicken Milanese Recipe FAQs
What kind of chicken cutlets should I use for best results?
Absolutely! It’s best to use thin chicken cutlets for this recipe. They not only cook evenly and quickly but also remain juicy and tender during frying. If you can’t find pre-sliced cutlets, you can easily cut chicken breasts into thin slices or gently pound them between plastic wrap to create uniform thickness.
How should I store leftovers of Giada Chicken Milanese?
Great question! Store any leftover Giada Chicken Milanese in an airtight container and refrigerate them for up to 3 days. I recommend reheating them in the oven at 375°F (190°C) for about 10-15 minutes to keep them crispy. Using a wire rack in the oven can help maintain that delightful crunch.
Can I freeze the chicken after breading?
Yes, you can! For longer storage, freeze the breaded, uncooked chicken cutlets. Wrap each individual cutlet tightly in plastic wrap and then place them in a resealable freezer bag. They can last for up to 2 months in the freezer. When you’re ready to cook them, no need to thaw—just fry them straight from frozen, but be sure to adjust cooking time.
What should I do if my breading isn’t sticking properly?
Very common! If you find the breading isn’t sticking, try pressing the panko down firmly to adhere to the chicken after coating it with the egg. Also, make sure the chicken is well-dusted in rice flour before dipping into the egg. For extra adhesion, consider letting the coated cutlets sit for about 10 minutes before frying. This forms a nice bond!
Is this recipe safe for my gluten-free diet?
Indeed! This Giada Chicken Milanese recipe is perfect for gluten-free diets if you use gluten-free panko and rice flour as specified. Always check the labels of your ingredients to ensure they are certified gluten-free if you’re cooking for someone with celiac disease or severe gluten sensitivity.
Can I add spices to the breading for extra flavor?
The more the merrier! Feel free to add your favorite spices to the rice flour or panko for a flavor boost. For example, paprika, garlic powder, or Italian seasoning can elevate the taste, bringing you a unique twist on this classic dish! Just make sure not to over-season—the chicken itself is quite flavorful.

Delicious Giada Chicken Milanese: Quick & Crispy Delight
Ingredients
Equipment
Method
- Pound the Chicken: Lay the chicken cutlets between two sheets of plastic wrap. Gently pound each piece until thin and even in thickness, ensuring they'll cook quickly and evenly.
- Season and Prep: Sprinkle both sides of the chicken with a portion of the salt. Set up three shallow bowls: one for rice flour, one for beaten eggs, and one for gluten-free panko. Divide the remaining salt among the bowls to season each component.
- Dredge the Chicken: Dredge each cutlet in the rice flour, shaking off any excess. Dip the cutlets into the egg mixture, letting the excess drip before coating them well with the panko. Press gently to ensure it sticks nicely.
- Heat the Oil: Heat a large skillet over medium heat. Add a generous amount of olive oil, allowing it to warm for a few moments—watch for a shimmer indicating it's ready!
- Cook in Batches: Carefully lay the breaded cutlets in the hot oil, ensuring not to overcrowd the pan. Fry the first side for about 4 to 5 minutes, until it's golden brown and crispy.
- Flip and Finish: Turn the cutlets over and continue cooking on the second side for another 3 minutes, or until they’re crispy and fully cooked through.
- Drain and Serve: Transfer the cooked cutlets to a wire rack to drain any excess oil. Season with the remaining salt and a sprinkle of black pepper, then serve hot with fresh lemon wedges.