
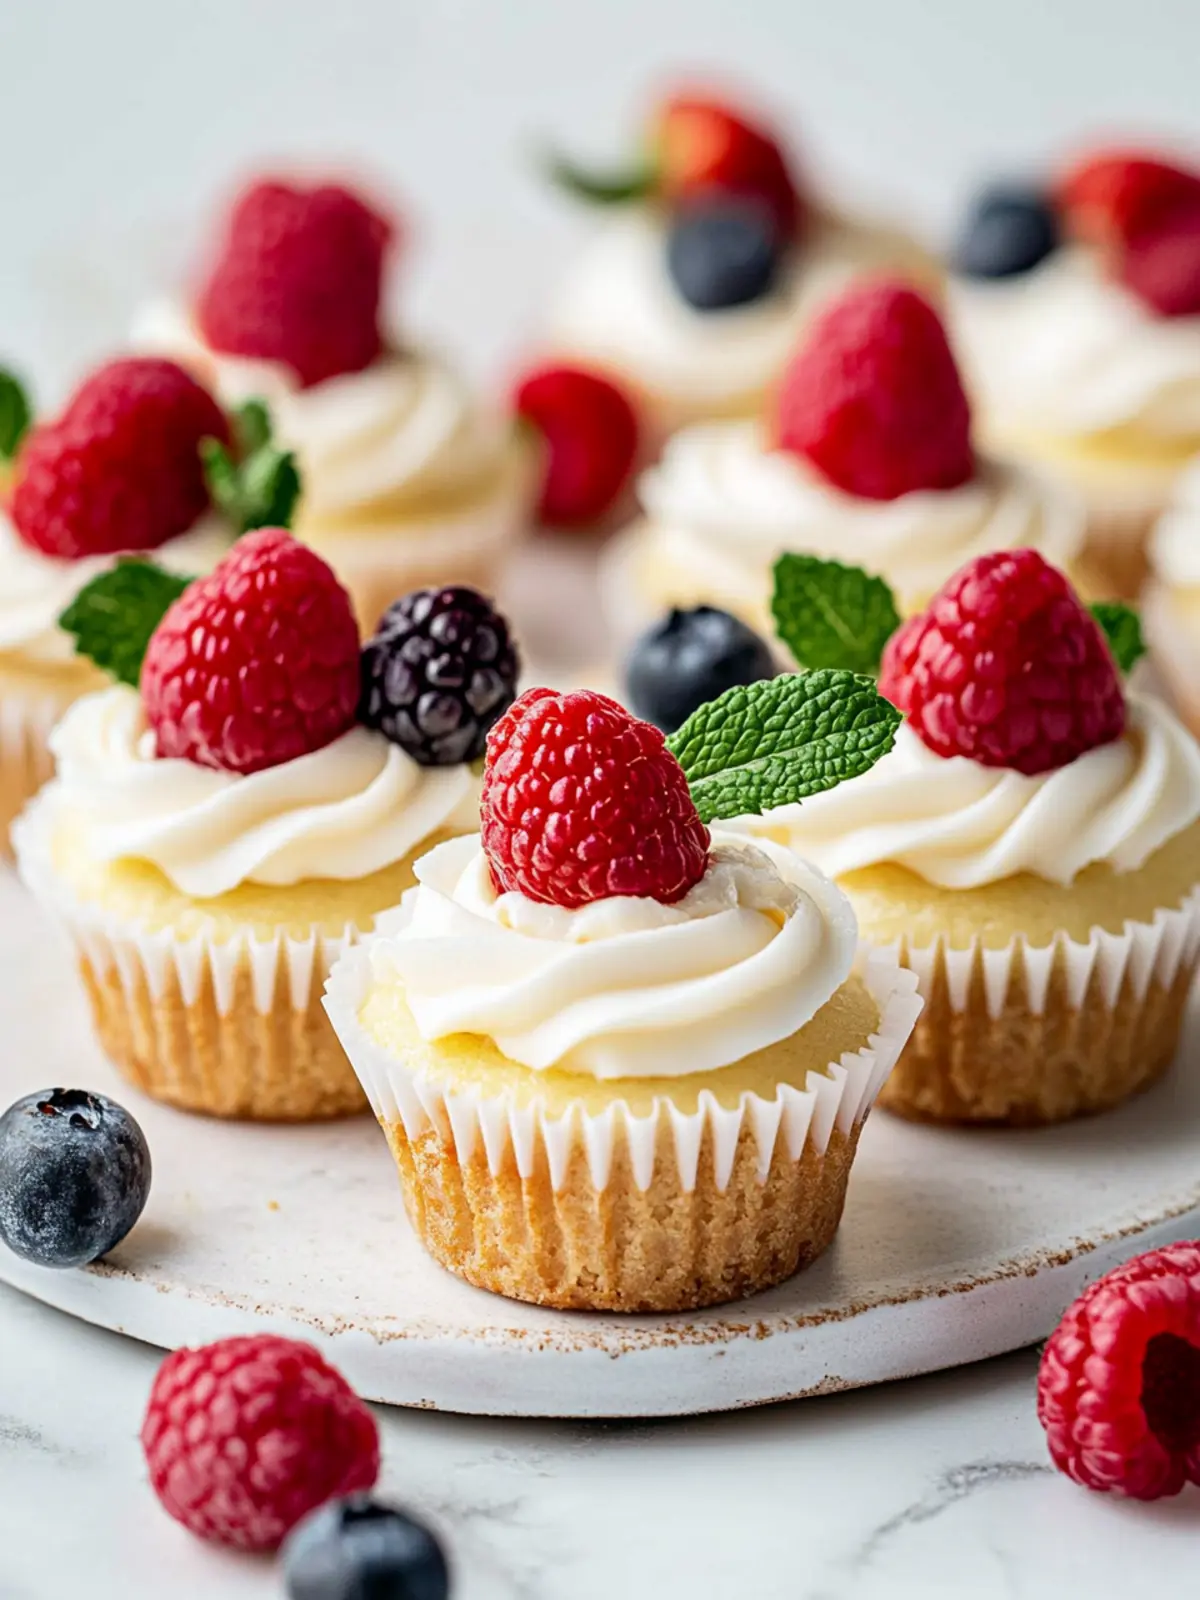
The sweet creaminess of homemade Mini Cheesecakes always brings a smile to my face. Just the thought of sinking my fork into that luscious cheesecake, all while knowing it’s perfectly baked in a simple muffin pan, makes my heart skip a beat. I discovered this delightful recipe after a long week when I craved something special but didn’t have time to spend hours in the kitchen. What’s even better is that these mini treats are effortlessly versatile—you can top them with fresh fruits, chocolate drizzle, or even a sprinkle of nuts, making them suitable for any occasion.
Picture this: a cozy gathering with friends or family, and you pull out a tray of these mini delights. The compliments will pour in, and you’ll bask in moments of joy, all because you decided to reclaim homemade desserts over fast-food options. Stay with me as I guide you through this simple yet rewarding recipe that promises to be a crowd-pleaser every time!

Why are Mini Cheesecakes a Must-Try?
Indulgent and Creamy: Each bite of these mini cheesecakes is a rich dream, delivering the perfect balance of creaminess that cheesecake lovers crave.
Easy to Make: Using a standard muffin pan simplifies the process, so you can whip up a batch without hassle.
Versatile Toppings: Dress them up with your favorite fruits, chocolate, or whipped cream to suit any occasion.
Impressive Presentation: These mini versions are not just delicious; they look gorgeous on any dessert table, ensuring you’ll receive praises from guests.
Quick Cool Down: With a chilling time of just two hours, you won’t have to wait long to indulge in your homemade treat!
Feel free to experiment with flavors and toppings or check out my variety of cake recipes for more delightful ideas!
Mini Cheesecakes Ingredients
For the Crust
• Graham cracker crumbs – these form the base and provide a delightful crunch.
• Granulated sugar – sweetens the crust and enhances the flavor.
• Unsalted butter – adds richness and helps hold the crust together.
For the Filling
• Full-fat cream cheese – the star of the show, creating that creamy texture we all love in mini cheesecakes.
• Granulated sugar – balances the cream cheese’s tanginess for a smooth sweetness.
• Full-fat sour cream – adds moisture and a hint of tang to the filling.
• Pure vanilla extract – infuses the filling with warm, aromatic flavor.
• Freshly squeezed lemon juice – brightens and elevates the cheesecake flavor beautifully.
• Large eggs – ensure the filling sets perfectly and adds richness.
Remember, these mini cheesecakes in a standard muffin pan are sure to impress your guests!
How to Make Mini Cheesecakes
-
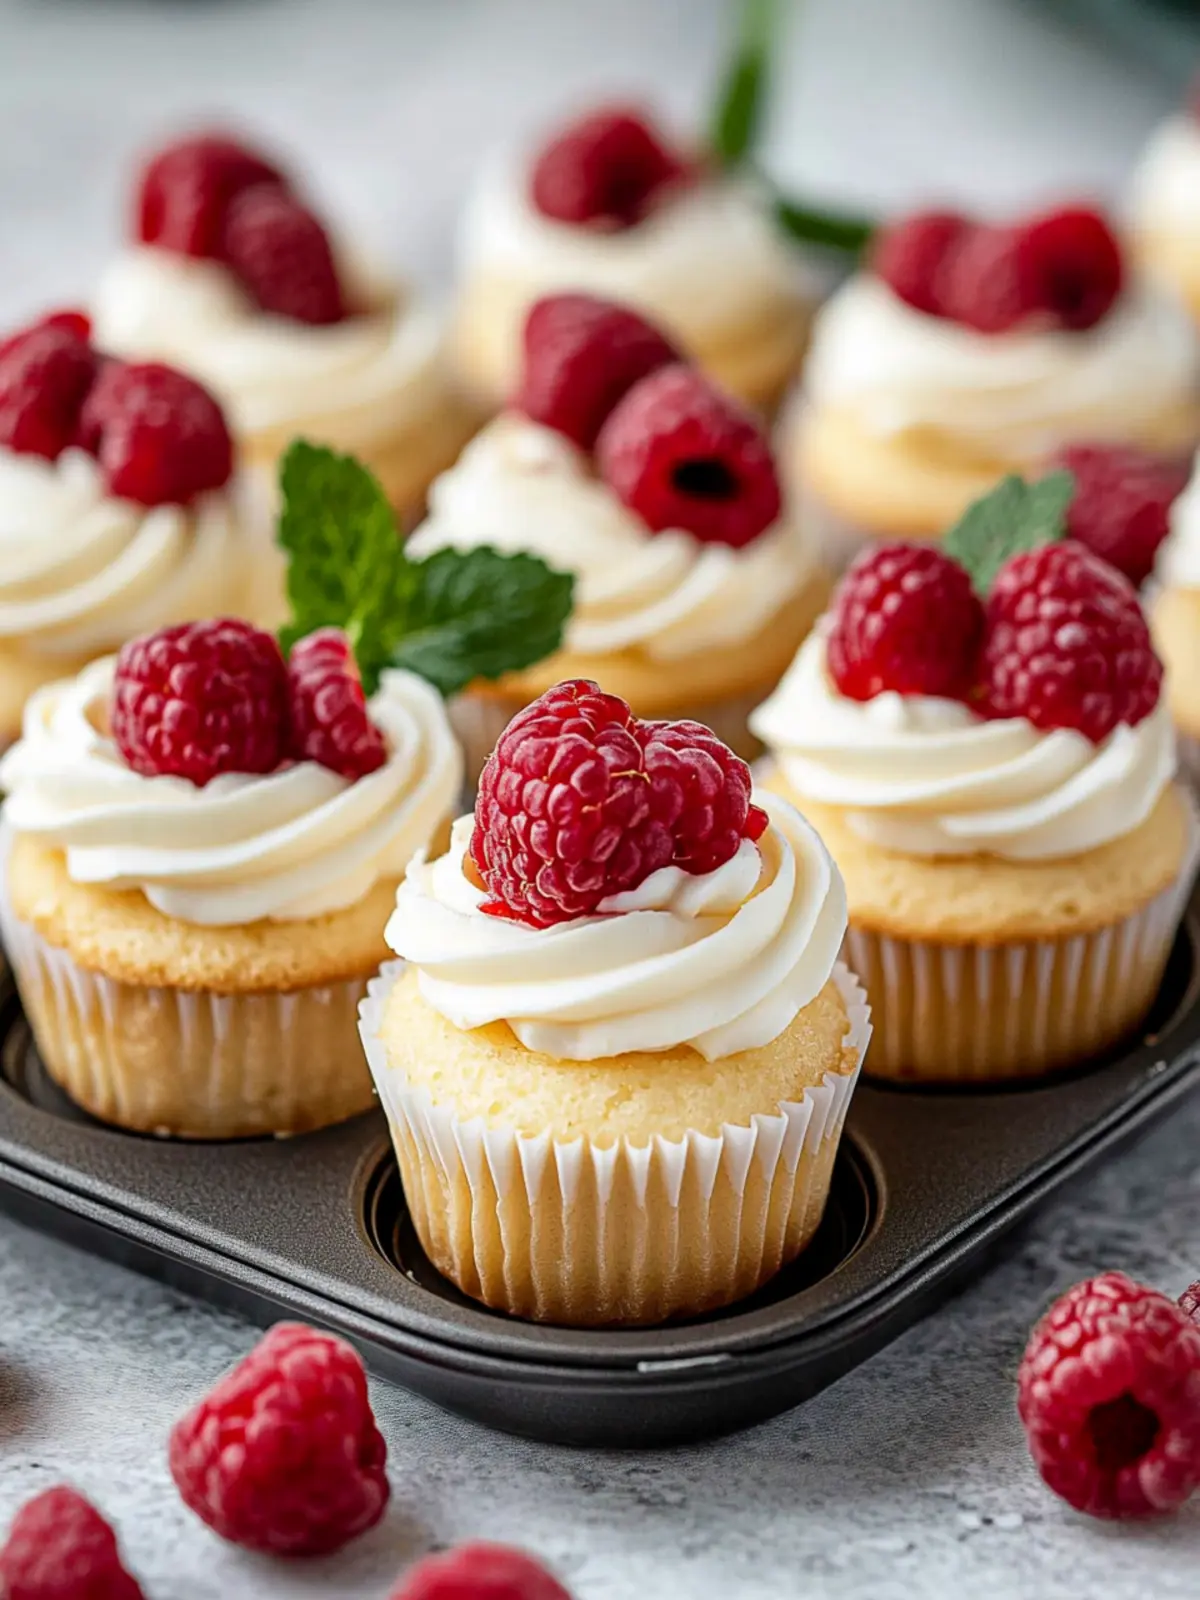
Preheat your oven to 350°F (177°C). This step gets your oven nice and toasty, ensuring even baking for those creamy little delights. Don’t forget to line your standard 12-count muffin pan with cupcake liners!
-
Combine the crust ingredients in a medium bowl. Mix graham cracker crumbs, granulated sugar, and melted butter together. Firmly press a heaping tablespoon of this mixture into each liner to form a sturdy crust. Bake for about 6 minutes until slightly golden.
-
Beat the cream cheese and granulated sugar in a large bowl with an electric mixer on medium-high speed. You’re aiming for a smooth and creamy texture, which takes about 2 minutes.
-
Add the sour cream, lemon juice, and vanilla extract to the mixture. Continue beating until everything is fully combined and the mixture is light and fluffy.
-
Introduce the eggs one at a time. With the mixer running on medium speed, beat each egg just until combined. Remember, we don’t want to over-mix here; a gentle touch will keep those cheesecakes tender!
-
Divide the batter among the crusts, filling each liner all the way to the top. The cheesecakes will rise slightly, so don’t worry about overfilling.
-
(Optional) If you choose to use a water bath for extra creaminess, boil a pot of water and pour it into a large metal baking pan about an inch deep. Place this pan on the bottom oven rack before putting your cheesecakes in the center rack.
-
Bake the cheesecakes until the edges are set, and the centers jiggle slightly when tapped, which usually takes around 20 minutes. They’ll be perfect!
-
Cool the pan on a cooling rack for 45 minutes at room temperature. After that, transfer them to the fridge to chill for at least 2 hours (or up to 24 hours) to attain that creaminess we all adore.
-
Top the chilled cheesecakes with whipped cream and your favorite toppings just before serving. Decorated cheesecakes can go back into the refrigerator until you’re ready to wow your guests.
-
Store any leftovers by covering and keeping them in the refrigerator for up to 5 days, although I doubt they’ll last that long!
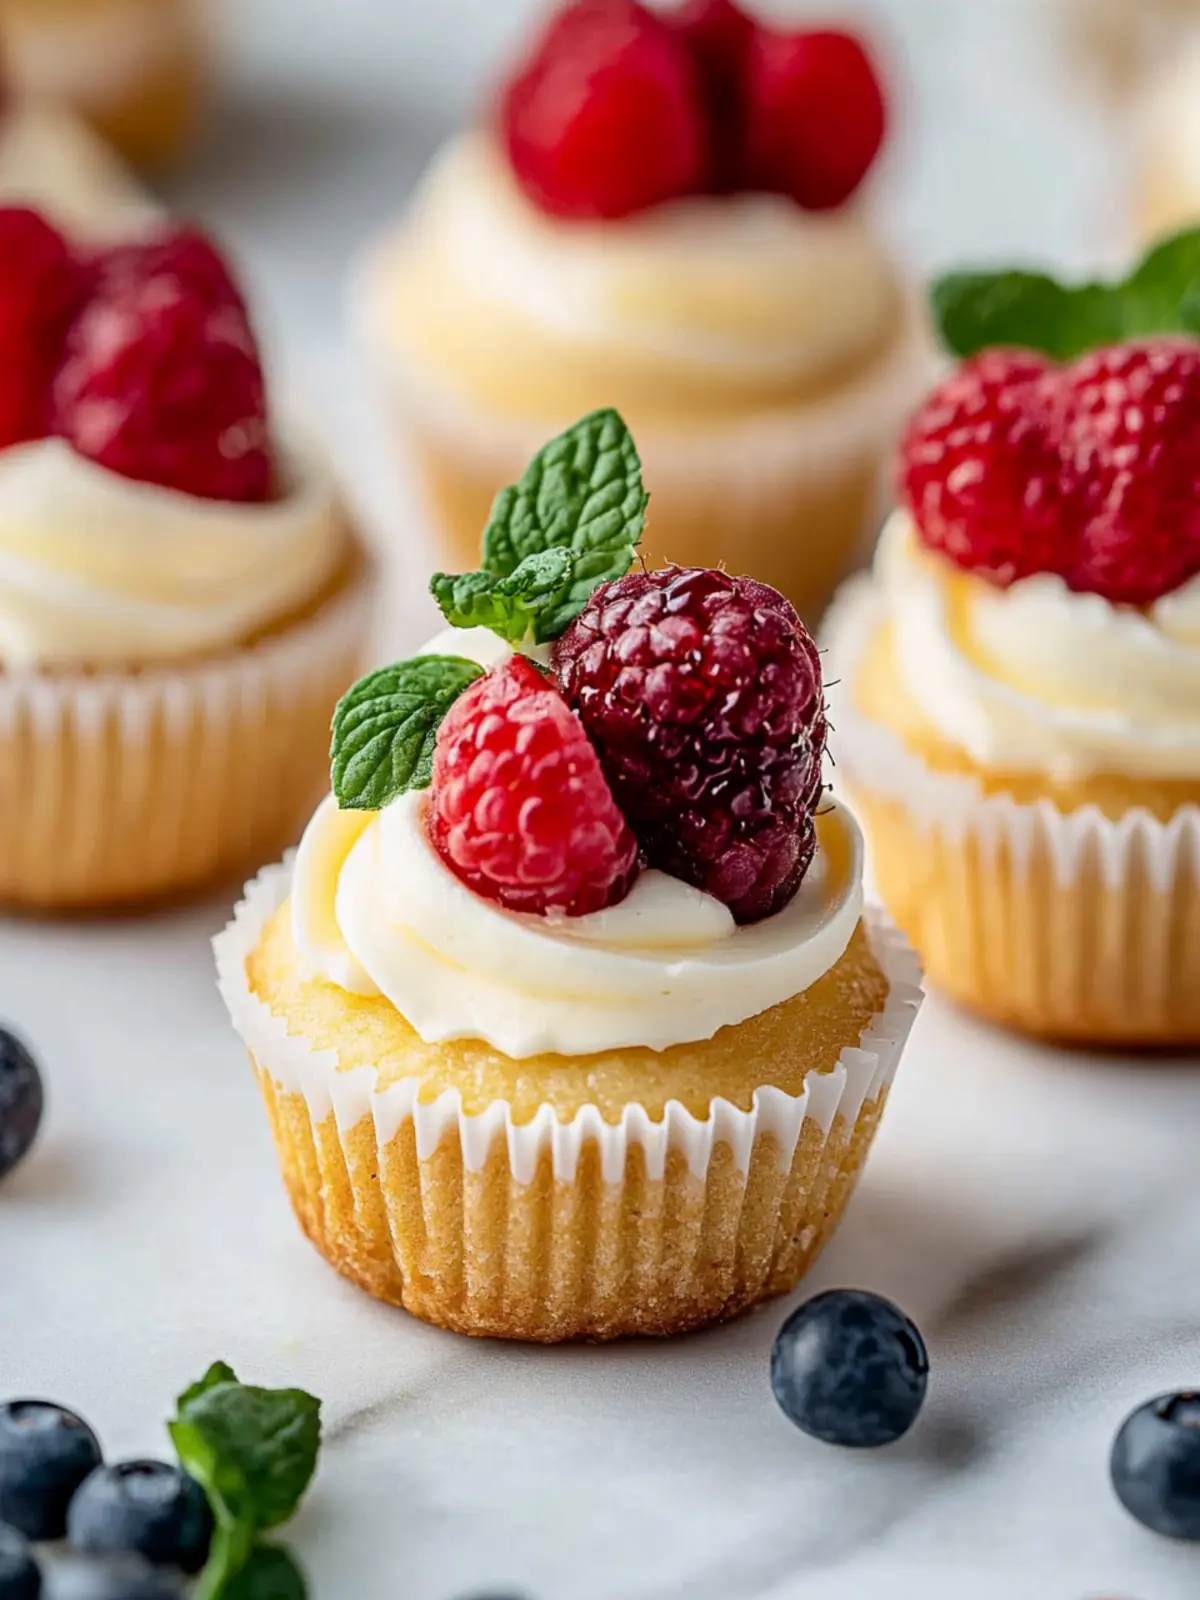
Optional: Drizzle with chocolate or serve with fresh berries for an extra special touch!
Exact quantities are listed in the recipe card below.
Mini Cheesecake Variations
Feel free to mix things up and add a personal touch to your delightful mini cheesecakes!
- Gluten-Free: Substitute graham cracker crumbs with gluten-free cookie crumbs or almond flour for a safe and delicious base.
- Chocolate Lovers: Add 1/3 cup of cocoa powder to the filling for a rich chocolate cheesecake experience; ensure to adjust the sugar slightly.
- Fruit-Filled: Swirl in a layer of fruit preserves or fresh fruit puree before baking to incorporate vibrant flavors and a pop of color!
- Nutty Flavor: Fold in 1/4 cup of finely chopped nuts, such as pecans or walnuts, into the crust for added texture and richness.
- Citrus Twist: Experiment with different citrus juices like lime or orange in place of lemon for a lovely, zesty variation.
- Sourdough Crust: For a twist, try replacing half of the graham cracker crumbs with crushed up shortbread cookies for a unique flavor profile.
- Mini Chocolate Chips: Stir in a handful of semi-sweet or dark chocolate chips into the batter before baking for little bursts of chocolatey goodness.
- Spicy Cinnamon: Sprinkle a pinch of ground cinnamon into the crust and filling for a warm, cozy flavor that pairs beautifully with cream cheese.
The beauty of these mini cheesecakes lies in their adaptability; feel free to explore and find your favorite combinations!
What to Serve with Mini Cheesecakes?
Indulge in a delightful spread that perfectly complements the creamy bliss of these mini treasures.
-
Fresh Berries: The tartness of strawberries, raspberries, or blueberries adds a refreshing burst that balances the richness of the cheesecakes beautifully.
-
Chocolate Ganache: Drizzling warm chocolate ganache over the top adds decadence, making each bite a true dessert lover’s dream.
-
Whipped Cream: Light and airy whipped cream enhances the mini cheesecakes’ creaminess, creating a perfectly sweet and fluffy finish.
-
Coffee or Espresso: A rich cup of coffee or espresso brings out the flavors, making for a delightful contrast with the sweetness of the cheesecake.
-
Lemon Curd: For a tangy twist, serving lemon curd alongside the cheesecakes brings brightness and a burst of citrus that elevates the dessert experience.
-
Savory Cheese Platter: Pairing the rich cheesecake with a selection of cheeses—like sharp cheddar or creamy brie—creates an interesting balance of flavors for a unique dessert charcuterie.
-
Mint Leaves: Fresh mint leaves can act as a refreshing garnish or simple palate cleanser between bites, adding a herbaceous touch.
-
Honey Drizzle: A light drizzle of honey adds an earthy sweetness that complements the flavors of the cream cheese perfectly.
-
Sparkling Water: A glass of sparkling water with a splash of lemon refreshes your palate and enhances the dessert experience without overwhelming the senses.
These pairing possibilities ensure that each bite of mini cheesecakes will be a memorable experience, bringing joy to those you serve!
Make Ahead Options
These Mini Cheesecakes are perfect for meal prep enthusiasts looking to save time on busy days! You can easily prepare the crusts and filling separately up to 24 hours in advance. Just mix the crust ingredients and press them into muffin liners, then store them in the fridge. For the filling, combine all the ingredients and refrigerate it in a sealed container until you’re ready to bake. When you’re set to indulge, simply pour the chilled filling into the crusts, bake as directed, and allow them to cool. This way, you’ll achieve delicious results with minimal last-minute effort, keeping your homemade treat just as creamy and delightful as if made fresh!
Expert Tips for Mini Cheesecakes
Cream Cheese Temperature: Ensure the cream cheese is at room temperature for a smooth filling. Cold cream cheese can lead to lumps in your mini cheesecakes.
Egg Addition: Add the eggs one at a time, mixing just until combined. Over-mixing can make your cheesecakes dense instead of light and fluffy.
Optional Water Bath: To achieve extra creamy cheesecakes, use a water bath. This prevents the tops from cracking and keeps a moist texture.
Cooling Time: Don’t rush the cooling process! Allowing your mini cheesecakes to cool at room temperature before chilling ensures the best texture.
Storage Advice: Always keep any leftover mini cheesecakes in the refrigerator, covered, for up to 5 days. They taste just as delicious after a day or two!
Enjoy your baking adventure with these tasty mini cheesecakes in a standard muffin pan!
How to Store and Freeze Mini Cheesecakes
Fridge: Store leftover mini cheesecakes covered in the refrigerator for up to 5 days to maintain their creamy texture and flavor.
Freezer: Individually wrap mini cheesecakes in plastic wrap and place them in an airtight container. They can be frozen for up to 3 months.
Thawing: Allow frozen mini cheesecakes to thaw in the refrigerator overnight for the best texture before serving.
Reheating: If you prefer your cheesecakes slightly warm, you can microwave them for about 10-15 seconds, but enjoy them chilled for the best experience!
Mini Cheesecakes Recipe FAQs
How do I choose ripe ingredients for this recipe?
Absolutely! When selecting your ingredients, ensure that your cream cheese is softened to room temperature for smooth blending. The sour cream should also be at room temperature to mix seamlessly. For the best flavor, use fresh lemons for juicing and opt for full-fat varieties for luscious creaminess in your cheesecakes.
What are the best storage methods for leftover mini cheesecakes?
Very! Once you’ve enjoyed your mini cheesecakes, cover them and place them in the refrigerator. They will stay fresh for up to 5 days while retaining their delicious creaminess. If you’re storing them for longer, consider freezing them instead!
Can I freeze mini cheesecakes, and how?
Absolutely! To freeze mini cheesecakes, individually wrap each cheesecake in plastic wrap to prevent freezer burn. Then, place them in an airtight container and freeze for up to 3 months. When you’re ready to enjoy them, simply thaw them overnight in the refrigerator for the most delightful texture.
What should I do if my mini cheesecakes crack while baking?
No need to worry! If your mini cheesecakes crack, it may be due to overmixing or baking at too high a temperature. To prevent this, ensure you’re mixing the batter gently after adding the eggs and avoid opening the oven door frequently while baking. Using a water bath also helps keep the consistency smooth and crack-free.
Are mini cheesecakes suitable for those with allergies?
Yes! However, be mindful of any specific allergens. This recipe includes dairy (cream cheese, sour cream) and eggs, which could be problematic for some. Consider making a dairy-free version by using plant-based cream cheese and sour cream alternatives if necessary. Always check labeling to ensure you accommodate any guests with food allergies.
Can I use non-standard muffin pans for this recipe?
The more the merrier! While a standard 12-count muffin pan is best, you can absolutely experiment with silicone molds or mini tart pans. Just remember, baking times might vary, so keep an eye on them as they bake!
Delicious Mini Cheesecakes in a Standard Muffin Pan
Ingredients
Equipment
Method
- Preheat your oven to 350°F (177°C) and line a standard 12-count muffin pan with cupcake liners.
- Combine the crust ingredients in a medium bowl. Press the mixture into each liner to form a crust. Bake for about 6 minutes.
- Beat the cream cheese and sugar until smooth and creamy, about 2 minutes.
- Add the sour cream, lemon juice, and vanilla, mixing until light and fluffy.
- Add the eggs one at a time, mixing gently after each addition.
- Divide the batter among the crusts, filling each liner to the top.
- Optionally, create a water bath for extra creaminess.
- Bake until the edges are set and centers jiggle slightly, around 20 minutes.
- Cool the pan at room temperature for 45 minutes, then refrigerate for at least 2 hours.
- Top with whipped cream and toppings just before serving.
- Store leftovers covered in the refrigerator for up to 5 days.