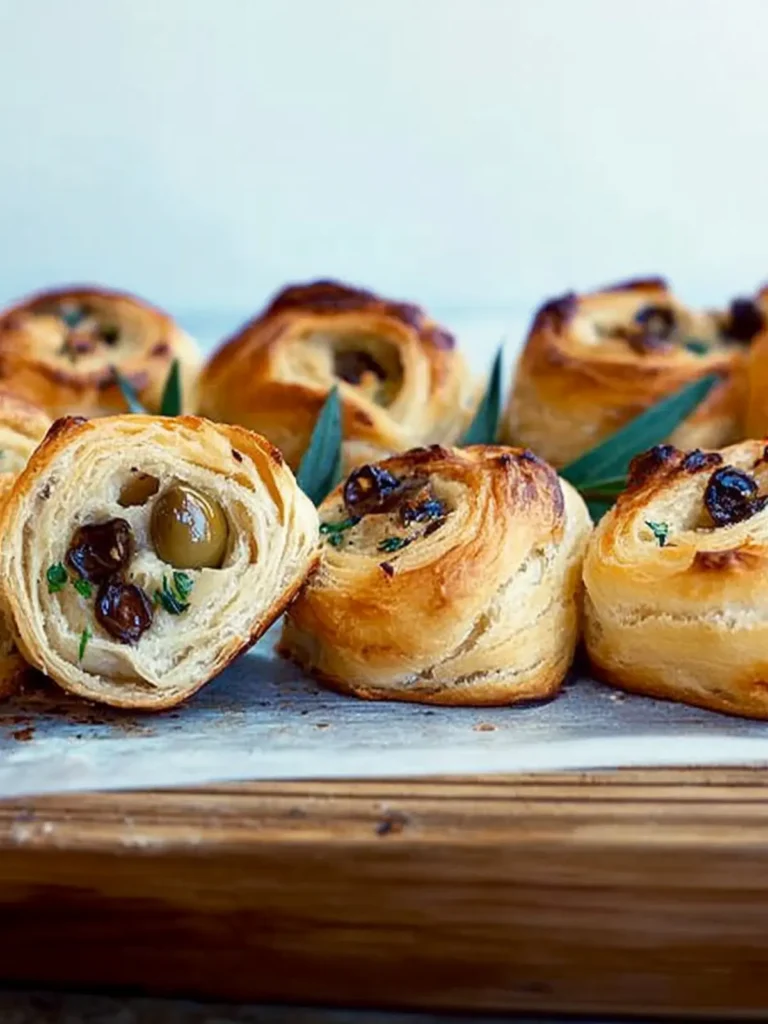
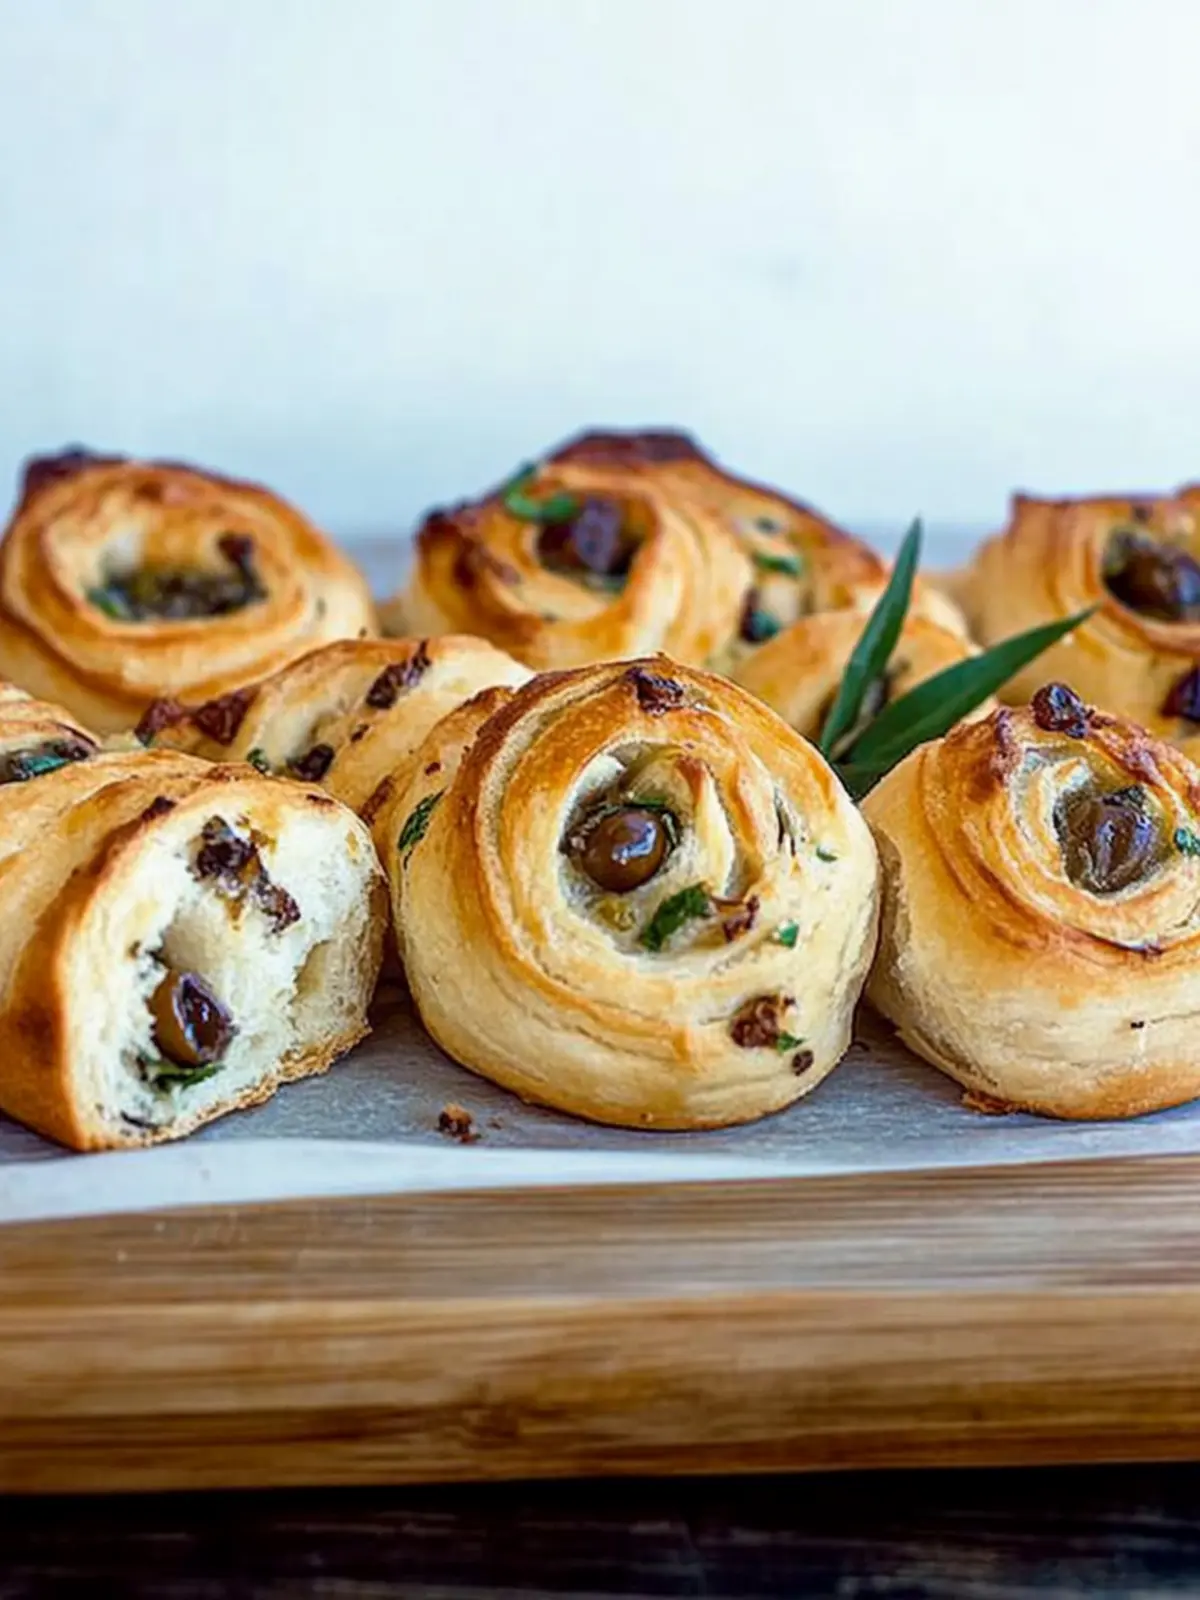
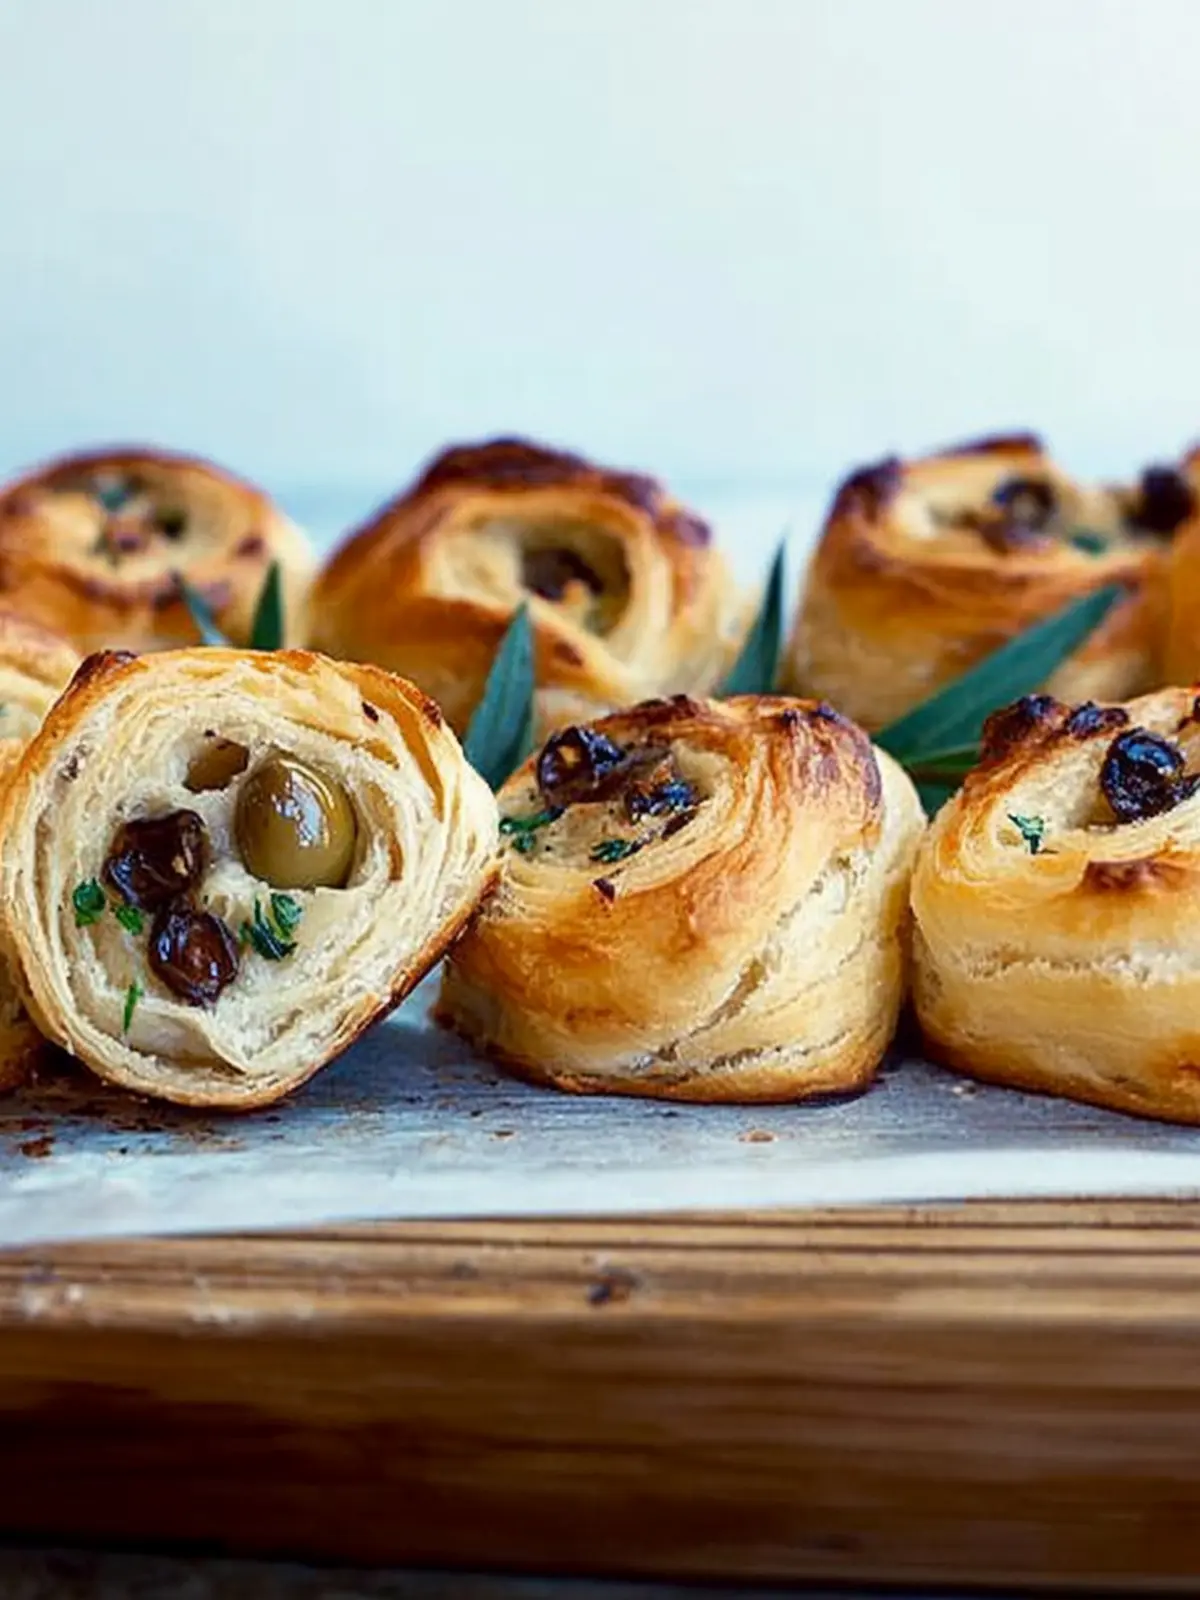
There’s something truly comforting about the combination of garlic and olives. Just the thought of pulling a warm batch of Garlic and Olive Scrolls out of the oven makes my mouth water. One rainy afternoon, I found myself yearning for a snack that wasn’t just another fast-food option—something fragrant, flavorful, and homemade. As the aroma of sizzling garlic filled my kitchen, I knew I was on to something delicious.
These scrolls are a delightful blend of simple ingredients, transforming pantry staples into an elegant treat that’s perfect for gatherings or just a cozy night in. The combination of Greek yogurt gives the dough a soft, fluffy texture, while the juicy olives and aromatic garlic deliver a burst of flavor that’ll impress even the pickiest eaters.
So, if you’re looking to elevate your baking game and create something that brings friends and family together, let’s dive into this easy recipe that is sure to become a staple in your kitchen!

Why will you love olive and garlic scrolls?
Unforgettable flavor: The irresistible combination of garlic and kalamata olives creates a savory treat that’s hard to resist.
Easy preparation: With just a few simple ingredients and straightforward steps, you can whip these up in no time.
Perfect for sharing: These scrolls make great appetizers or snacks for gatherings, sure to impress all your guests.
Fluffy texture: Thanks to the Greek yogurt, every bite is light and airy, balancing out the rich flavors beautifully.
Versatile option: Enjoy them fresh from the oven or pair them with a dip for an evening snack.
Whether you’re looking for a crowd-pleaser or a satisfying homemade snack, these Garlic and Olive Scrolls will become a cherished favorite!
Olive and Garlic Scrolls Ingredients
Make these scrolls even more delicious!
For the Dough
- 3 cups self-raising flour – ensures a light and fluffy texture for your olive and garlic scrolls.
- 1 tsp baking powder – helps the dough rise even more for a soft bite.
- 1 tsp salt – enhances the flavor, balancing all the savory ingredients.
- 2 cups plain Greek yoghurt – provides moisture and makes the dough beautifully pliable.
For the Filling
- 3 cloves garlic, sliced – adds rich and aromatic depth to the scrolls.
- 1/2 cup pitted kalamata olives, roughly chopped – introduces a briny punch that complements the garlic perfectly.
- 2 tbsp parsley, chopped – brightens up the flavors and adds a touch of color.
- 1/2 cup grated tasty cheese – melts beautifully, giving a creamy, indulgent texture that ties everything together.
Let’s get baking and turn these delightful ingredients into a flavorful masterpiece!
How to Make Olive and Garlic Scrolls
-
Combine ingredients: In a large bowl, mix the self-raising flour, baking powder, and salt. Add the Greek yogurt, stirring gently until everything is well combined. Transfer the dough to a floured surface and knead until smooth. Cover it and let it rest in a warm spot for 1 hour.
-
Preheat oven: While your dough is resting, set your oven to 200°C (about 392°F). Prepare a 30cm x 22cm oven-proof dish by lining it with baking paper.
-
Prepare the filling: Turn the rested dough out onto a floured surface. Knead in half the sliced garlic, half the chopped olives, and all the parsley. Roll the dough into a rectangular shape measuring approximately 36cm x 25cm, placing the long side in front of you. Sprinkle the remaining garlic, olives, and all of the grated cheese evenly across the surface.
-
Roll and cut: Starting from the edge closest to you, carefully roll the dough into a long sausage shape. Use a sharp knife to slice the roll into 12 pieces, each about 2cm thick. Arrange the scrolls flat in your prepared tin, making sure they are just touching.
-
Bake and enjoy: Place your scrolls in the oven and bake for 15 minutes, or until they are a beautiful golden brown. Let them cool for a moment before digging in!
Optional: Serve with a side of hummus or your favorite dip for an extra tasty treat!
Exact quantities are listed in the recipe card below.
What to Serve with Garlic and Olive Scrolls?
Create a delightful meal experience that perfectly complements the rustic charm of warm, fluffy scrolls.
-
Tomato Basil Salad: Fresh tomatoes and fragrant basil add a splash of color and a burst of flavor, enhancing the scrolls beautifully. Pairing it with a drizzle of balsamic glaze elevates this dish to a refreshing starter.
-
Hummus Dip: This creamy, garlicky dip contrasts beautifully with the chewy texture of the scrolls. It creates a delightful pairing worthy of any gathering.
-
Roasted Vegetables: Caramelized carrots, bell peppers, and zucchini provide a sweet touch and earthy flavors, harmonizing perfectly with the salty olives. This adds a rustic, vibrant touch to your meal.
-
Creamy Garlic Sauce: Indulge in a rich garlic sauce for dipping that amplifies the garlic goodness in the scrolls. It’s irresistible and will leave guests coming back for more!
-
Cheese Platter: Complement the scrolls with assorted cheeses like brie and aged cheddar, which offer a range of flavors and textures. This pairing adds sophistication and variety to any snack spread.
-
Sparkling Water: A refreshing sparkling water with a hint of lemon cleanses the palate while enhancing the meal’s savory components. It’s a light and enjoyable drink choice.
-
Olive Tapenade: Serve alongside an olive tapenade to celebrate the bold flavors within the scrolls. This zesty spread will accentuate the olive aspect and add depth to your appetizer table.
With these pairings, your Olive and Garlic Scrolls will shine brightly and turn a simple snack time into a delightful culinary occasion!
Expert Tips for Olive and Garlic Scrolls
-
Resting Time: Allowing the dough to rest for an hour enhances its texture. This step cannot be skipped, as it helps the scrolls rise beautifully.
-
Kneading Technique: Knead the dough gently but thoroughly. Over-kneading can make the scrolls tough, while under-kneading may prevent them from rising properly.
-
Even Rolling: Roll the dough into an even thickness to ensure all scrolls bake uniformly. Uneven sections can lead to some scrolls being doughy while others are overcooked.
-
Cheese Choice: Using a tasty cheese that melts well will make the flavor richer. Feel free to experiment with cheeses like mozzarella or feta for a different twist!
-
Storage Advice: Enjoy them fresh out of the oven for the best flavor and texture. If you have leftovers, store them in an airtight container and reheat for a quick snack.
These tips will help you create perfect olive and garlic scrolls every time and ensure that you impress your family and friends!
Variations & Substitutions for olive and garlic scrolls
Feel free to get creative and put your own spin on these delightful scrolls!
- Gluten-Free: Substitute self-raising flour with a gluten-free flour blend and add a bit more baking powder for rise.
- Herb-Infused: Incorporate dried herbs like oregano or thyme into the dough for an aromatic twist.
- Cheese Swap: Try mozzarella or crumbled feta instead of tasty cheese for a different flavor profile.
- Spicy Kick: Add a pinch of red pepper flakes or chopped fresh chili for a nice warmth in each bite.
- Veggie Boost: Mix in some finely diced sun-dried tomatoes or roasted red peppers for added flavor and texture.
For a mini-paragraph variation, consider adding a layer of texture and color by folding in some fresh spinach. Not only does it add a vibrant green hue, but it also packs in additional nutrients, creating a more wholesome snack for everyone to enjoy!
- Vegan Option: Replace Greek yogurt with a plant-based yogurt and use nutritional yeast in place of cheese for a delicious dairy-free treat.
- Change the Olives: Experiment with green olives or even add a touch of black olives for different flavor notes and brininess.
These variations ensure you’ll never tire of this wonderful recipe as you explore new tastes and textures!
Make Ahead Options
These olive and garlic scrolls are ideal for meal prep, allowing you to enjoy homemade goodness on busy days! You can prepare the dough up to 24 hours in advance; simply follow the initial steps and then refrigerate it in a covered bowl. Additionally, you can cut the scrolls and place them in the oven-proof dish, covering them tightly with plastic wrap, where they’ll stay fresh for up to 3 days. When you’re ready to bake, remove the cover and let them sit at room temperature for about 30 minutes while preheating your oven. This way, you can have freshly baked, delectable scrolls with minimal effort anytime!
How to Store and Freeze Olive and Garlic Scrolls
Room Temperature: Keep your olive and garlic scrolls at room temperature for up to 2 days, wrapped in a clean kitchen towel or in a paper bag to maintain their softness.
Fridge: If you want to keep them longer, store the scrolls in an airtight container in the fridge for up to 5 days. Reheat gently in the oven for best results.
Freezer: For extended storage, freeze the scrolls in a single layer on a baking sheet, then transfer to a freezer bag for up to 3 months. Reheat from frozen in the oven at 180°C (350°F) until warmed through.
Reheating: Reheat your scrolls by placing them in a preheated oven at 180°C (350°F) for 10 minutes. This helps to restore their delightful texture and flavor.

Garlic and Olive Scrolls Recipe FAQs
How do I choose ripe olives for my garlic and olive scrolls?
Absolutely! When selecting olives, look for firm options without dark spots or blemishes. Kalamata olives should have a rich, dark purple color and should feel slightly soft to the touch for the best flavor.
What’s the best way to store leftover garlic and olive scrolls?
For optimal freshness, store your scrolls in an airtight container at room temperature for up to 2 days. If you prefer a longer shelf life, refrigerate them for up to 5 days. Ensure they are well-wrapped to maintain their softness.
Can I freeze garlic and olive scrolls?
Very! To freeze, start by placing the scrolls in a single layer on a baking sheet lined with parchment paper. Freeze them for 1-2 hours until solid, then transfer to a freezer bag. They can be stored for up to 3 months. When ready to enjoy, bake them from frozen at 180°C (350°F) for about 15-20 minutes.
What should I do if my dough seems too sticky?
No worries! If you find your dough is too sticky to handle, sprinkle a little extra flour onto your work surface and incorporate it gently into the dough. Knead just until it forms a smooth ball. Be careful not to add too much flour, as this can make the scrolls dense.
Are garlic and olive scrolls safe for pets or those with allergies?
When preparing garlic and olive scrolls, it’s crucial to keep in mind that garlic can be toxic to dogs and cats, so be sure to keep any leftovers away from them. Additionally, check for any allergies related to gluten in the self-raising flour or cheese. Always consider substituting ingredients based on dietary needs to ensure everyone can enjoy these delicious treats!
What can I do to make the scrolls healthier?
Consider making a few simple substitutions! For a healthier twist, you can use whole wheat flour instead of self-raising flour and Greek yogurt or a dairy-free alternative to cut down on calories. Adding more fresh herbs and reducing cheese can enhance the health benefits while still maintaining fantastic flavor.
Garlic and Olive Scrolls: Your New Favorite Snack Recipe
Ingredients
Equipment
Method
- In a large bowl, mix the self-raising flour, baking powder, and salt. Add the Greek yogurt, stirring gently until everything is well combined. Transfer the dough to a floured surface and knead until smooth. Cover it and let it rest in a warm spot for 1 hour.
- While your dough is resting, set your oven to 200°C (about 392°F). Prepare a 30cm x 22cm oven-proof dish by lining it with baking paper.
- Turn the rested dough out onto a floured surface. Knead in half the sliced garlic, half the chopped olives, and all the parsley. Roll the dough into a rectangular shape measuring approximately 36cm x 25cm. Sprinkle the remaining garlic, olives, and all of the grated cheese evenly across the surface.
- Starting from the edge closest to you, carefully roll the dough into a long sausage shape. Use a sharp knife to slice the roll into 12 pieces, each about 2cm thick. Arrange the scrolls flat in your prepared tin, making sure they are just touching.
- Place your scrolls in the oven and bake for 15 minutes, or until they are a beautiful golden brown. Let them cool for a moment before digging in!