
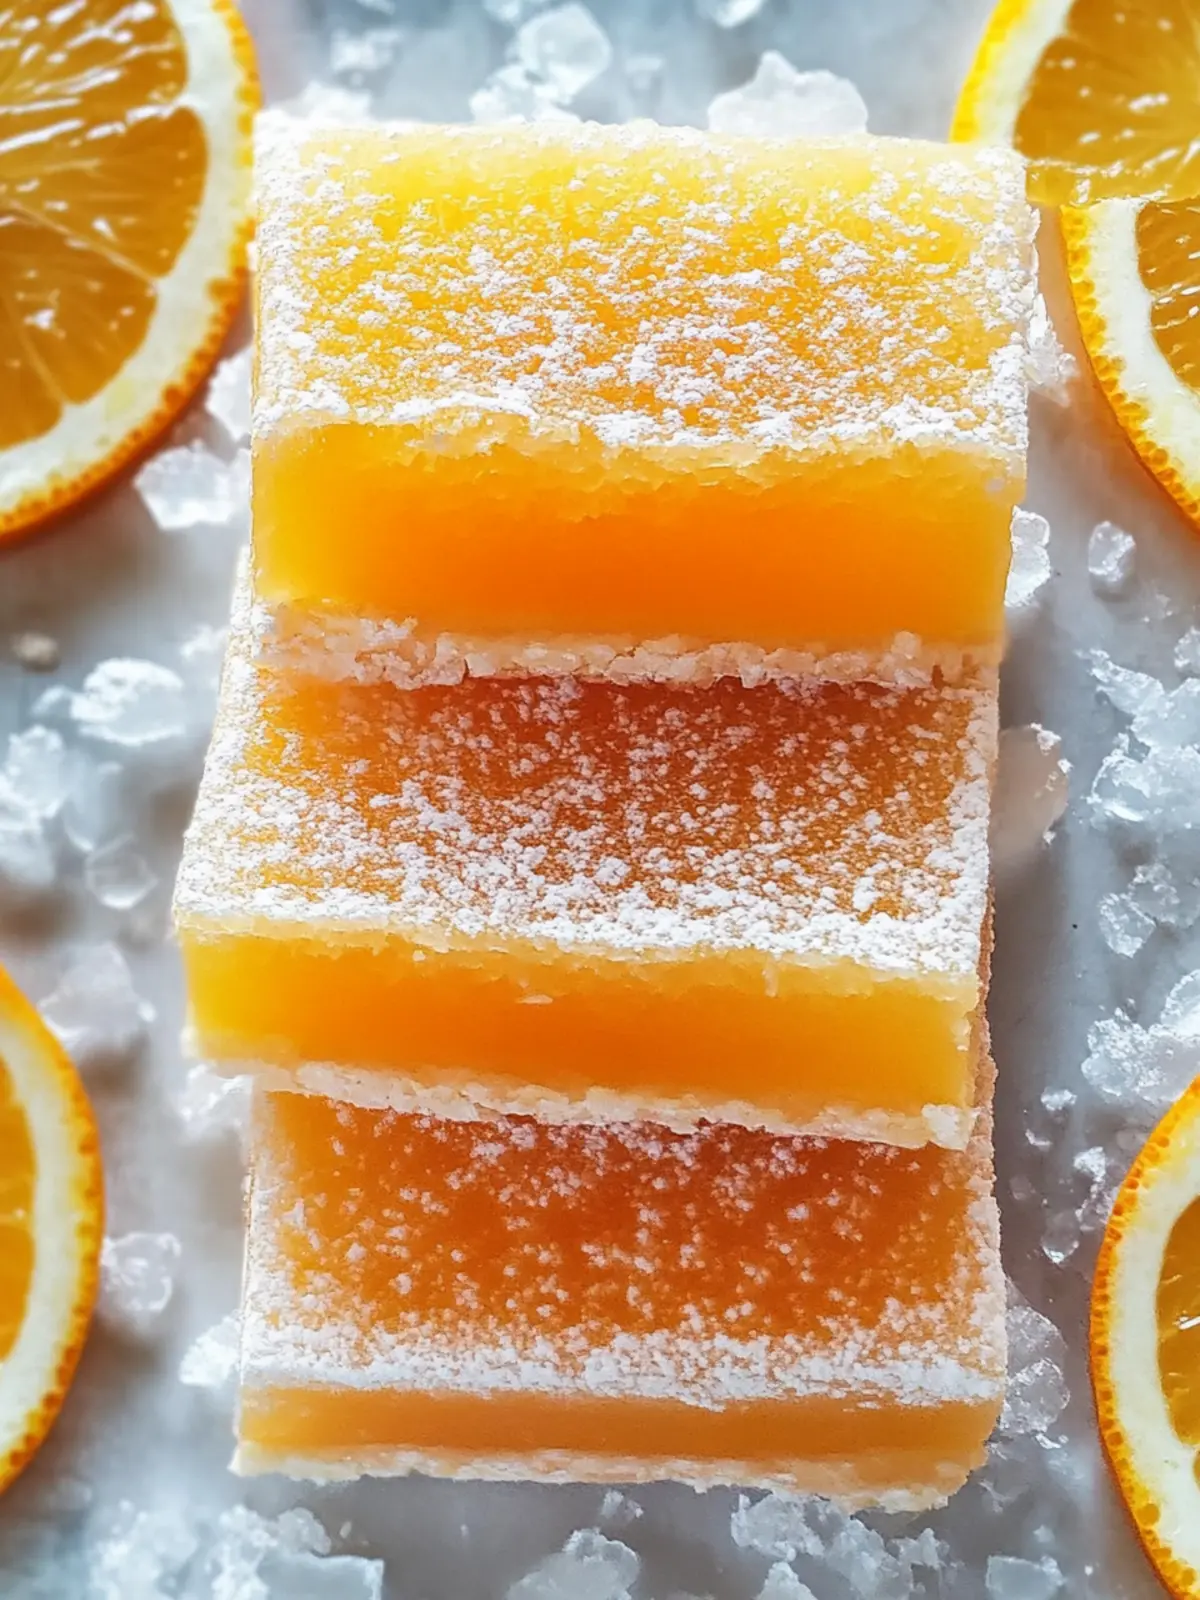
There’s a certain joy that comes with filling your kitchen with vibrant scents, and nothing does it quite like the aroma of freshly baked Orange Bars. As I whisk together the ingredients, the bright zest and tangy juice of the oranges transport me to a sun-kissed citrus grove. These delightful bars boast a perfect balance of sweet and tart flavors, making them an instant mood-lifter whether enjoyed at breakfast, brunch, or as an afternoon treat.
What I love most about this recipe is its simplicity; you won’t need any fancy equipment to bring these cheery bars to life. Just a few pantry staples come together to create a tender, cake-like base topped with a fudgy orange filling and finished off with a glossy glaze. So, if you’re looking to escape the fast-food rut and indulge in something homemade and uplifting, these Orange Bars are just the ticket. Let’s dive into this bright and delicious treat!

Why are Orange Bars a must-try?
Simplicity at its finest: You only need basic ingredients and no special equipment to whip up these delightful treats.
Vibrant flavors: The sweet-tart combination of fresh oranges elevates your baking experience, bringing sunshine to every bite.
Mood-lifting treat: Perfect for any time of day, these bars can brighten breakfast, brunch, or an afternoon snack.
Versatile delight: Customize with almond extract or serve with fresh berries for a delightful twist, making them suitable for various occasions.
Effortless crowd-pleaser: Their appealing taste and lovely presentation make them an instant hit with family and friends, ensuring you are the star of any gathering.
Quick preparation: The straightforward steps mean you’ll have these golden delights ready in no time, leaving you more moments to savor life’s sweet experiences.
Orange Bars Ingredients
For the Base
• All-purpose flour – Provides structure and body; ensure freshness by sifting.
• Granulated sugar – Adds sweetness; substitute with coconut sugar for a healthier twist.
• Unsalted butter – Gives richness; use softened butter for the best texture.
• Large eggs – Binds ingredients together; using room temperature eggs helps with mixing.
For the Filling
• Fresh orange juice – Delivers vibrant citrus flavor; freshly squeezed juice is best for these Orange Bars.
• Orange zest – Adds intense flavor; only use the colored part of the peel for maximum taste.
• Cornstarch – Thickens the filling to achieve a custard-like texture; no substitutes recommended.
• Vanilla extract – Rounds out the flavors; optional but enhances the overall profile.
For the Glaze
• Powdered sugar – Creates a sweet, glossy finish; adjust the consistency with orange juice.
• Additional orange zest – Use to amp up the citrus flavor in the glaze for a delightful punch.
How to Make Orange Bars
-
Preheat Oven: Start by preheating your oven to 350°F (175°C). This ensures your Orange Bars bake evenly and turn out deliciously golden.
-
Prepare the Pan: Grease an 8×8 or 9×13 inch baking pan, and line it with parchment paper. This makes removing the bars easy after baking!
-
Mix Dry Ingredients: In a medium bowl, whisk together the flour, granulated sugar, baking powder, and salt. Add the fresh orange zest to brighten the flavor and stir until well combined.
-
Combine Wet Ingredients: In a large bowl, mix the melted butter and eggs until well blended. This mixture will provide richness to the base of your Orange Bars.
-
Incorporate Dry Ingredients: Gradually add the dry mixture into the wet ingredients, stirring until just combined. Be gentle to keep your bars tender.
-
Prepare the Filling: For the filling, whisk together the sugar, cornstarch, fresh orange juice, zest, eggs, and vanilla extract in a separate bowl until smooth.
-
Assemble & Bake: Spread the base batter evenly in the prepared pan. Pour the orange filling over the top, spreading it gently. Bake for 25-35 minutes (for a 9×13 pan) or 35-45 minutes (for an 8×8 pan) until the edges are set and golden.
-
Cool & Glaze: Allow the bars to cool completely on a wire rack. For the glaze, whisk together powdered sugar, orange juice, and zest until it reaches your desired consistency, then drizzle it over the cooled bars.
Optional: Top with extra orange zest or serve with fresh berries for an added touch!
Exact quantities are listed in the recipe card below.
What to Serve with Orange Bars?
These cheerful treats offer a delightful citrus burst that pairs beautifully with an array of flavors.
- Fresh Fruit Salad: Bursting with color and nutrients, a mix of seasonal fruits creates a refreshing contrast to the sweet bars.
- Creamy Yogurt Parfait: Layering these bars with yogurt and granola adds creaminess and crunch, making for a delightful breakfast or snack.
- Coffee or Tea: A warm cup brings out the citrus flavors, providing a cozy complement perfect for lazy mornings or afternoon breaks.
- Vanilla Ice Cream: Serve a slice on top of creamy vanilla ice cream for an indulgent dessert experience—pure bliss!
- Coconut Whipped Cream: Light and airy, coconut whipped cream enhances the tropical vibe, making every bite feel like a mini-vacation.
- Honey Drizzle: A light drizzle of honey over the bars adds a touch of sweetness, elevating their vibrant flavor profile.
- Lemonade or Iced Tea: The tanginess of lemonade or refreshing iced tea creates a perfect foil for the bars’ sweetness, ideal for summer gatherings.
Expert Tips for Orange Bars
-
Fresh Ingredients: Use fresh oranges for juice and zest to achieve the best flavor; it truly elevates these Orange Bars beyond just any dessert.
-
Room Temperature Eggs: Always use room temperature eggs for better incorporation, which helps the filling set perfectly and avoids a lumpy texture.
-
Gentle Mixing: Mix the batter gently; overmixing can lead to tough bars instead of the tender texture you desire.
-
Cool Before Glazing: Allow the bars to cool completely before adding the glaze to prevent it from melting into a mess, ensuring a beautiful finish.
-
Monitor Baking Time: Check for doneness starting at the lower end of the baking range; the center should gently jiggle for perfect results in these Orange Bars.
How to Store and Freeze Orange Bars
Room Temperature: Store Orange Bars in an airtight container at room temperature for up to 3 days. This keeps them soft and delicious for immediate enjoyment.
Fridge: If you want to extend their life, refrigerate for up to a week. Place them in an airtight container to prevent drying out.
Freezer: For longer storage, freeze the Orange Bars before glazing. Wrap them tightly in plastic wrap and place in a freezer-safe bag for up to 2-3 months.
Reheating: To enjoy frozen Orange Bars, simply thaw overnight in the fridge. For a quick warm-up, pop them in the microwave for a few seconds until just warmed through.
Make Ahead Options
These delightful Orange Bars are perfect for meal prep enthusiasts! You can make the base batter and filling components up to 24 hours in advance. To do this, prepare the base and pour it into the pan, covering it tightly with plastic wrap, while storing the filling in an airtight container in the fridge to maintain freshness. When you’re ready to bake, simply pour the prepped filling over the base and bake as instructed. This approach ensures your bars come out just as delicious, saving you precious time on busy days. After baking, remember to let them cool completely before glazing to achieve that beautiful shine!
Orange Bars Customizations
Feel free to play with these delightful variations and make the recipe your own!
-
Gluten-Free: Use a 1:1 gluten-free flour blend to create a deliciously tender version for those avoiding gluten.
-
Naturally Sweetened: Swap granulated sugar for maple syrup or honey in the base for a natural sweetness that complements the orange flavor.
-
Nutty Addition: Incorporate chopped walnuts or pecans into the batter for a satisfying crunch and added depth of flavor.
-
Tropical Twist: Replace half of the orange juice with pineapple juice for a unique, tropical flair that brings sunshine to your treats.
-
Spicy Kick: Add a pinch of cayenne pepper or ground ginger to the filling for a surprising warmth that dances on your taste buds.
-
Coconut Cream: Top the bars with a dollop of whipped coconut cream for a tropical finish that perfectly balances the citrus.
-
Dairy-Free: Substitute unsalted butter with coconut oil or a vegan butter alternative to make these bars dairy-free without losing richness.
-
Chocolate Drizzle: For a delightful twist, drizzle melted dark chocolate over the glaze for a decadent contrast of flavors.
Orange Bars Recipe FAQs
What kind of oranges should I use for the best flavor?
Absolutely! For the most vibrant flavor, I recommend using fresh, juicy navel oranges. Their sweetness and low acidity make them perfect for these Orange Bars. Look for oranges that feel heavy for their size and have a bright, smooth skin with no dark spots.
How should I store my Orange Bars?
To keep your Orange Bars fresh, store them in an airtight container at room temperature for up to 3 days. If you’d like to extend their shelf life, you can refrigerate them for up to a week. Just make sure to keep them sealed to prevent them from drying out!
Can I freeze Orange Bars, and if so, how?
Yes, you can freeze these delightful bars! It’s best to freeze them before glazing. To do this, wrap the cooled Orange Bars tightly in plastic wrap and then place them in a freezer-safe bag or container. They can be stored for up to 2-3 months. When you’re ready to enjoy them, simply thaw overnight in the fridge and glaze before serving!
My filling didn’t set properly; what went wrong?
Very! If your filling didn’t set as expected, it could be due to several reasons. Ensure that you used cornstarch, as it thickens the filling. If you didn’t mix it long enough or didn’t bake the bars at the right temperature, the filling might be too runny. Make sure to whisk until smooth and bake until the center just barely jiggles to achieve that custard-like texture.
Can I make these bars gluten-free?
Certainly! You can substitute the all-purpose flour with a high-quality gluten-free all-purpose flour blend. I recommend checking the packaging for any specific measurements or adjustments, but generally, a 1:1 gluten-free blend works great in recipes like these Orange Bars. Enjoy a gluten-free delight!
Are there any dietary considerations to keep in mind?
Of course! If you have allergies or dietary restrictions, it’s essential to tailor the recipe accordingly. For nut allergies, ensure your vanilla extract is nut-free, and consider substituting butter with a dairy-free margarine. For those watching their sugar intake, coconut sugar is a healthier option for sweetening these Orange Bars.
Zesty Orange Bars That Brighten Your Day Anytime!
Ingredients
Equipment
Method
- Preheat your oven to 350°F (175°C).
- Grease an 8x8 or 9x13 inch baking pan and line it with parchment paper.
- In a medium bowl, whisk together the flour, granulated sugar, baking powder, and salt. Add the fresh orange zest and stir until well combined.
- In a large bowl, mix the melted butter and eggs until well blended.
- Gradually add the dry mixture into the wet ingredients, stirring until just combined.
- For the filling, whisk together the sugar, cornstarch, fresh orange juice, zest, eggs, and vanilla extract in a separate bowl until smooth.
- Spread the base batter evenly in the prepared pan. Pour the orange filling over the top, spreading it gently. Bake for 25-35 minutes (for a 9x13 pan) or 35-45 minutes (for an 8x8 pan) until the edges are set and golden.
- Allow the bars to cool completely on a wire rack. For the glaze, whisk together powdered sugar, orange juice, and zest until it reaches your desired consistency, then drizzle it over the cooled bars.