
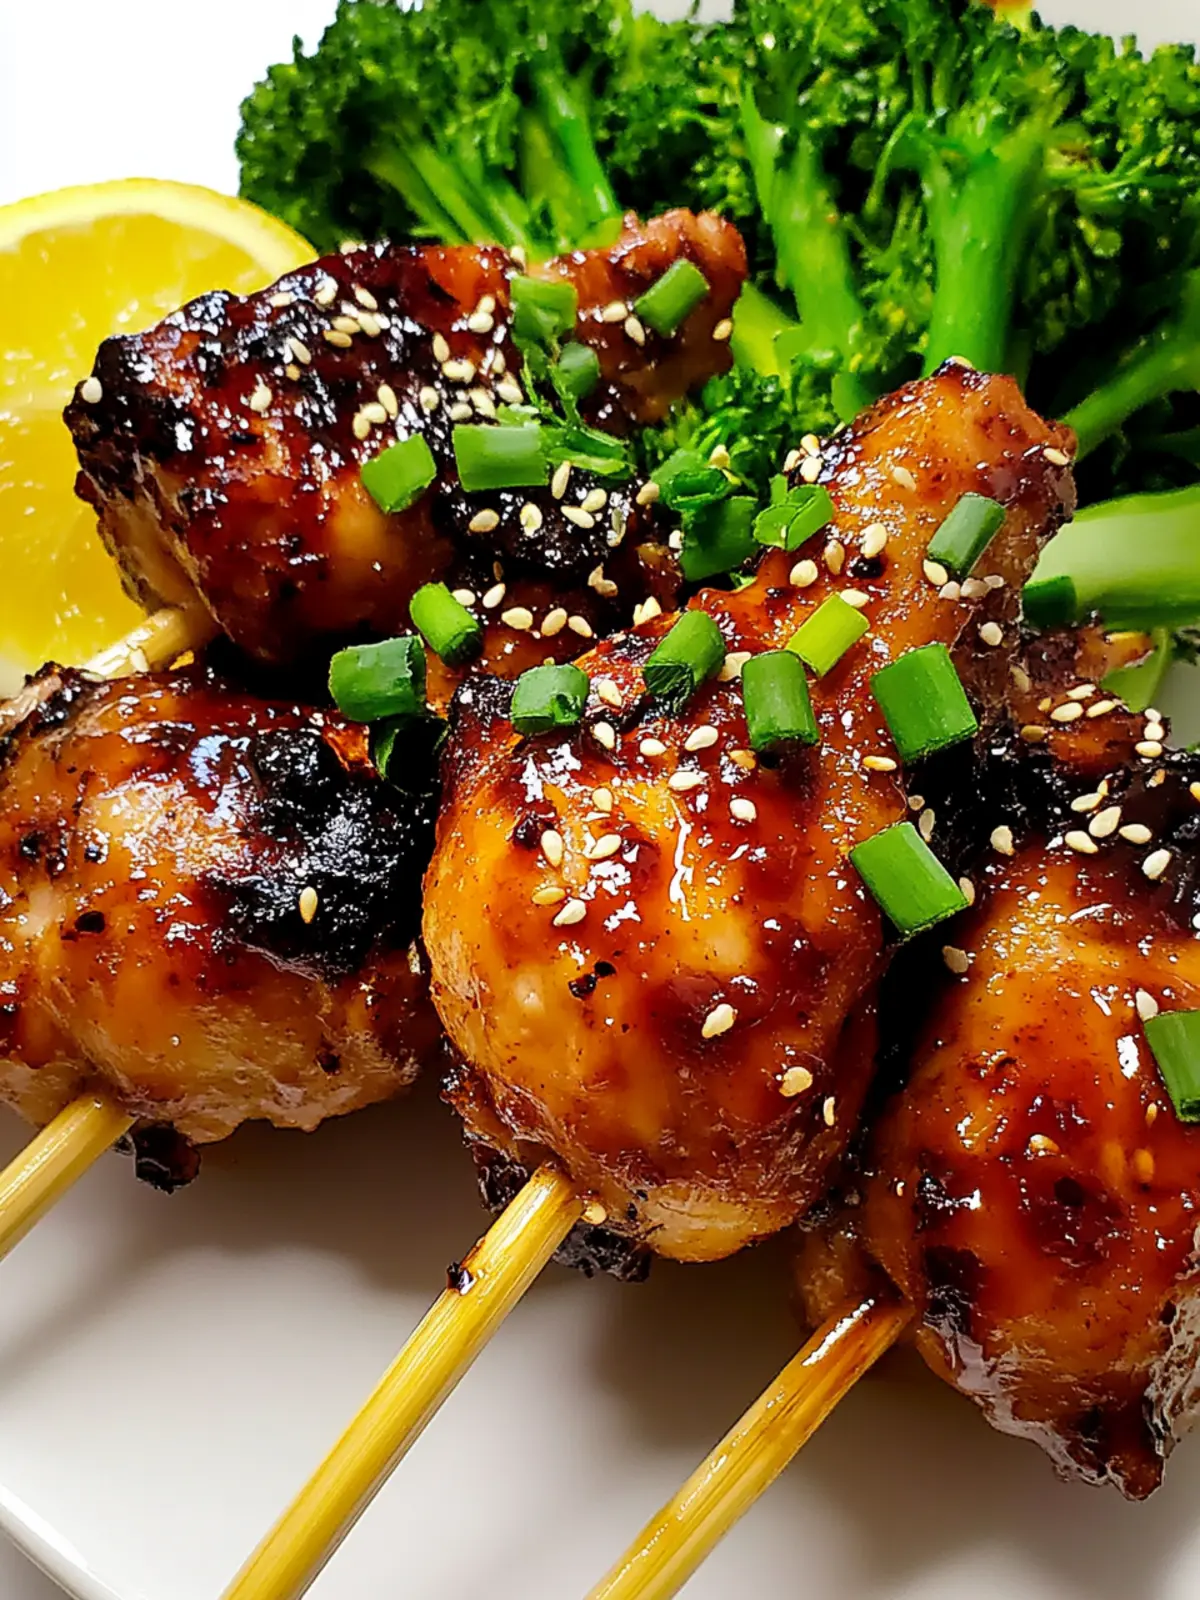
There’s a delightful buzz in my kitchen as I prepare these Sticky Ginger Teriyaki Chicken Lollipops, and I can already imagine the joy on my family’s faces when they see this stunning dish. Picture the crispy, caramelized exterior and the tender, juicy meat just waiting to be devoured—it’s a dish that elevates a simple drumstick to gourmet status.
After a long week of mundane meals, I wanted something that packed a punch without slaving away in the kitchen. When I stumbled upon this easy yet impressive recipe, I knew I had found a winner. With a handful of ingredients and just a few straightforward steps, I could whip up a crowd-pleaser that’s perfect for casual dinners or special occasions alike.
As you take a bite, the warm blend of ginger, soy, and a hint of spice dances on your palate, proving comfort food can be exhilarating, too! So grab your apron, and let’s make magic happen with these Sticky Ginger Teriyaki Chicken Lollipops!

Why choose Sticky Ginger Teriyaki Chicken Lollipops?
Unique Flavor: These sticky lollipops combine the warmth of ginger with savory soy sauce for a taste that’s both comforting and exciting.
Easy Prep: Creating lollipops from drumsticks is surprisingly simple, making this a fun project for any home chef.
Crowd-Pleaser: Perfect for family dinners or gatherings, these lollipops are sure to be a hit with both kids and adults alike!
Flexible Serving: Serve as an appetizer or main dish; they pair wonderfully with rice or salads.
Time-Saver: With just 50 minutes from prep to plate, you can have a gourmet meal ready in no time!
Show-Stopping Presentation: Who wouldn’t love a beautifully garnished platter of these visually striking lollipops?
Sticky Ginger Teriyaki Chicken Lollipops Ingredients
These ingredients will elevate your cooking game!
For the Chicken
- Drumsticks – 6-8 pieces for juicy and tender bites.
For the Marinade
- Soy Sauce – 1/3 cup adds saltiness and umami depth.
- Ginger Paste – 3 tablespoons brings a warm, aromatic kick.
- Brown Swerve – 3 tablespoons for a sweet touch without the sugar!
- Chinese Five Spice – 2 tablespoons imparts a complex flavor profile.
- Garlic Pepper or Garlic Powder – ½ tablespoon enhances the savory notes.
- Onion Powder – ½ tablespoon provides another layer of richness.
- Sesame Oil – ½ tablespoon adds a nutty aroma and taste.
- Cayenne Pepper – 2 teaspoons for a delightful hint of heat.
For Garnishing
- Parsley – 1 teaspoon for a fresh touch.
- Green Onion – For garnish; adds a burst of color and flavor.
- Sesame Seeds – For garnish; these add both crunch and appeal.
- Salt and Pepper – To taste; always essential for perfect seasoning.
Feel inspired to create your own Sticky Ginger Teriyaki Chicken Lollipops!
How to Make Sticky Ginger Teriyaki Chicken Lollipops
-
Preheat the oven to 400°F. This ensures your lollipops will cook evenly and achieve that ideal crispy exterior. The warmth of the oven will set the stage for mouthwatering flavors to come!
-
Prepare the drumsticks by carefully cutting around the least meaty end. Remove tendons and free the remaining meat by pulling it downwards. Clean off any excess fat or cartilage to reveal the bone, creating that charming lollipop effect.
-
Mix a dry rub with onion powder, garlic pepper, parsley, and Chinese five spice. Generously season the chicken, ensuring each piece is well coated in flavor before placing it on a baking sheet. This will enhance the taste beautifully during baking.
-
Combine the marinade by mixing soy sauce, ginger paste, brown swerve, sesame oil, cayenne, salt, and pepper in a bowl. This sauce is the heart of the dish—sweet, spicy, and oh-so-satisfying!
-
Arrange the chicken on a wire rack set over a baking sheet. Bake for 20 minutes, then flip and bake for an additional 15 minutes. After that, remove from the oven, brush each piece with the marinade, and return to bake for another 15 minutes. The chicken should look golden and glossy!
-
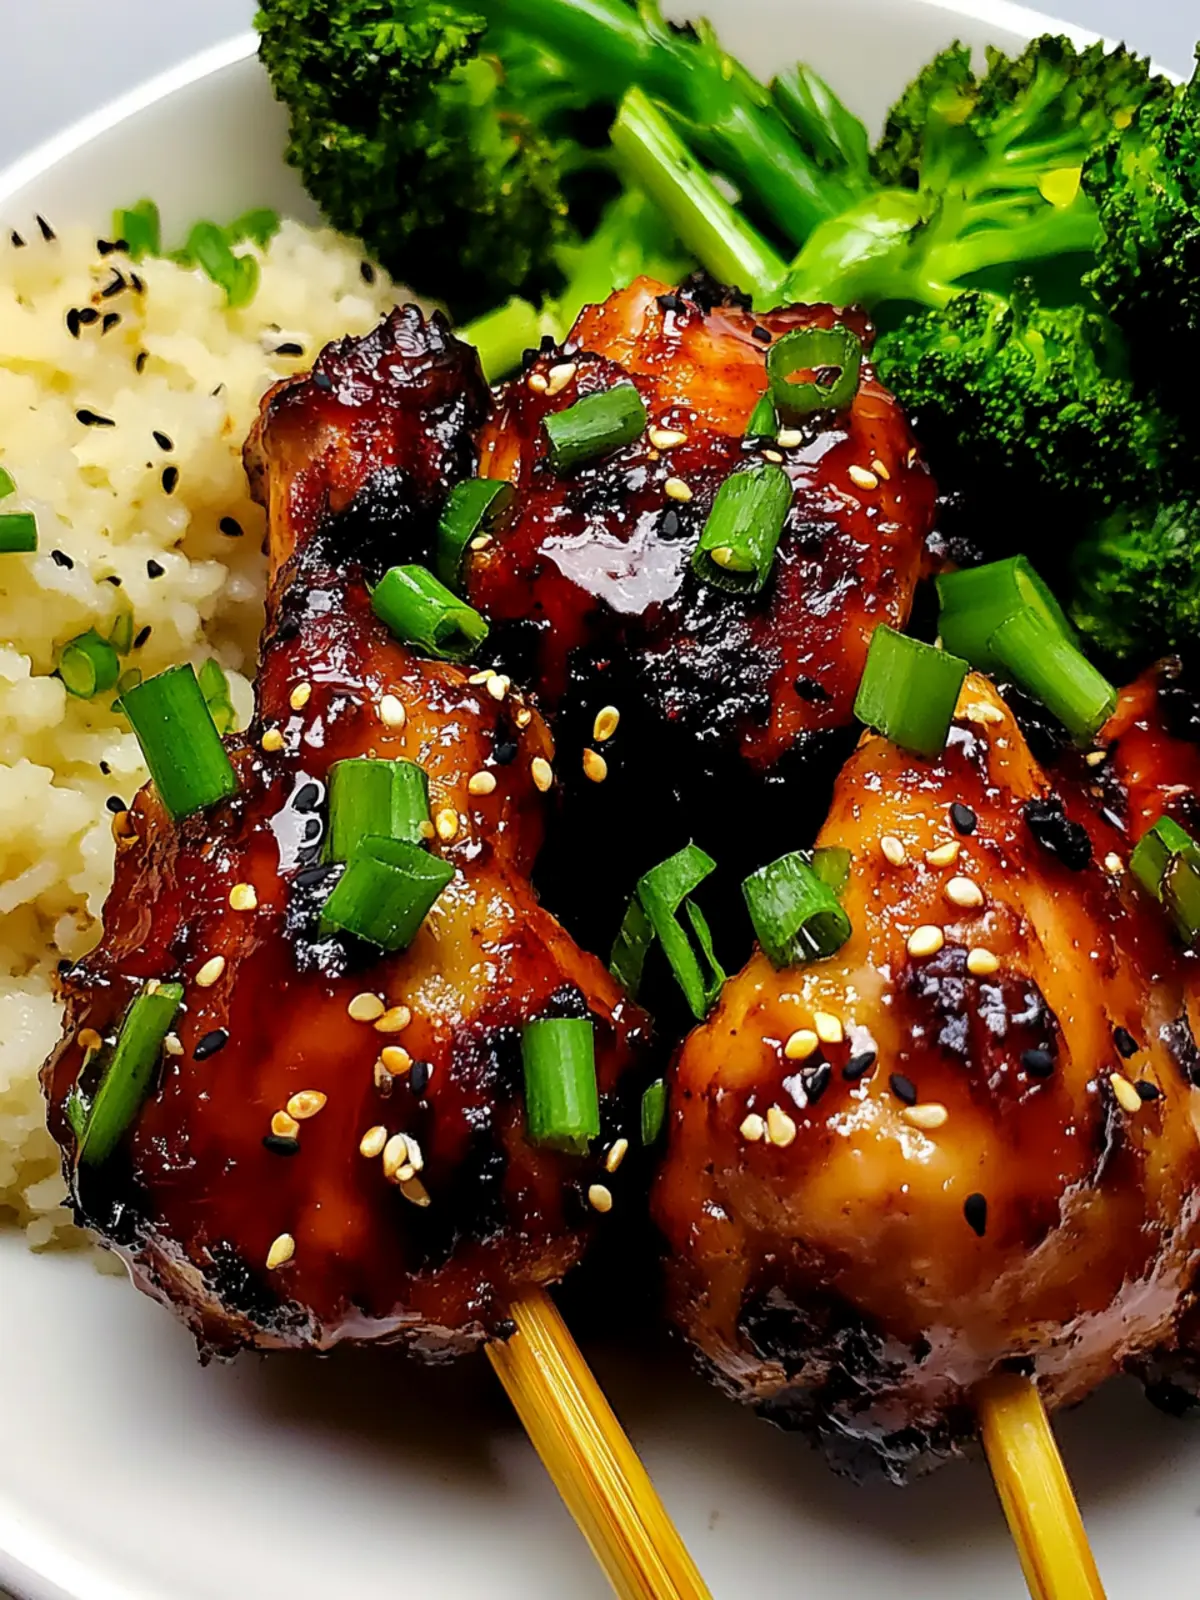
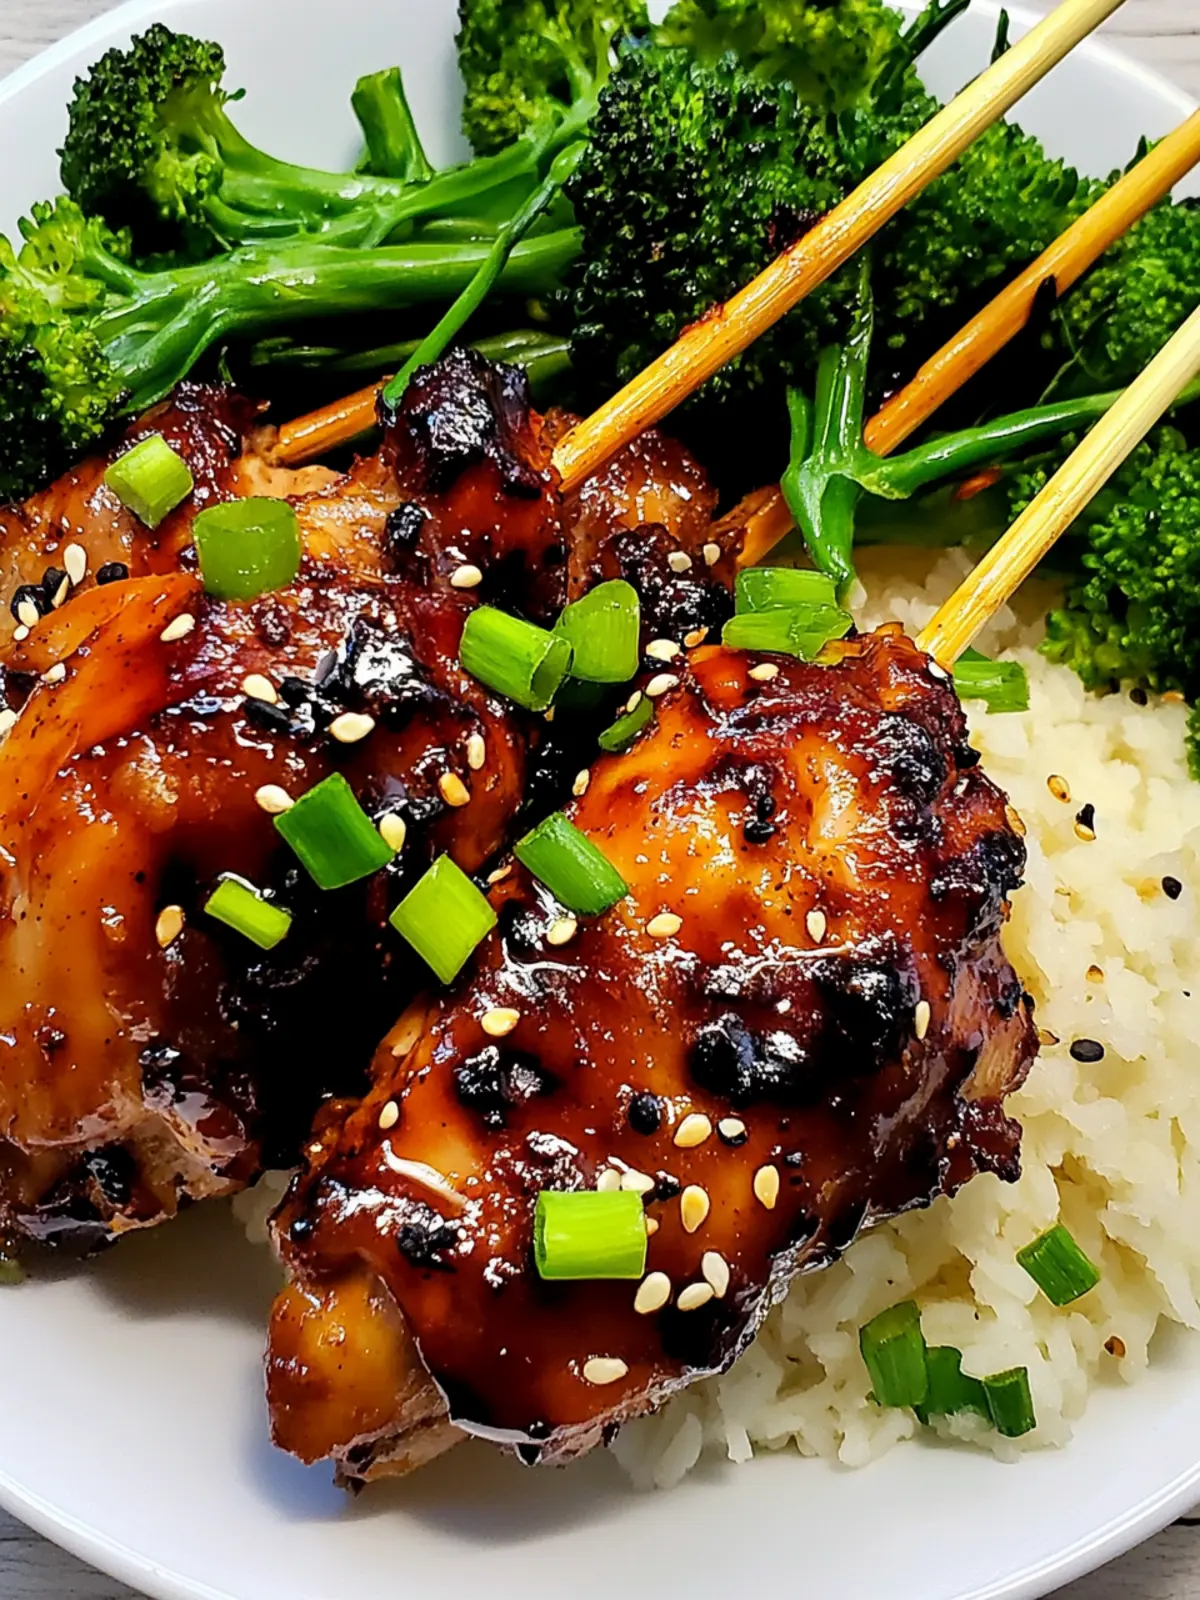
Finish by removing the chicken from the oven and generously coating it with the remaining sauce. Garnish with sesame seeds and chopped green onions for a beautiful presentation that invites everyone to dig in.
Optional: Serve with a side of rice or a refreshing salad for a complete meal.
Exact quantities are listed in the recipe card below.
What to Serve with Sticky Ginger Teriyaki Chicken Lollipops?
As you bite into the juicy warmth of these chicken lollipops, consider elevating your meal with these delightful pairings.
- Steamed Jasmine Rice: This fragrant rice absorbs the delicious sauce, making each bite extra satisfying and comforting.
- Garlic Green Beans: Crisp-tender green beans sautéed with garlic add a crunchy, fresh element that perfectly balances the hearty lollipops.
- Sesame Cucumber Salad: A refreshing side that brings a cool crunch and a hint of acidity to complement the sticky sweetness of the chicken.
- Creamy Coleslaw: The creamy tang of coleslaw provides a lovely contrast to the spiced chicken, making every bite uniquely enjoyable.
- Red Cabbage Slaw: Vibrant and sharp, this crunchy slaw can brighten your plate while adding a pop of color and flavor diversity.
- Sweet Potato Fries: Crispy fries offer a sweet and savory combo that perfectly pairs with the lollipops’ zing. Their texture enhances the overall dining experience!
- Asian-Inspired Quinoa Salad: Fluffy quinoa mixed with colorful veggies and a light vinaigrette can tie together the meal beautifully.
- Sparkling Ginger Lemonade: This refreshing drink mirrors the ginger in the dish, making it a fantastic palate cleanser throughout your meal.
- Mango Sorbet: For dessert, this fruity treat offers a light, sweet finish that balances the meal without being overly heavy.
Sticky Ginger Teriyaki Chicken Lollipop Variations
Feel free to get creative and customize these lollipops to suit your taste!
-
Gluten-Free: Substitute tamari for soy sauce to keep the savory flavor while catering to gluten sensitivities. It’s an easy swap that keeps all the yumminess intact!
-
Sweet and Spicy: Add a tablespoon of honey or maple syrup to the marinade for a sweeter glaze with a delightful depth. The extra sweetness pairs perfectly with the heat from the cayenne.
-
Herb-Inspired: Mix in fresh herbs like cilantro or basil for a vibrant twist. These fresh flavors add a layer of brightness that enhances the original recipe beautifully.
-
Crispy Option: For an extra crunchy texture, toss the drumsticks in panko breadcrumbs before baking. The crispy layer gives every bite a delightful crunch that’s hard to resist.
-
Coconut Twist: Substitute half of the soy sauce with coconut aminos for a unique, slightly sweeter flavor profile. This tweak brings a tropical vibe that makes your taste buds dance!
-
Fire-Up the Heat: Increase the cayenne pepper to suit your spice tolerance or add a chopped jalapeño to the marinade. This adjustment delivers a fiery kick that spicier fans will adore.
-
Asian-Inspired: Add a splash of rice vinegar or sesame seeds to the marinade for a tangy finish. This acidity beautifully balances the sweetness, creating harmony in every bite.
-
Smoky Flavor: Incorporate a dash of smoked paprika into your dry rub for a smoky essence. This enhances the overall flavor profile, transporting your taste buds to a backyard BBQ.
Get ready to experiment and find your personal favorite—after all, cooking is all about joy and creativity!
How to Store and Freeze Sticky Ginger Teriyaki Chicken Lollipops
Fridge: Store leftover lollipops in an airtight container for up to 3 days. This keeps them moist while letting the flavors meld beautifully.
Freezer: For longer storage, freeze the cooked lollipops in a single layer on a baking sheet, then transfer them to a freezer-safe bag for up to 3 months.
Reheating: When ready to enjoy, reheat them in the oven at 350°F for about 15-20 minutes, or until heated through. This keeps your Sticky Ginger Teriyaki Chicken Lollipops just as delicious as when they were fresh!
Garnishes: If storing, consider adding fresh garnishes before serving, as they can wilt over time.
Expert Tips for Sticky Ginger Teriyaki Chicken Lollipops
-
Uniform Cuts: Make sure to cut the drumsticks evenly around the bone, ensuring each lollipop is shaped nicely and cooks uniformly.
-
Flavor Infusion: Allow the drumsticks to marinate for at least 30 minutes before baking. This enhances the flavors in your Sticky Ginger Teriyaki Chicken Lollipops.
-
Watch for Browning: Keep an eye on the chicken while it bakes; if you notice too much browning, cover them loosely with foil to prevent burning.
-
Check for Doneness: Use a meat thermometer to ensure the internal temperature reaches 165°F for juicy, perfectly cooked chicken.
-
Experiment with Garnishes: Feel free to customize your garnishes! Adding fresh herbs or a squeeze of lime can bring extra brightness to your presentation.
Make Ahead Options
These Sticky Ginger Teriyaki Chicken Lollipops are a fantastic option for meal prep, allowing you to enjoy a gourmet dish even on the busiest nights! You can prepare the chicken lollipops up to 24 hours in advance by assembling and marinating them; just cut the drumsticks, create the dry rub, and coat them with the marinade before refrigerating. When you’re ready to serve, simply take them out of the fridge and let them sit at room temperature for about 15 minutes before baking. This ensures they cook evenly and stay juicy. Follow the cooking directions as outlined, and you’ll have delicious lollipops ready with minimal last-minute effort!
Sticky Ginger Teriyaki Chicken Lollipops Recipe FAQs
How do I select the best drumsticks for this recipe?
Absolutely! When choosing your drumsticks, look for fresh pieces with clean, unblemished skin. They should be plump and meaty, without dark spots or excessive fat. Ideally, they should have a nice pink hue that shows they are fresh and ready to shine in your Sticky Ginger Teriyaki Chicken Lollipops.
How should I store leftover lollipops?
To keep your leftovers tasty, store them in an airtight container in the fridge for up to 3 days. This helps maintain their moisture and lets the flavors meld together, making them even more delicious the next day!
Can I freeze the cooked lollipops?
Yes, you can! For freezing, place the cooked lollipops in a single layer on a baking sheet. Once they’re fully chilled, transfer them to a freezer-safe bag or container. They will stay tasty for up to 3 months. When you’re ready to enjoy them, just reheat in the oven at 350°F for about 15-20 minutes.
What if my chicken isn’t browning properly while baking?
If you notice your chicken isn’t browning as it should, you can cover it loosely with foil to avoid burning while still allowing it to cook through. Additionally, ensure your oven is preheated to the right temperature and avoid overcrowding the baking sheet, giving each piece space to breathe.
Are these lollipops suitable for anyone with allergies?
While nutritious and delightful, these Sticky Ginger Teriyaki Chicken Lollipops do contain soy and sesame. If you or your loved ones have allergies, consider using gluten-free soy sauce or omitting sesame oil and seeds. Always consult ingredient labels to be sure they’re safe for your dietary preferences.
Can I use other cuts of chicken instead of drumsticks?
Very much so! You can use chicken thighs or wings as alternatives. Keep in mind that cooking times may vary slightly—make sure to adjust accordingly. The flavor will still be delightful, bringing a unique twist to your Sticky Ginger Teriyaki Chicken Lollipops!
Sticky Ginger Teriyaki Chicken Lollipops You’ll Love to Make
Ingredients
Equipment
Method
- Preheat the oven to 400°F.
- Prepare the drumsticks by carefully cutting around the least meaty end and clean off any excess fat or cartilage.
- Mix a dry rub with onion powder, garlic pepper, parsley, and Chinese five spice.
- Combine the marinade by mixing soy sauce, ginger paste, brown swerve, sesame oil, cayenne, salt, and pepper.
- Arrange the chicken on a wire rack set over a baking sheet.
- Bake for 20 minutes, flip the chicken, and bake for an additional 15 minutes.
- Remove from the oven, brush each piece with the marinade, and return to bake for another 15 minutes.
- Finish by removing the chicken from the oven and generously coating it with the remaining sauce.
- Garnish with sesame seeds and chopped green onions for a beautiful presentation.