
When the afternoon slump hits, I often find myself reaching for a quick pick-me-up. That’s when I discovered the blissful combination of sweet and salty flavors in these no-bake peanut butter granola bars. The creation of these bars was a delightful accident, born from a pantry full of oats, peanuts, and a craving for something satisfying yet healthy.
With a crispy crunch thanks to Rice Krispies and a lush, creamy base of rich peanut butter and honey, they quickly became my go-to snack. It’s almost magical how a simple mix of wholesome ingredients transforms into a treat that not only whispers homey comfort but also answers the call of my snack cravings. These bars are perfect for life on the go—whether you need a pre-workout boost or a quick breakfast before heading out the door, they’ve got you covered. So grab your mixing bowl, and let’s whip up a batch of these sweet and salty peanut butter granola bars that will have everyone asking for the recipe!

Why Are Sweet And Salty Peanut Butter Granola Bars Irresistible?
Unique Flavor Balance: The marriage of sweet honey and salty peanuts creates a flavor explosion that keeps you coming back for more.
No-Bake Convenience: Perfect for busy individuals, these bars don’t require an oven and can be whipped up in no time!
Healthy Snacking: Packed with wholesome ingredients, they offer a nutritious alternative to store-bought snacks.
Versatile Options: Customize your bars with various nuts, seeds, or even chocolate to cater to your tastes.
Crowd-Pleasing Delight: Share these bars at parties, and watch them disappear—they’re a hit among kids and adults alike!
Looking for more easy snacks? Check out our delicious homemade granola recipes!
Sweet And Salty Peanut Butter Granola Bars Ingredients
For the Base
- Rolled Oats – Provides structure and chewiness; quick oats can be used for a finer texture.
- Rice Krispies – Adds crunch; use gluten-free rice cereal for a gluten-free option.
- Salted Peanuts – Delivers saltiness and texture; feel free to substitute with your favorite nuts or seeds.
- Peanut Butter – Acts as a binder and contributes creaminess; almond butter works well if you want a flavor twist.
- Honey – Sweetens the mix and helps bind the ingredients; maple syrup is a great vegan alternative.
For the Topping
- White Chocolate – Adds sweetness and a creamy coating; dark chocolate can replace it for a richer flavor.
- Smooth Peanut Butter (for coating) – Enhances the chocolate layer with an extra punch of peanut flavor.
Get ready to delight your taste buds with these sweet and salty peanut butter granola bars!
How to Make Sweet And Salty Peanut Butter Granola Bars
-
Combine Dry Ingredients: In a large bowl, mix together the rolled oats, Rice Krispies, and salted peanuts until well distributed. This step sets the crunchy base for your granola bars.
-
Melt Wet Ingredients: In a microwave-safe bowl, warm the peanut butter and honey together for about 20-30 seconds until they blend smoothly. Stir until fully combined, creating a creamy mixture.
-
Mix Together: Pour the peanut butter-honey blend over your dry ingredients, stirring well to ensure everything is coated and mixed evenly. This adhesive step is crucial for firm bars!
-
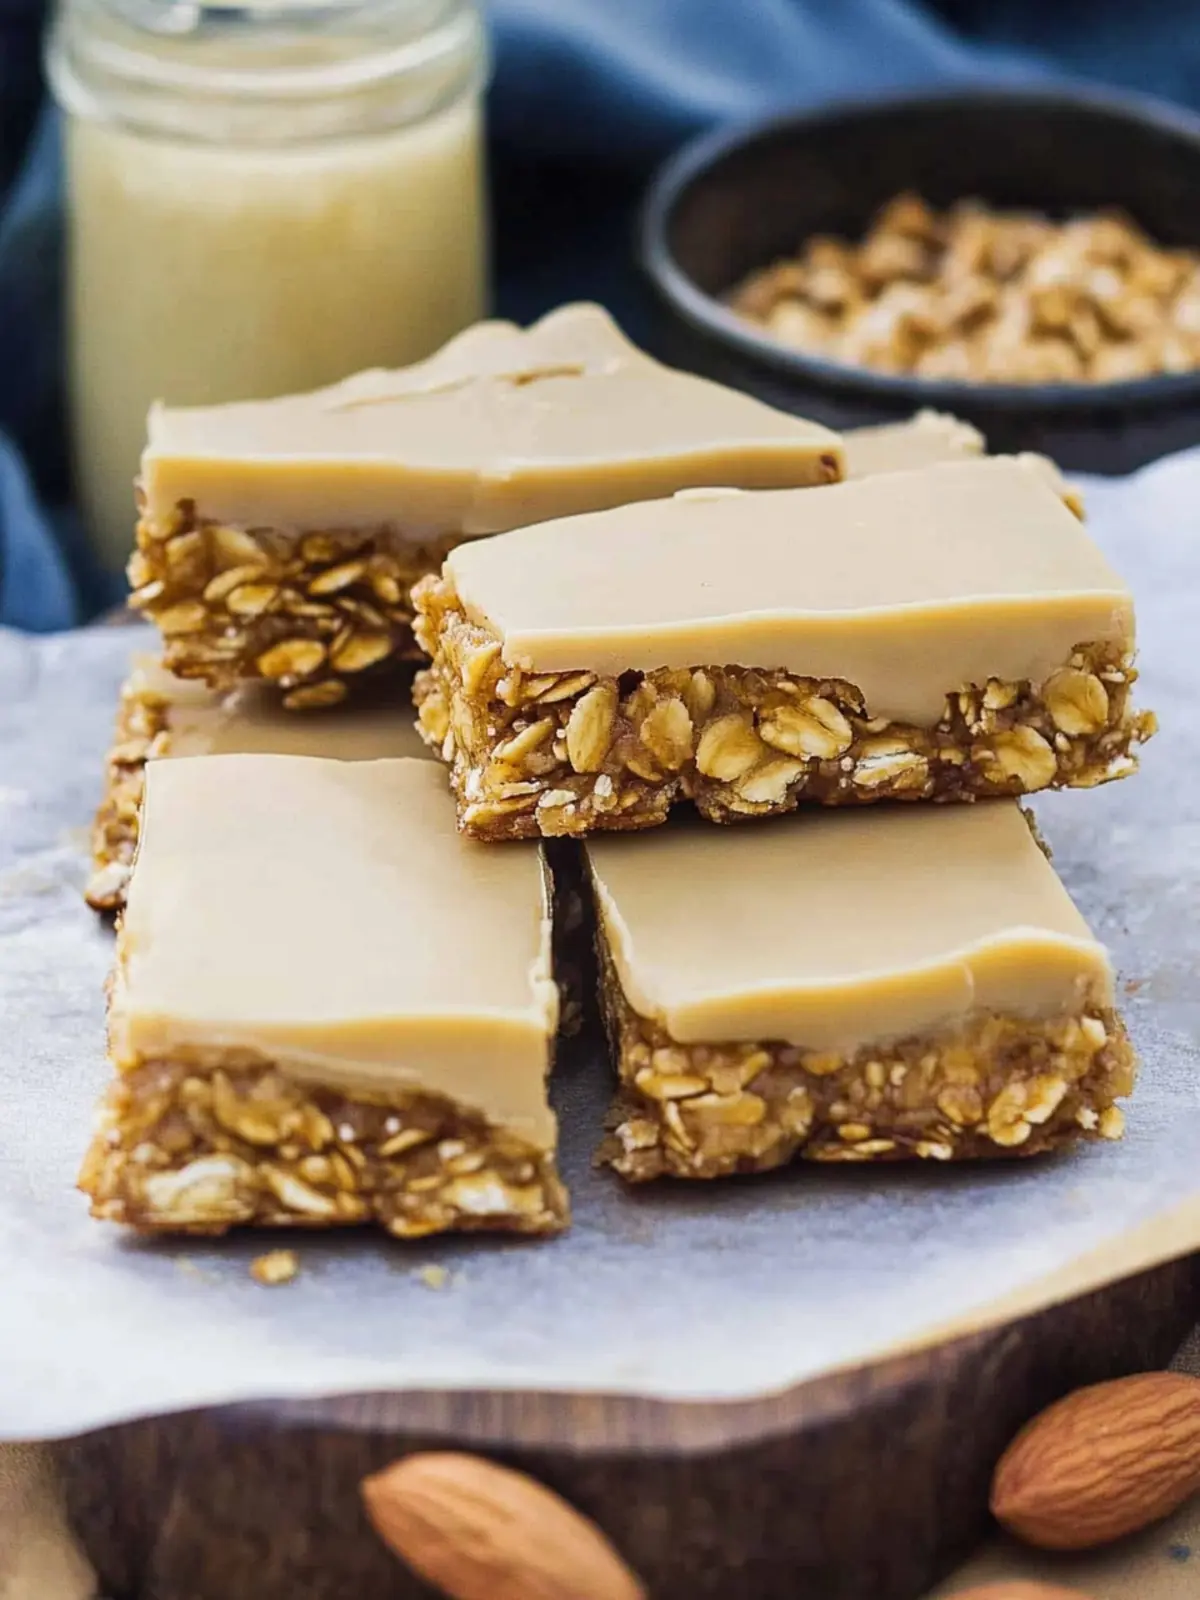
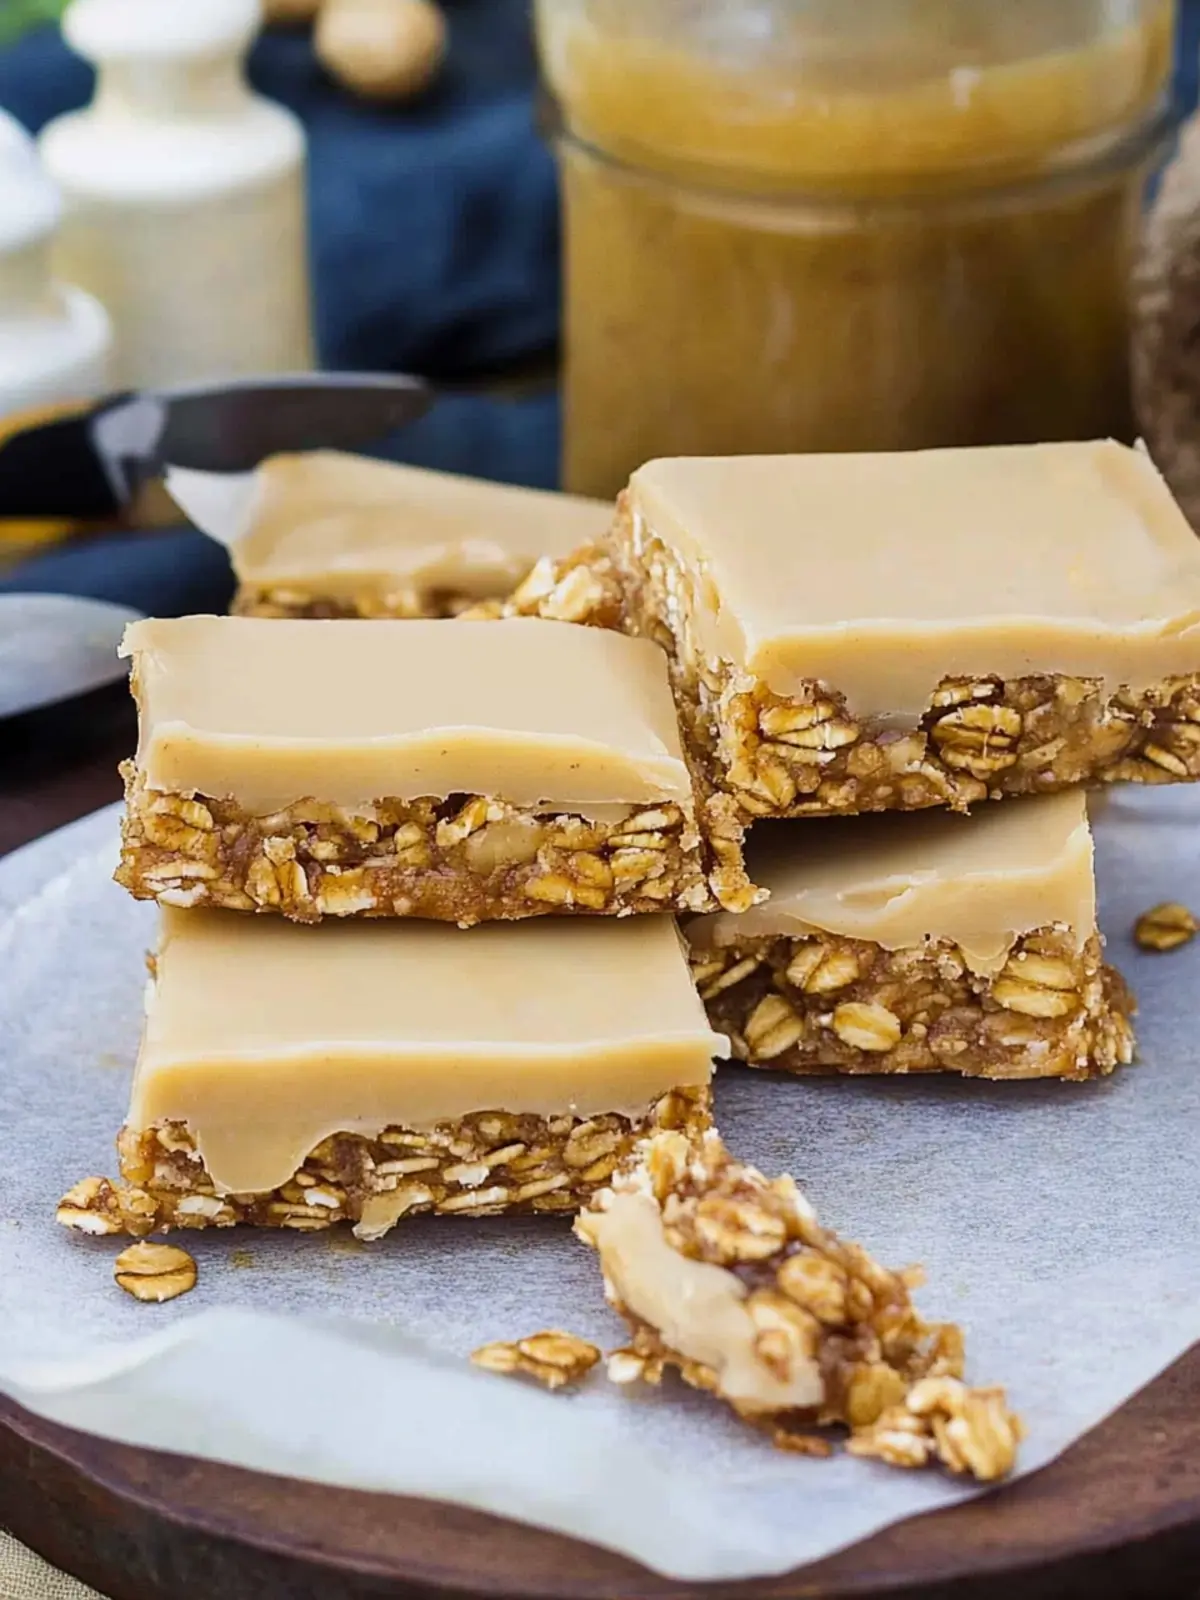
Press into Pan: Firmly press the mixture into an 8×8 inch pan, ensuring an even layer. The tighter it’s packed, the less likely the bars will crumble after cutting. Refrigerate for about 30 minutes to set.
-
Prepare the Topping: Melt the white chocolate and smooth peanut butter together until smooth, then dip the top of each bar into the mixture for a delicious coating.
-
Cut and Store: After chilling, remove from the pan and cut into bars. Wrap each bar individually for easy grab-and-go snacking; these keep wonderfully for later!
Optional: Drizzle extra melted chocolate on top for a decorative touch.
Exact quantities are listed in the recipe card below.
What to Serve with Sweet and Salty Peanut Butter Granola Bars?
Elevate your snacking experience by pairing these no-bake treats with delightful sides that complement their flavors and textures.
- Fresh Fruit: Juicy berries or sliced apples add a refreshing contrast to the nutty sweetness of the bars.
- Greek Yogurt: Creamy and tangy, yogurt provides a perfect balance and adds protein for a satisfying snack.
- Nut Milk: Almond or oat milk enhances the peanut flavor and offers a smooth, delicious drink alongside.
- Trail Mix: A mix of nuts and dried fruits brings crunchy variety and more healthy benefits, making it a perfect companion.
- Dark Chocolate Squares: Rich dark chocolate intensifies the indulgence of the granola bars, satisfying your sweet tooth even more.
- Chia Seed Pudding: Light and nutritious, this pudding adds creaminess and a touch of extra flavor that complements the bars beautifully.
Serving these alongside your Sweet and Salty Peanut Butter Granola Bars not only rounds out your snack time but ensures a delightful treat for any craving!
Expert Tips for Sweet And Salty Peanut Butter Granola Bars
-
Mix Thoroughly: Ensure the wet and dry ingredients are combined well to prevent the bars from crumbling. A good blend helps with binding.
-
Press Firmly: When packing the mixture into the pan, press down firmly. This step is crucial; if not done properly, the bars may fall apart when cut.
-
Experiment with Flavors: Don’t hesitate to swap ingredients! For instance, use almond butter or add coconut flakes to the mix for unique sweet and salty peanut butter granola bars.
-
Chill Well: Let the bars set in the refrigerator for at least 30 minutes. This cooling period allows them to firm up nicely.
-
Storage Tip: Wrap each bar individually and store them in the freezer for maximum freshness. They will last for up to a week, ready for whenever a snack craving hits.
Make Ahead Options
These Sweet and Salty Peanut Butter Granola Bars are ideal for meal prep, making snack time much simpler! You can prepare the mixture and press it into the pan up to 24 hours in advance; just refrigerate it tightly covered. For best freshness, store the cut bars in an airtight container in the fridge for up to 3 days, but they also freeze well if wrapped individually. When you’re ready to enjoy them, simply dip each bar in the melted chocolate coating, let it set, and voilà! You’ll have delicious, homemade snacks ready whenever you need a quick pick-me-up!
Storage Tips for Sweet And Salty Peanut Butter Granola Bars
Room Temperature: Store the bars in an airtight container at room temperature for up to 3 days. Keep them in a cool, dry place to maintain freshness.
Fridge: For extended freshness, refrigerate the bars in a sealed container for up to 1 week. This helps retain their chewy texture while being easily accessible.
Freezer: Wrap each bar individually in plastic wrap or foil and freeze for up to 2 months. Thaw at room temperature briefly before enjoying for optimal flavor and firmness.
Reheating: If desired, you can microwave a bar for 10-15 seconds to warm it up, enhancing the rich peanut butter flavor of your sweet and salty peanut butter granola bars.
Sweet And Salty Peanut Butter Granola Bars Variations
Feel free to unleash your creativity and customize your granola bars to suit your taste!
-
Nut-Free: Replace peanut butter with sunbutter to keep it nut-free and just as delicious.
This swap allows those with nut allergies to enjoy a chewy snack without compromising on flavor. -
Vegan Delight: Substitute honey with agave syrup or maple syrup for a wholly vegan treat.
Both options add sweetness and maintain the binding properties necessary for those scrumptious bars. -
Oat-Free: Use puffed quinoa or puffed rice in place of oats for a lighter texture.
It’s a fantastic way to switch things up without losing that delightful crunch! -
Choco-Nutty: Add chocolate chips or chunks along with the dry ingredients for a burst of chocolatey goodness.
Dark, milk, or even white chocolate would complement the sweet and salty flavors perfectly. -
Fruit Boost: Incorporate dried fruits like cranberries, apricots, or raisins for added sweetness and texture.
This twist brings a delightful chewiness, creating a symphony of flavors with each bite. -
Spicy Kick: For those who enjoy heat, sprinkle in a dash of cayenne pepper or chopped jalapeños.
This unexpected twist elevates the sweet and salty into a whole new dimension! -
Coconut Bliss: Mix in shredded coconut or coconut flakes for a tropical flavor explosion.
It adds a lovely texture and an exotic touch that transports you to sunny shores with each bite. -
Seed Power: Swap out some nuts for chia seeds or pumpkin seeds for an extra health boost.
These nutrient-packed ingredients add a delightful crunch and a floral hint that balances the flavors beautifully.
Sweet And Salty Peanut Butter Granola Bars Recipe FAQs
What type of oats should I use for the Sweet and Salty Peanut Butter Granola Bars?
I recommend using rolled oats for their chewy texture and structure when making these granola bars. If you’re in a pinch, quick oats can be substituted for a finer texture, but be aware that this may alter the final consistency slightly.
How long can I store my granola bars?
For optimal freshness, keep your Sweet and Salty Peanut Butter Granola Bars wrapped in an airtight container at room temperature for up to 3 days. If you want them to last longer, refrigerate them for up to a week, or wrap each bar individually and freeze for up to 2 months!
Can I freeze these granola bars and how?
Absolutely! To freeze your bars, wrap each one tightly in plastic wrap or foil to prevent freezer burn, and store them in a freezer-friendly bag or container. They will maintain their goodness for up to 2 months. When you’re ready to enjoy, take one out and allow it to thaw at room temperature for a few minutes before eating.
What should I do if my granola bars crumble when cut?
If your Sweet and Salty Peanut Butter Granola Bars crumble, it’s usually because the mixture wasn’t pressed firmly enough into the pan. Ensure you’re packing the ingredients tightly when you press them down. For better binding, you can also reduce the amount of peanut butter and honey slightly or allow the mixture to chill longer before cutting.
Are there any dietary considerations for these granola bars?
Yes! If you or someone in your home has nut allergies, feel free to replace the peanuts with seeds like pumpkin or sunflower seeds. For gluten sensitivity, ensure you use gluten-free Rice Krispies and oats. These small adjustments make the bars a safe and inclusive snack for all!
What’s the best way to customize my granola bars?
Get creative! You can add ingredients such as chia seeds or flax seeds for extra nutrition. If you’re looking for a different flavor, try substituting cashews for the peanuts or adding coconut flakes for a tropical spin. That’s the beauty of these Sweet and Salty Peanut Butter Granola Bars—customization makes them personal!

Sweet And Salty Peanut Butter Granola Bars You’ll Crave Daily
Ingredients
Equipment
Method
- In a large bowl, mix together the rolled oats, Rice Krispies, and salted peanuts until well distributed.
- In a microwave-safe bowl, warm the peanut butter and honey together for about 20-30 seconds until they blend smoothly.
- Pour the peanut butter-honey blend over your dry ingredients, stirring well to ensure everything is coated and mixed evenly.
- Firmly press the mixture into an 8x8 inch pan, ensuring an even layer, and refrigerate for about 30 minutes to set.
- Melt the white chocolate and smooth peanut butter together until smooth, then dip the top of each bar into the mixture.
- After chilling, remove from the pan and cut into bars. Wrap each bar individually for easy grab-and-go snacking.