
As I sat sipping my coffee one quiet morning, the thought of breakfast felt more like a chore than a delight. Then, I remembered discovering a simple yet elegant dish that turned my mundane mornings into something special: Shirred Eggs. The magic lies in their creamy texture, perfectly runny yolks, and the fresh burst of chives and Parmesan that elevates them to gourmet status—all made in just one ramekin!
This dish not only saves you the hassle of a complicated breakfast but also leaves you satisfied without the heaviness of fast food. Picture being able to indulge in a warm, comforting plate that’s both nutritious and delicious, all in under 15 minutes. Whether it’s a lazy weekend brunch or a quick weekday breakfast, these Shirred Eggs are versatile enough to brighten any day. Let’s dive into this quick recipe that guarantees to impress your taste buds and bring back the joy of homemade meals!

Why are Shirred Eggs a breakfast favorite?
Simplicity: With just a few basic ingredients, making Shirred Eggs is a breeze, perfect for chefs of all skills.
Creamy Texture: The combination of heavy cream and perfectly baked eggs creates a luscious mouthfeel.
Flavor Boost: Fresh chives and Parmesan cheese add gourmet notes that make each bite delightful.
Time-Saving: Ready in just 12-15 minutes, they’re ideal for busy mornings or lazy weekends.
Single Ramekin: Minimal cleanup means you can enjoy your meal without the hassle—just like in my favorite easy breakfast ideas.
Shirred Eggs Ingredients
For the Base
• Unsalted butter – used to grease the ramekin for a rich flavor and easy egg release.
• Heavy cream – adds creaminess and a luxurious texture to the dish.
• Large eggs – the star of the show; their yolks should remain runny for the best experience.
For Seasoning
• Salt – enhances the natural flavor of the eggs; adjust to taste.
• Freshly ground black pepper – adds a subtle warmth and depth of flavor.
For Garnishing
• Minced fresh chives – brightens the dish with a fresh, mild onion flavor.
• Grated Parmesan cheese – brings a wonderful nuttiness that elevates the Shirred Eggs to gourmet heights.
How to Make Shirred Eggs
-
Preheat the oven to 375°F, ensuring it’s perfectly warmed up for your Shirred Eggs. This temperature allows for a gentle bake, creating that delightful creamy texture we love.
-
Grease a 6-ounce ramekin with unsalted butter, making sure the bottom and sides are well coated. This will help your eggs release easily once baked, resulting in a beautiful presentation.
-
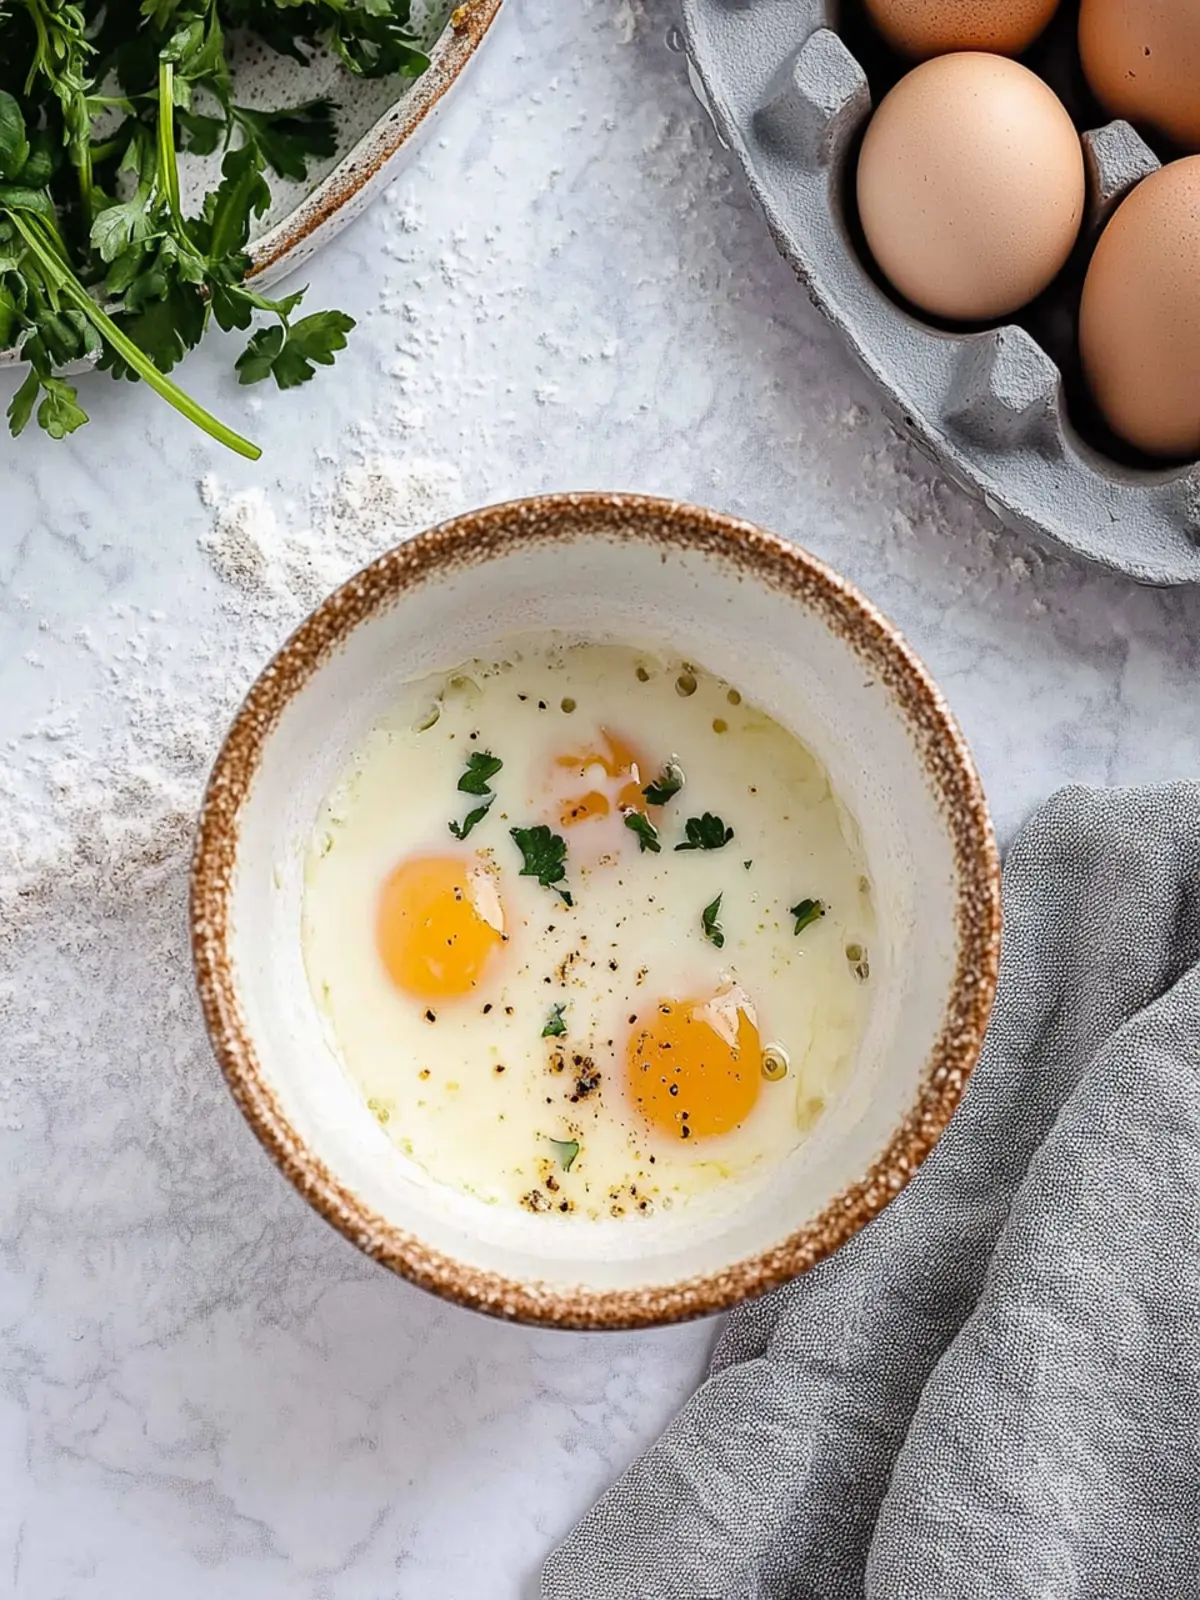
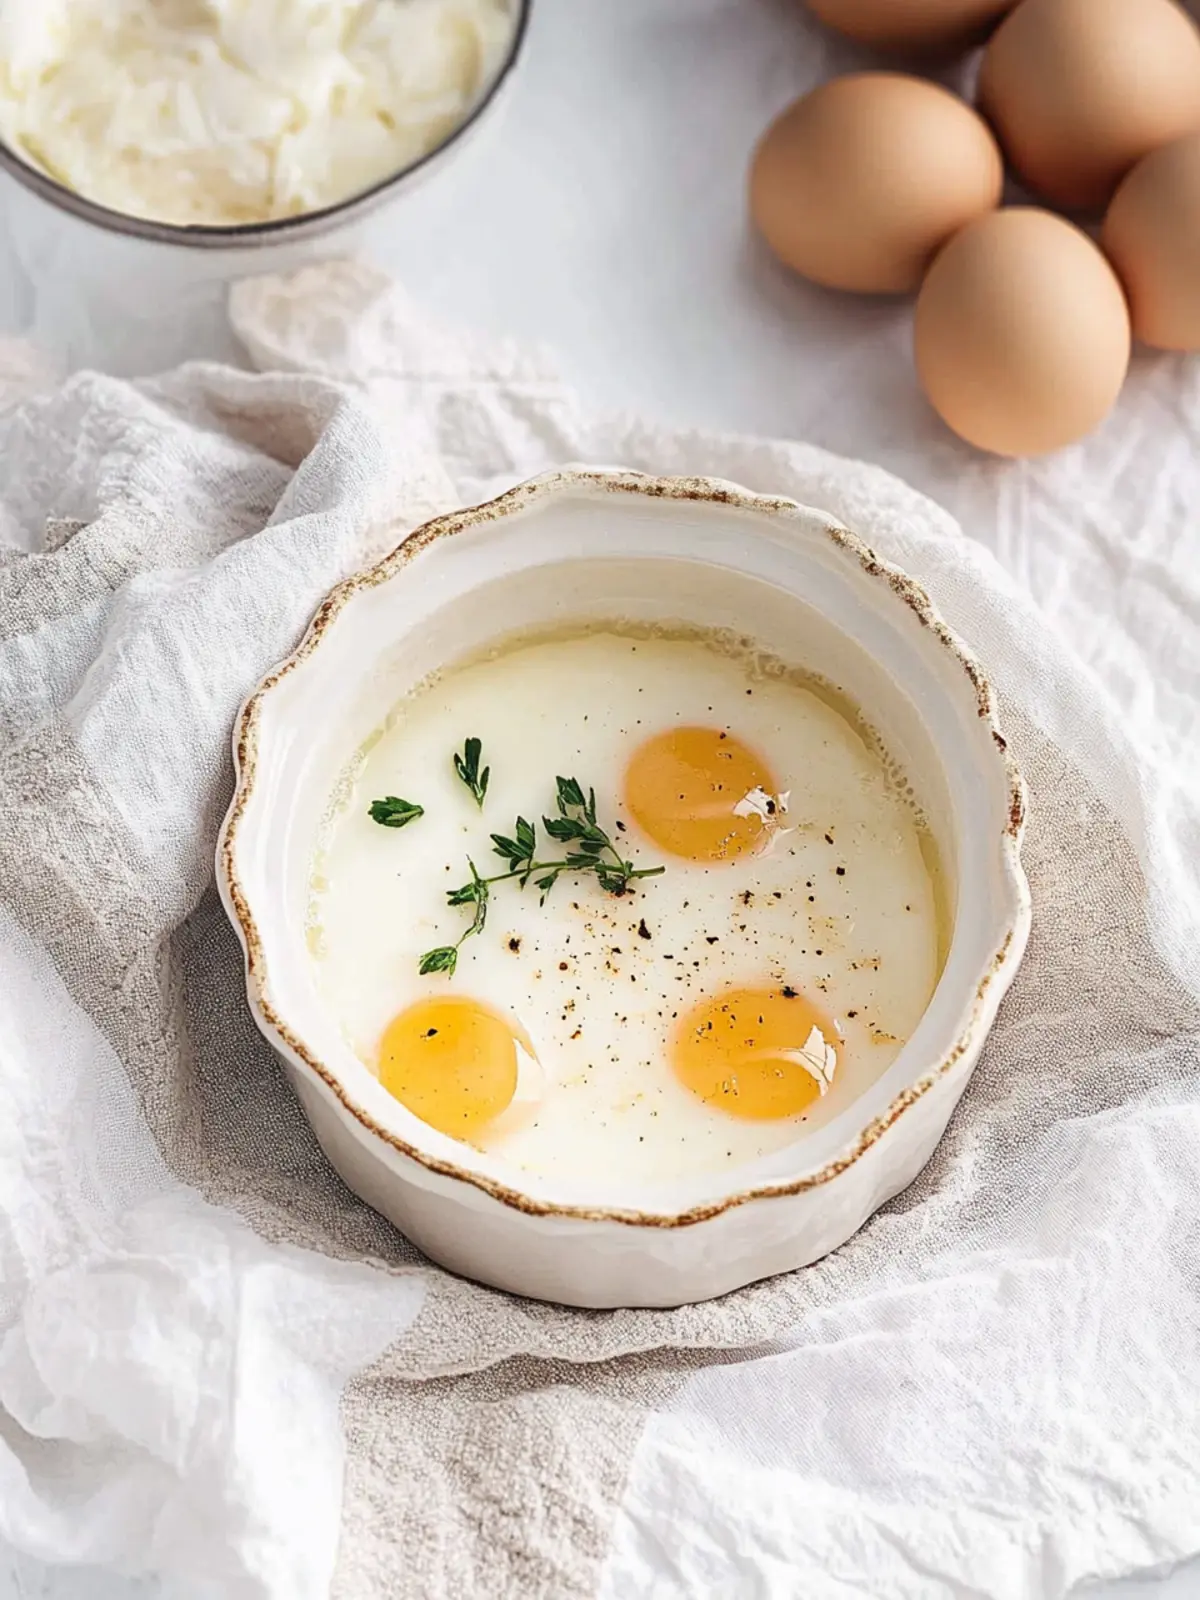
Pour 2 teaspoons of heavy cream into the greased ramekin, creating a luscious base for your eggs. Then, gently crack the two large eggs on top, being careful not to break the yolks; we want those delicious runny centers!
-
Season the eggs with a sprinkle of salt and freshly ground black pepper. Next, sprinkle minced chives and grated Parmesan cheese on top for that gourmet flair and delightful flavor boost.
-
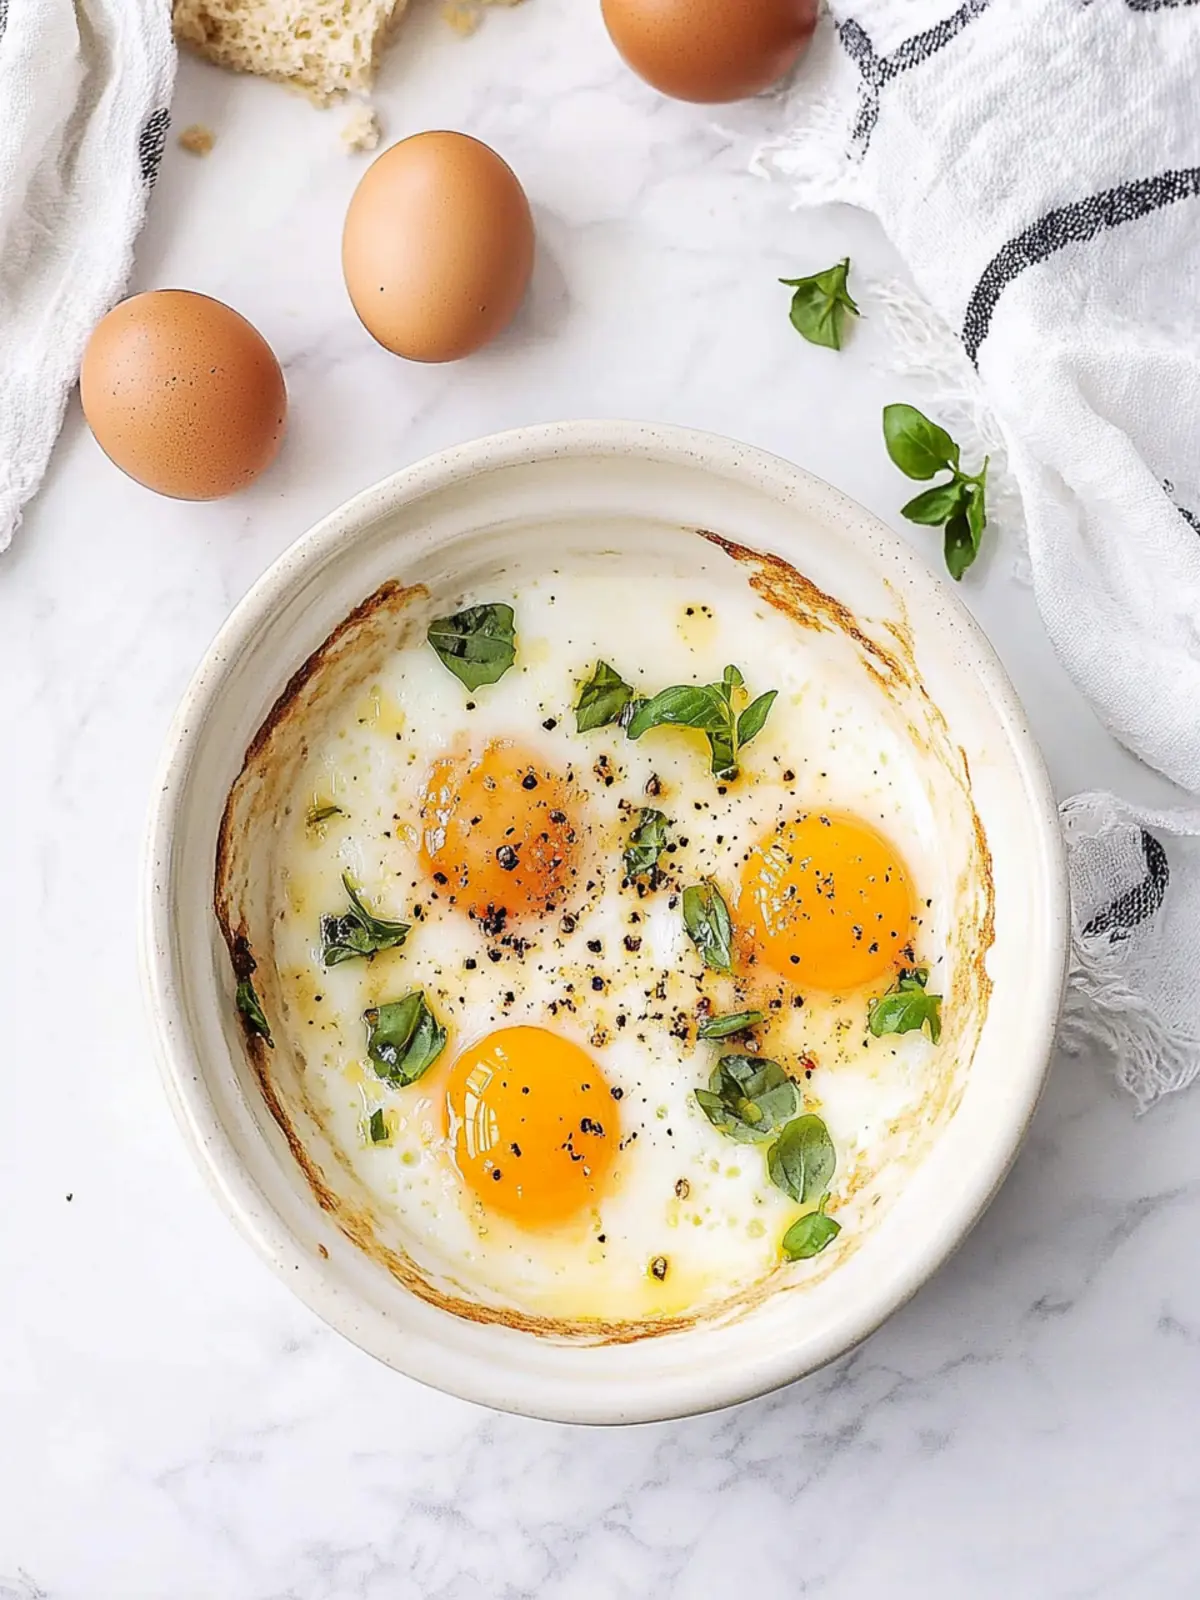
Bake the ramekin on a baking sheet in the preheated oven for about 12 to 15 minutes. Look for the egg whites to be set while keeping the yolks runny—a perfect balance of textures!
-
Rest the ramekin out of the oven for a couple of minutes before serving. This brief waiting period allows the flavors to settle, making each bite even more enjoyable.
Optional: Serve with toasted bread for dipping into those heavenly yolks!
Exact quantities are listed in the recipe card below.
Shirred Eggs Variations
Add your personal touch to the delightful flavor and texture of Shirred Eggs! Experiment with these ideas to elevate your breakfast experience even further.
-
Herb-Infused: Add a mix of fresh herbs like parsley, thyme, or dill before baking for an aromatic twist.
-
Cheese Lover’s Delight: Swap Parmesan for crumbled feta or goat cheese for a tangy flavor profile and creamy texture.
-
Vegetable Boost: Incorporate finely diced vegetables such as spinach, bell peppers, or mushrooms into the ramekin for added nutrition and color.
-
Spicy Kick: Sprinkle a pinch of red pepper flakes or add jalapeños to the dish to give it an exciting heat that awakens your taste buds.
-
Smoky Flavor: Introduce a dash of smoked paprika or substitute the butter with bacon fat for a delightful smoky essence in every bite.
-
Dairy-Free: Swap heavy cream with coconut cream or a nut-based cream alternative to create a deliciously creamy, dairy-free version.
-
Protein-Packed: Add cooked and crumbled sausage or crispy bacon to the mix for a heartier breakfast that keeps you fuller for longer.
With these variations, your Shirred Eggs will never become monotonous but rather a canvas for your culinary creativity!
Expert Tips for Shirred Eggs
- Cream Quality Matters: Use fresh, high-quality heavy cream for a richer flavor and creamier texture in your Shirred Eggs.
- Watch the Time: Keep a close eye on baking time; overbaking will lead to firm yolks. Aim for that delicious runny center!
- Perfect Grease Technique: Ensure the ramekin is well-greased with unsalted butter, which not only prevents sticking but enhances the dish’s buttery flavor.
- Customize Your Garnish: Feel free to experiment with other herbs like thyme or dill, and different cheeses to find your favorite Shirred Eggs variation!
- Don’t Skip the Chives: Fresh chives add a pleasant brightness; dried herbs won’t provide the same flavor impact, so always opt for fresh when possible.
Make Ahead Options
Shirred Eggs are perfect for meal prep enthusiasts! You can prepare the components up to 24 hours in advance, making busy mornings a breeze. First, grease the ramekin with unsalted butter and add the heavy cream. Crack the eggs on top but wait to season them with salt, pepper, chives, and Parmesan until you’re ready to bake. Cover your ramekin tightly with plastic wrap and refrigerate until you’re set to indulge. When you’re ready to cook, simply remove the wrap, bake in a preheated oven at 375°F for 12 to 15 minutes, and enjoy your delicious, gourmet-quality breakfast that feels just as fresh as if made on the spot!
What to Serve with Shirred Eggs?
To create a cozy breakfast experience, it’s all about finding the perfect companions for your creamy Shirred Eggs.
-
Toasted Sourdough Bread: The crusty texture adds a delightful crunch, perfect for scooping up the runny yolks.
-
Roasted Asparagus: Bright and slightly charred, it balances the richness of the eggs while providing a pop of color and nutrients.
-
Crispy Bacon: Salty and savory, crispy bacon complements the creamy eggs beautifully, delivering that satisfying crunch with each bite.
-
Avocado Slices: Creamy and healthy, avocado brings a fresh, buttery flavor that pairs wonderfully with Shirred Eggs, creating a heartier meal.
-
Fresh Garden Salad: A light mix of greens adds brightness and a refreshing contrast, enhancing the overall balance on your plate.
-
Freshly Squeezed Orange Juice: The zesty sweetness of orange juice cuts through the richness of the dish, giving your breakfast a refreshing lift.
Indulge in these delightful pairings that transform a simple breakfast into a feast for the senses!
How to Store and Freeze Shirred Eggs
Fridge: Keep any leftover Shirred Eggs in an airtight container for up to 3 days. Reheat gently in the microwave or oven until warmed through.
Freezer: Shirred Eggs can be frozen, but it’s best to freeze them before baking. Wrap each ramekin tightly in plastic wrap and foil, storing for up to 2 months.
Thawing: To enjoy your frozen Shirred Eggs, thaw them in the refrigerator overnight before baking as per the original instructions.
Reheating: If you’ve baked them in advance, reheat in a warm oven set to 350°F until heated through, about 10-15 minutes.
Shirred Eggs Recipe FAQs
What should I look for when selecting fresh eggs?
Absolutely! When choosing fresh eggs, look for those without any visible cracks or dark spots. Fresh eggs have a clean, smooth shell and when you crack them open, the whites should be thick and the yolks should be bright yellow or orange for that delicious flavor and richness.
How do I store leftover Shirred Eggs?
To store any leftover Shirred Eggs, place them in an airtight container in the refrigerator. They will keep for up to 3 days. When you’re ready to enjoy them, gently reheat in the microwave or oven—you want to warm them through without overcooking!
Can I freeze Shirred Eggs?
Yes, you can freeze Shirred Eggs, but it’s best to do so before baking. Wrap each ramekin tightly in plastic wrap and then in foil. They can be stored for up to 2 months. When you’re ready to bake, thaw them in the refrigerator overnight and then follow the regular baking instructions!
What if my egg yolks break while baking?
No worries! If your yolks break, the Shirred Eggs will still taste great, but the texture will differ. For a runny yolk experience, handle the eggs gently when cracking them into the ramekin. Start with the egg’s wider end to allow a controlled release, keeping the yolk intact.
Can pets eat Shirred Eggs?
While eggs are generally safe for most pets in small amounts, keep in mind the added cream, cheese, and seasoning. It’s best to offer them plain scrambled eggs as a treat. Always consult your vet regarding any dietary changes for your pets!
Are there any allergy considerations with this recipe?
Yes! This recipe contains dairy, so those with lactose intolerance or dairy allergies should substitute the heavy cream and cheese with alternatives like coconut cream and nutritional yeast. Always double-check ingredient labels to ensure safety for those with allergies!
Savory Shirred Eggs for a Cozy Breakfast Treat
Ingredients
Equipment
Method
- Preheat the oven to 375°F.
- Grease a 6-ounce ramekin with unsalted butter.
- Pour 2 tablespoons of heavy cream into the greased ramekin, then crack the eggs on top.
- Season with salt and pepper, then sprinkle chives and Parmesan cheese on top.
- Bake for about 12-15 minutes until whites are set and yolks remain runny.
- Rest for a couple of minutes before serving.