
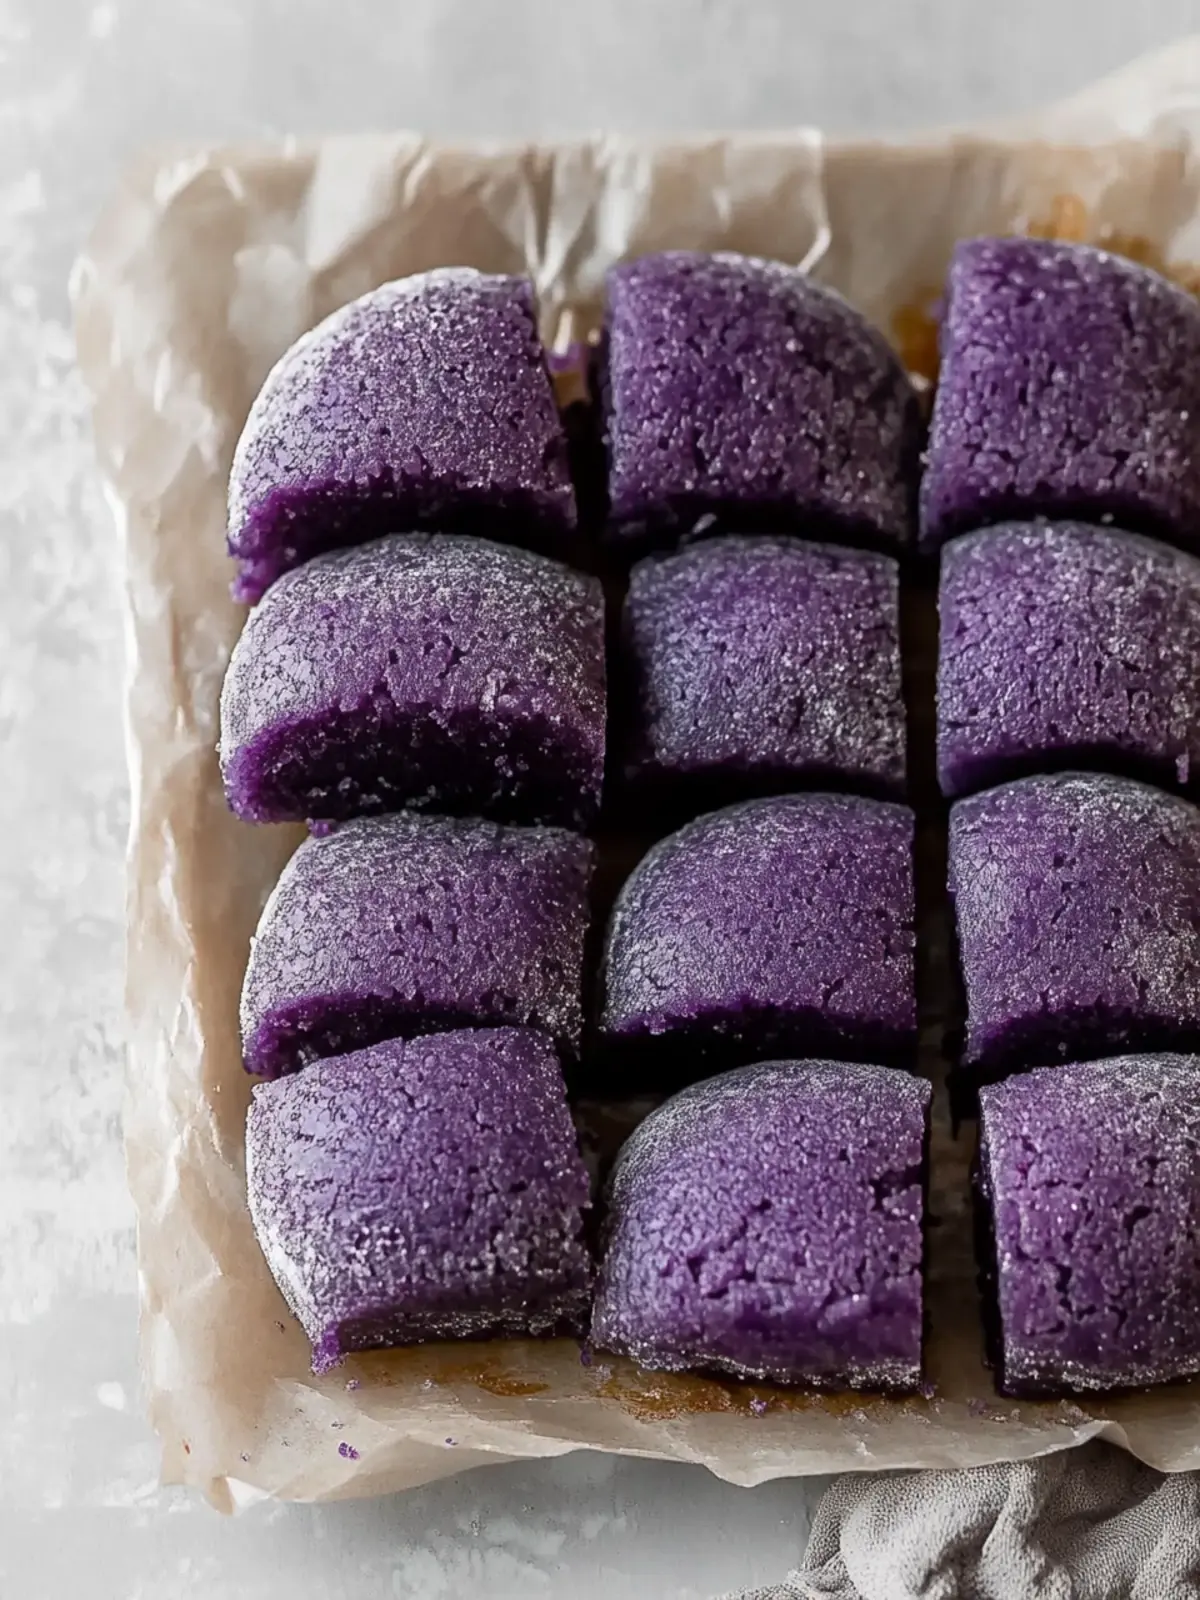
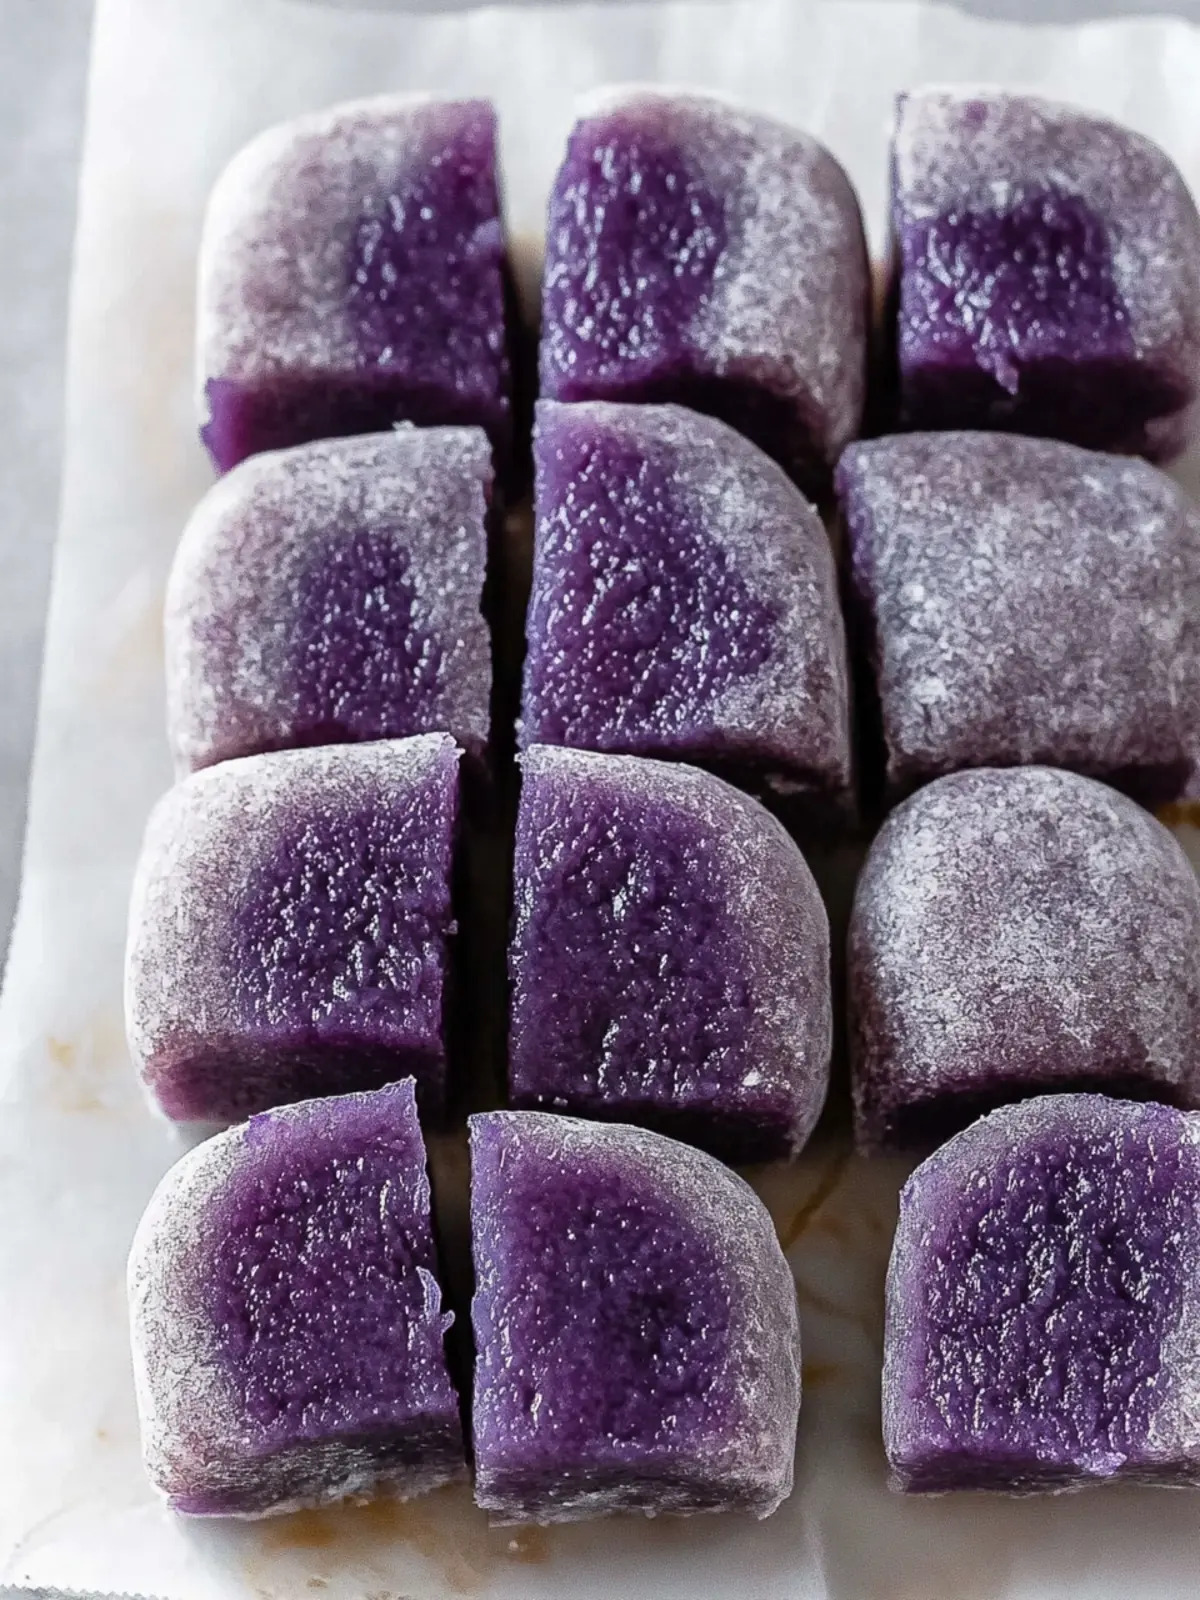
When I first discovered ube mochi, I was instantly captivated by its enchanting purple hue and the promise of a chewy delight that awaited me. The moment I took a bite, the sweet, nutty flavor of ube—Filipino purple yam—melded beautifully with the rich creaminess of coconut. It’s safe to say I was hooked.
This easy ube mochi recipe is a delightful way to bring a taste of the tropics into your kitchen. With just a handful of ingredients and under an hour of your time, you can indulge in a treat that is not only gluten-free but also a feast for the senses. Whether you’re hosting a family gathering or simply searching for a comforting dessert, these chewy, buttery bars are bound to impress.
Join me as we whip up this captivating dessert that will transform your dessert game—say goodbye to mundane sweet treats and embrace this vibrant, flavorful experience!

Why is this Ube Mochi Recipe a must-try?
Easy to Make: With just one bowl and under 10 ingredients, this recipe is approachable for cooks of all skill levels.
Chewy & Delicate: The unique texture resembles that of a soft brownie but offers chewy perfection that melts in your mouth.
Visually Stunning: Those vibrant purple hues from ube make these bars a showstopper at any gathering.
Versatile Flavor: Customize with toppings like shredded coconut or your favorite extracts to elevate your dessert experience.
Cultural Delight: Embrace the fusion of Hawaiian and Filipino influences, bringing rich tradition into your kitchen!
Serve these bars chilled or at room temperature for a sweet treat that your friends and family will love.
Ube Mochi Recipe Ingredients
For the Batter
• Unsalted Butter – Adds richness and moisture; substitute with coconut oil for a dairy-free option.
• Granulated Sugar – Provides sweetness; adjust to taste, reducing slightly for a less sweet version.
• Large Eggs – Contributes to structure and moisture; ensure they are at room temperature for best incorporation.
• Ube Extract – Imparts the signature purple color and unique flavor; can substitute with ube powder, adjusting the quantity to taste.
• Mochiko Flour – This glutinous rice flour creates the chewy texture essential for the Ube Mochi Recipe; regular glutinous rice flour can be used, ensuring it’s not sweet rice flour.
• Baking Powder – Introduces a slight rise; ensure it is fresh for best results.
• Evaporated Milk – Adds creaminess and depth; can be swapped with coconut milk for a dairy-free option.
• Coconut Milk – Enhances tropical richness; opt for a low-fat version for a lighter dessert.
How to Make Ube Mochi
-
Preheat your oven to 350°F (175°C) and prepare a 9×13-inch baking pan by lining it with parchment paper. This ensures easy removal after baking.
-
Combine melted unsalted butter and granulated sugar in a large bowl until well mixed, creating a creamy base for your batter.
-
Add large eggs one at a time, mixing thoroughly after each addition until the mixture is cohesive and smooth.
-
Stir in the ube extract until evenly blended, letting its vibrant color infuse throughout the batter.
-
Fold in mochiko flour and baking powder gently until about 80% combined; be careful not to overmix, as this could affect texture.
-
Include evaporated milk and coconut milk, mixing until the batter is smooth and free of lumps for a perfect consistency.
-
Pour the batter into the prepared baking pan, spreading it out evenly, and bake for 45 minutes, or until a tester inserted into the center comes out with minimal dry crumbs.
-
Cool the mochi in the pan completely before slicing into bars for the best chewy texture and delightful presentation.
Optional: Dust with powdered sugar before serving for an elegant finish.
Exact quantities are listed in the recipe card below.

Ube Mochi Recipe Variations & Substitutions
Feel free to explore these delightful twists to make this recipe truly your own!
- Dairy-Free: Substitute unsalted butter with coconut oil and evaporated milk with coconut milk for a completely dairy-free dessert.
- Less Sweet: Reduce granulated sugar slightly; your mochi will still be delicious with a subtly less sweet profile.
- Fruit-Infused: Add in mashed banana or pumpkin puree for an unexpected flavor twist that complements the ube beautifully.
- Texture Boost: Fold in chopped nuts like macadamia or almonds for added crunch and a lovely contrast to the chewy texture.
- Chewy & Fruity: Mix in chunks of fresh or dried mango for a tropical explosion of flavor that sings of the islands.
- Flavor Extracts: Swap ube extract for pandan or banana extract to infuse new flavors into the delightful base.
- Sweet Toppings: Drizzle with sweetened condensed milk or top with a sprinkle of toasted coconut for a visually appealing and tasty finish.
- Chocolate Lovers: Add cocoa powder to the batter or drizzle melted chocolate on top for a rich chocolatey experience that goes hand in hand with ube.
What to Serve with Ube Mochi Recipe?
Delight in the joy of pairing your ube mochi with complementary flavors and textures for an unforgettable dessert experience.
-
Fresh Fruits: The natural sweetness and acidity of fruits like mango or strawberries enhance the tropical vibes of ube mochi.
-
Coconut Whipped Cream: This light and airy topping adds a creamy texture and complements the already rich flavors beautifully. It’s a match made in dessert heaven!
-
Matcha Tea: The earthy notes of matcha provide a delightful contrast to the sweet, nutty flavor of the ube mochi, creating a balanced experience.
-
Chocolate Drizzle: A silky chocolate sauce lends indulgence, making each bite feel like a special treat. It adds an elegant touch to your dessert plating.
-
Dessert Wine: A fruity dessert wine or a light moscato pairs wonderfully, enhancing the sweetness of the mochi while balancing the flavors.
-
Ice Cream: Serve with a scoop of vanilla or coconut ice cream for a refreshing contrast and added creaminess that melts with the warm mochi.
Elevate your ube mochi dessert with these delightful pairings that will not only impress but also ignite joyful flavors!
Expert Tips for Ube Mochi Recipe
-
Butter Temperature: Ensure the butter is slightly cooled before mixing. Hot butter can cook the eggs, leading to a scrambled texture.
-
Mixing Technique: Combine ingredients until just smooth; overmixing can create a dense texture rather than the chewy consistency that defines a good ube mochi recipe.
-
Using Parchment Paper: Line your baking pan with parchment for effortless removal. This helps in achieving cleanly sliced mochi bars that look as good as they taste.
-
Test for Doneness: Check doneness by inserting a tester; minimal dry crumbs should stick for perfect bars. If it’s too wet, it needs more time in the oven.
-
Storage Tips: Enjoy your ube mochi at room temperature for up to three days. Refrigeration can alter the beloved chewy texture, so store covered in a cool place.
How to Store and Freeze Ube Mochi
Room Temperature: Keep the ube mochi covered at room temperature for up to 3 days for optimal chewiness. Avoid refrigeration as it may change its delightful texture.
Freezer: For longer storage, wrap individual bars tightly in plastic wrap and place them in an airtight container. Ube mochi can be frozen for up to 2 months without losing its chewy goodness.
Reheating: To enjoy frozen ube mochi, let it thaw in the fridge overnight or at room temperature for a few hours. Reheat briefly in the microwave for 10-15 seconds to restore its soft texture.
Make-Ahead: You can prepare this ube mochi recipe a day in advance, making it a perfect dessert for gatherings or special occasions!
Make Ahead Options
Preparing this Ube Mochi Recipe ahead of time is a wonderful way to save time and reduce stress on busy days! You can mix the batter up to 24 hours in advance, storing it covered in the refrigerator to maintain its freshness and vibrant flavor. To ensure the best quality, avoid refrigeration if already baked—store the cooled bars covered at room temperature for up to 3 days. When you’re ready to enjoy your delicious mochi bars, simply slice and serve them chilled or at room temperature for the perfect chewy treat. With these make-ahead tips, you’ll have this delightful dessert ready with minimal effort when it’s time to indulge!
Ube Mochi Recipe FAQs
What should I look for when selecting ube extract?
Absolutely! When selecting ube extract, look for a natural product with minimal additives to ensure the best flavor and vibrant color. Check for a vivid purple hue without any dark spots or impurities. Brands that focus on Filipino ingredients often provide the most authentic taste.
How should I store leftover ube mochi?
For optimal chewiness, store leftover ube mochi covered at room temperature for up to 3 days. Avoid refrigeration, as it can alter the texture and make it more rubbery. I often place mine in a sealed container, away from direct sunlight, to keep it fresh and delightful!
Can I freeze ube mochi, and how do I do it?
Absolutely! To freeze your ube mochi, first cut it into individual bars. Wrap each bar tightly in plastic wrap, then place them in an airtight container or freezer bag. This will preserve their soft, chewy goodness. You can freeze them for up to 2 months. When you’re ready to enjoy, just let them thaw at room temperature for a few hours or overnight in the fridge.
What if my mochi turns out too dense?
Oh no! If your ube mochi turns out dense, it could be due to overmixing the batter or too much mochiko flour. For next time, gently fold in the dry ingredients until just combined. Also, ensure you’re using the right measuring technique—spooning the flour into the measuring cup gently can help prevent it from compacting, leading to a lighter texture.
Are there any dietary considerations for this ube mochi?
Yes! This ube mochi recipe is naturally gluten-free thanks to mochiko flour. If you need it to be dairy-free, you can substitute the evaporated milk and coconut milk with plant-based alternatives like almond milk or soy milk. Always check for allergies with your guests—using coconut milk may not be suitable for individuals allergic to tree nuts.
Can I use fresh ube instead of ube extract?
Very! If you have access to fresh ube, you can definitely use that in place of ube extract. Simply steam or boil the ube until tender, then mash it until smooth before incorporating it into your batter. This will give your mochi an authentic flavor and a beautiful purple color, but be aware that the moisture content may vary, so you might need to slightly adjust your other liquid ingredients.
Irresistible Ube Mochi Recipe - Chewy Hawaiian Delight
Ingredients
Equipment
Method
- Preheat your oven to 350°F (175°C) and prepare a 9x13-inch baking pan by lining it with parchment paper.
- Combine melted unsalted butter and granulated sugar in a large bowl until well mixed.
- Add large eggs one at a time, mixing thoroughly after each addition until smooth.
- Stir in the ube extract until evenly blended.
- Fold in mochiko flour and baking powder gently until about 80% combined.
- Include evaporated milk and coconut milk, mixing until smooth.
- Pour the batter into the prepared baking pan, spreading it out evenly, and bake for 45 minutes.
- Cool the mochi in the pan completely before slicing into bars.